The forwarding can be set up either automatically or manually. In the following guide, we’ll show you how to configure both options:
1) How to Set Up Automatic Brokerkit Forwarding in Gmail?
This feature allows users to redirect incoming emails to the brokerkit forwarding address, allowing selected incoming messages and Brokerkit email replies to be recorded.
1. Introduction
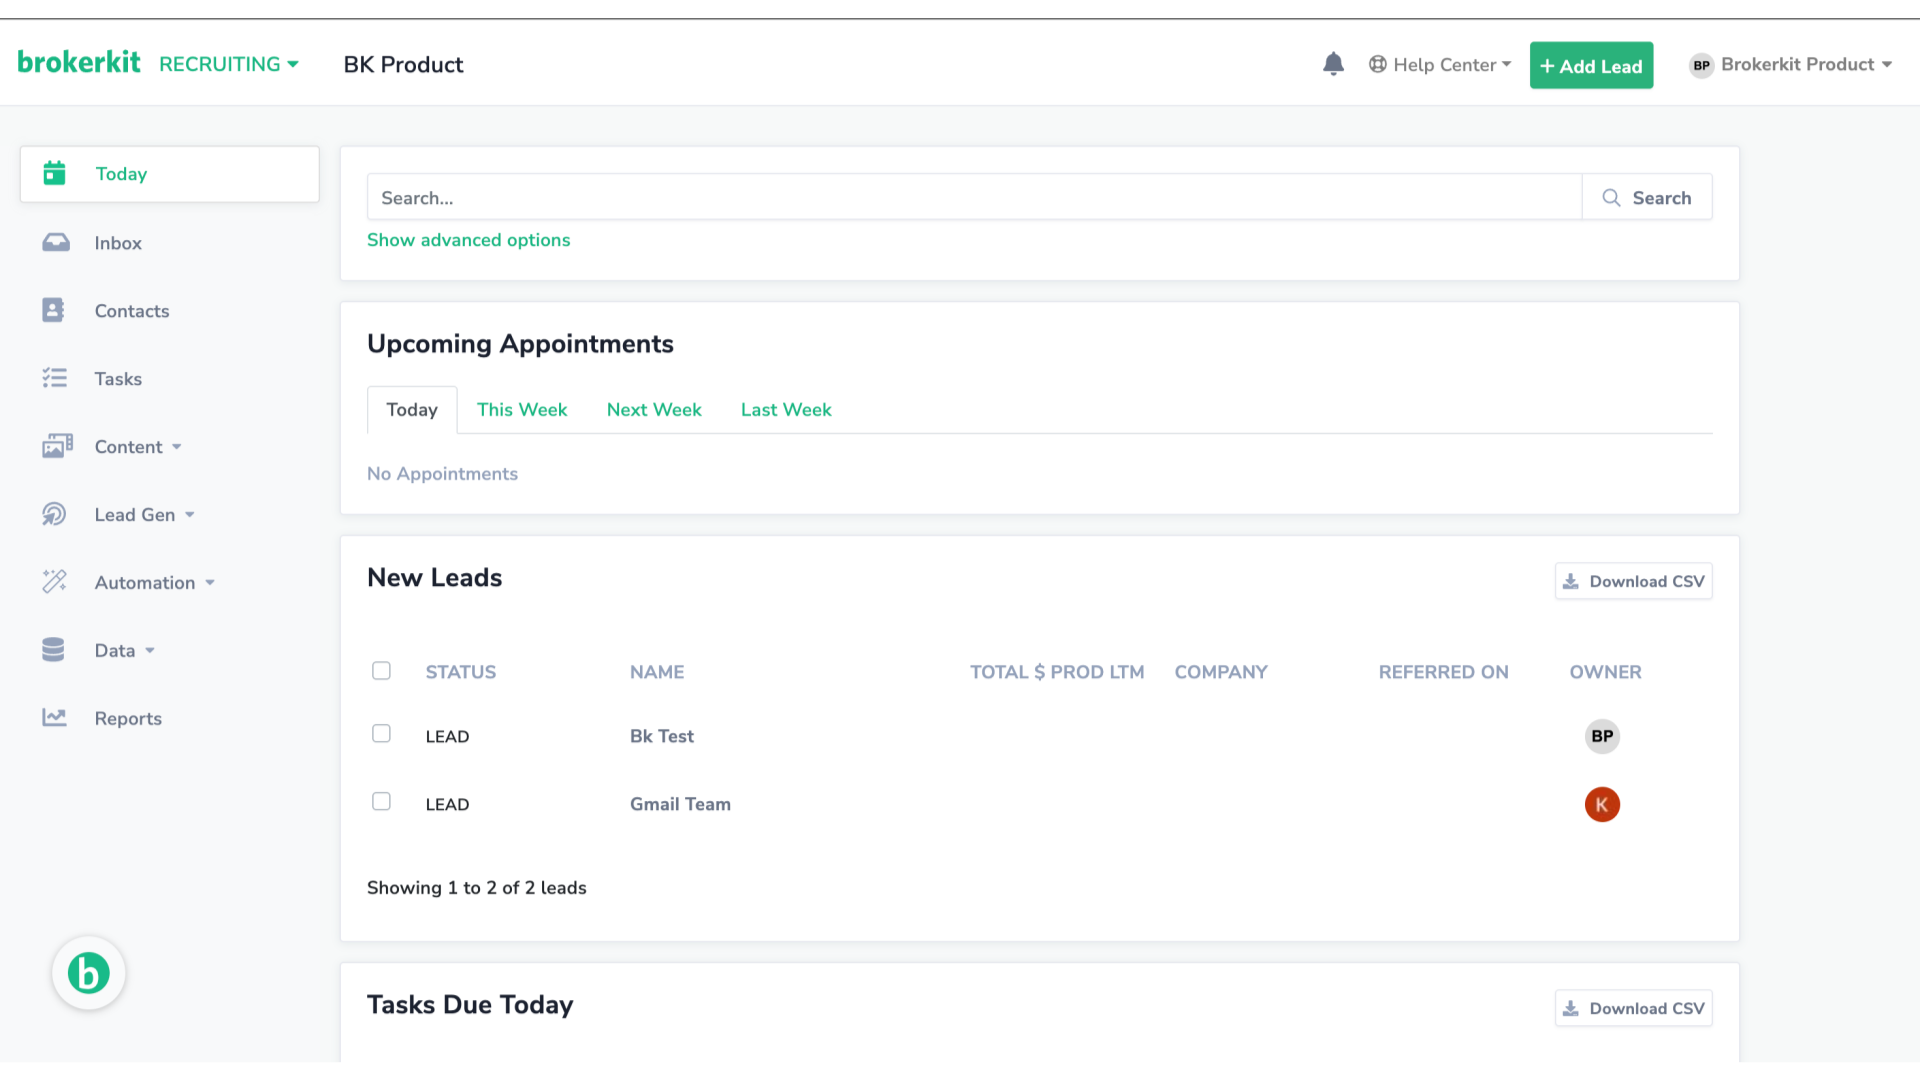
To start with the set up, please access the Brokerkit platform
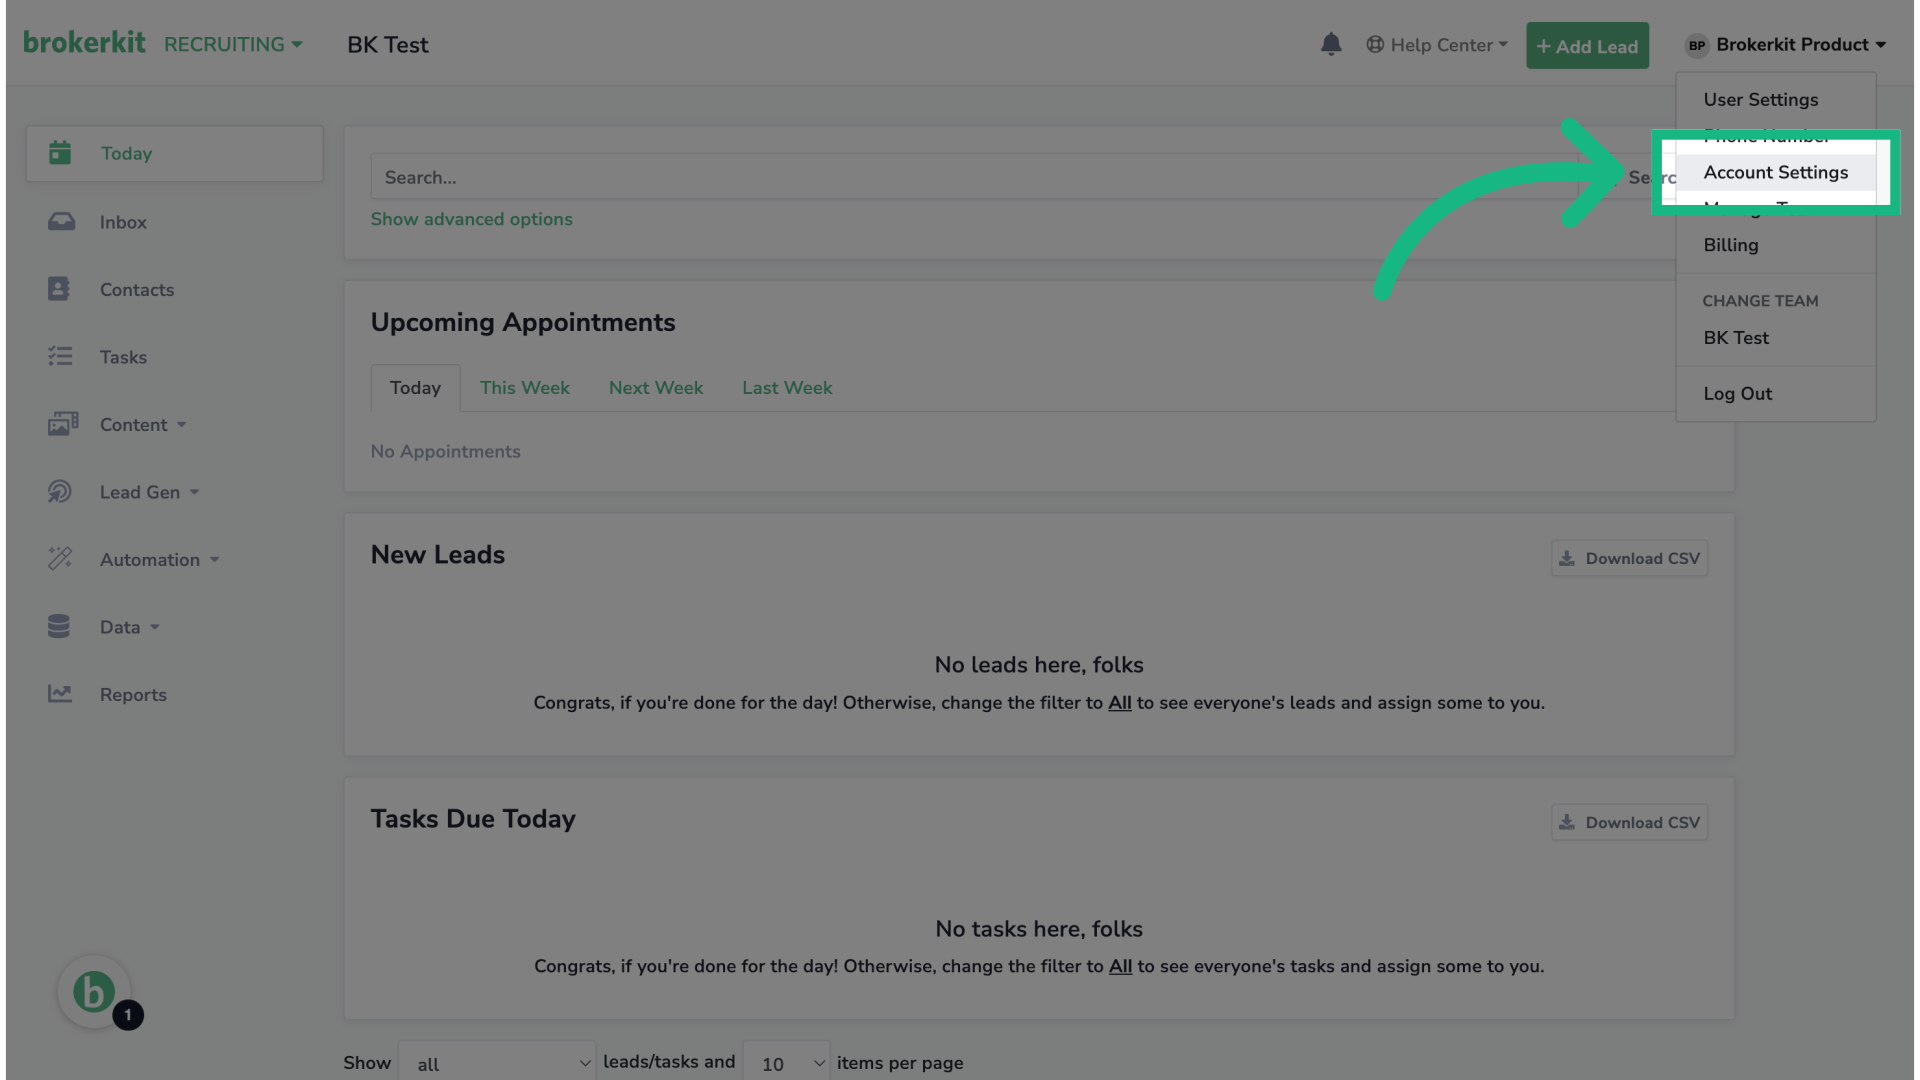
2. Click "Account Settings"
Go to the option Account Settings.
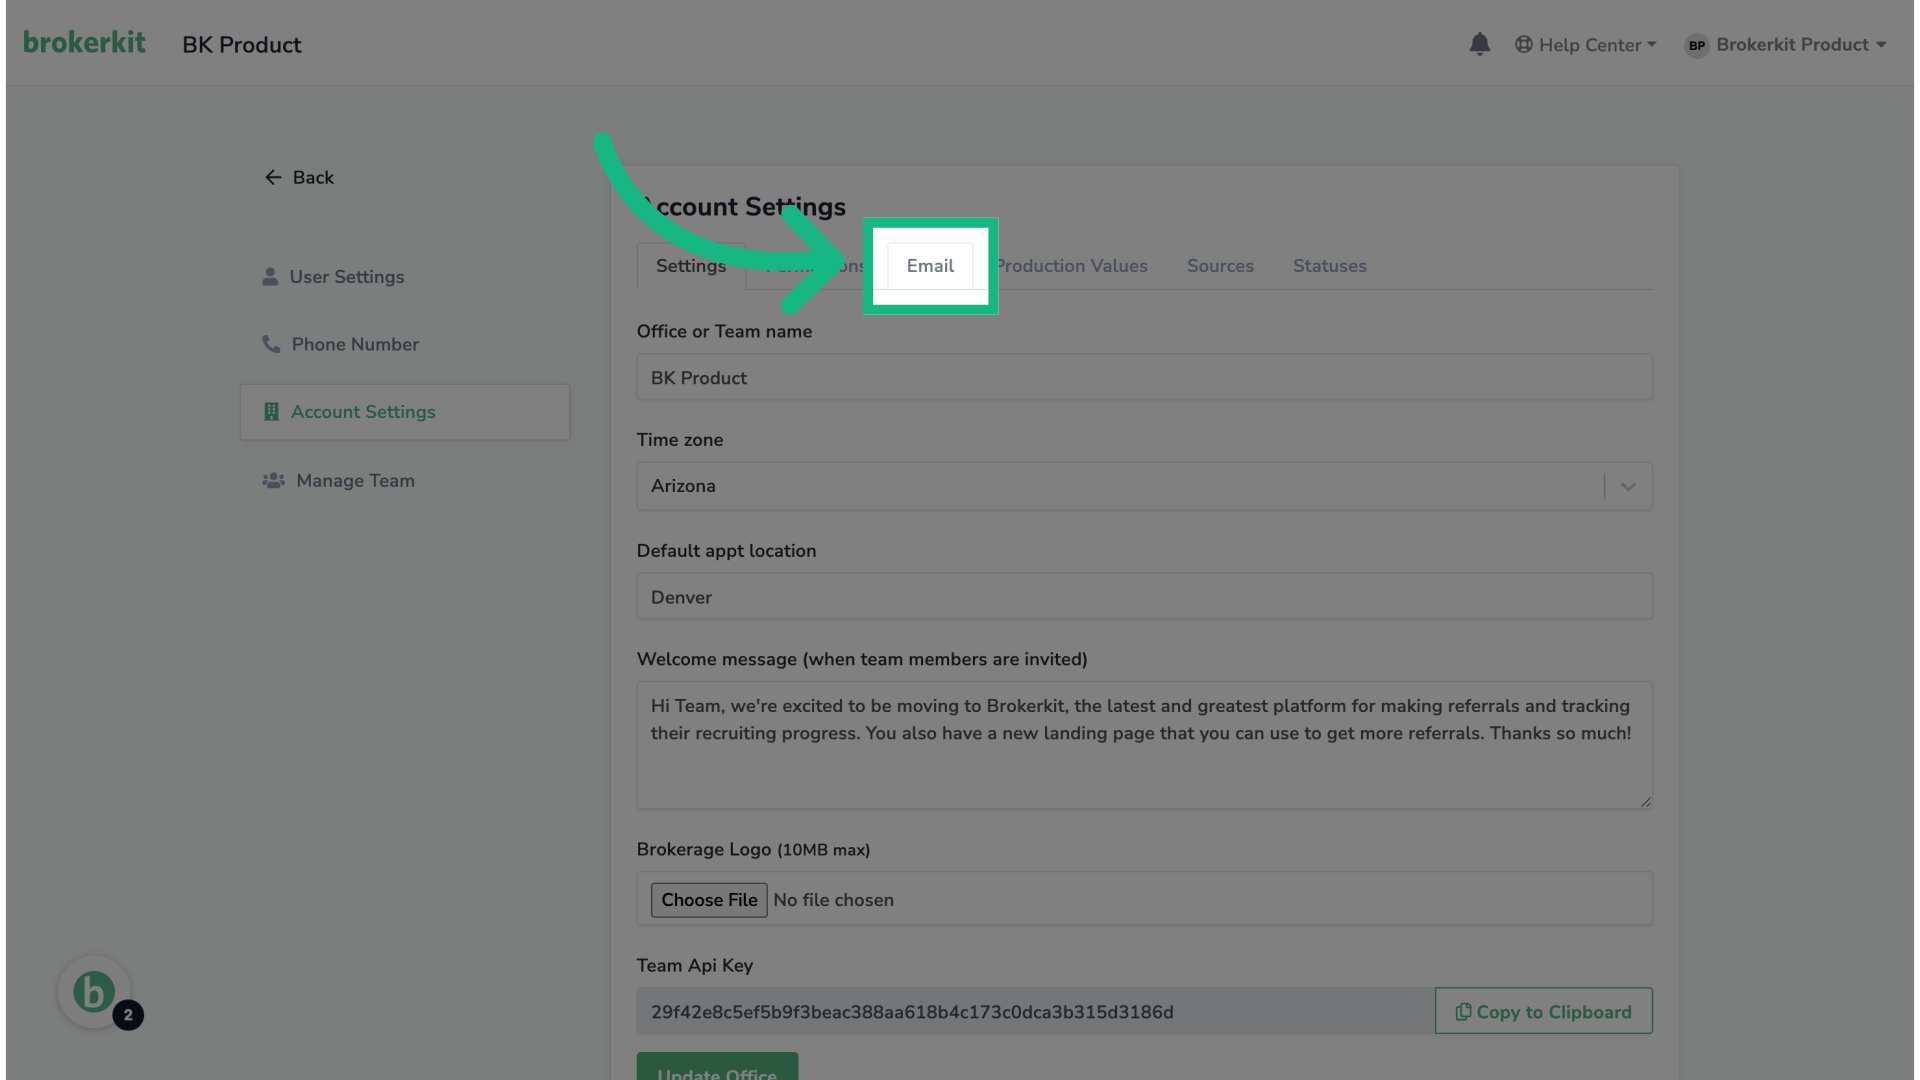
3. Click "Email"
Then, go to the tab Email to see the email settings.
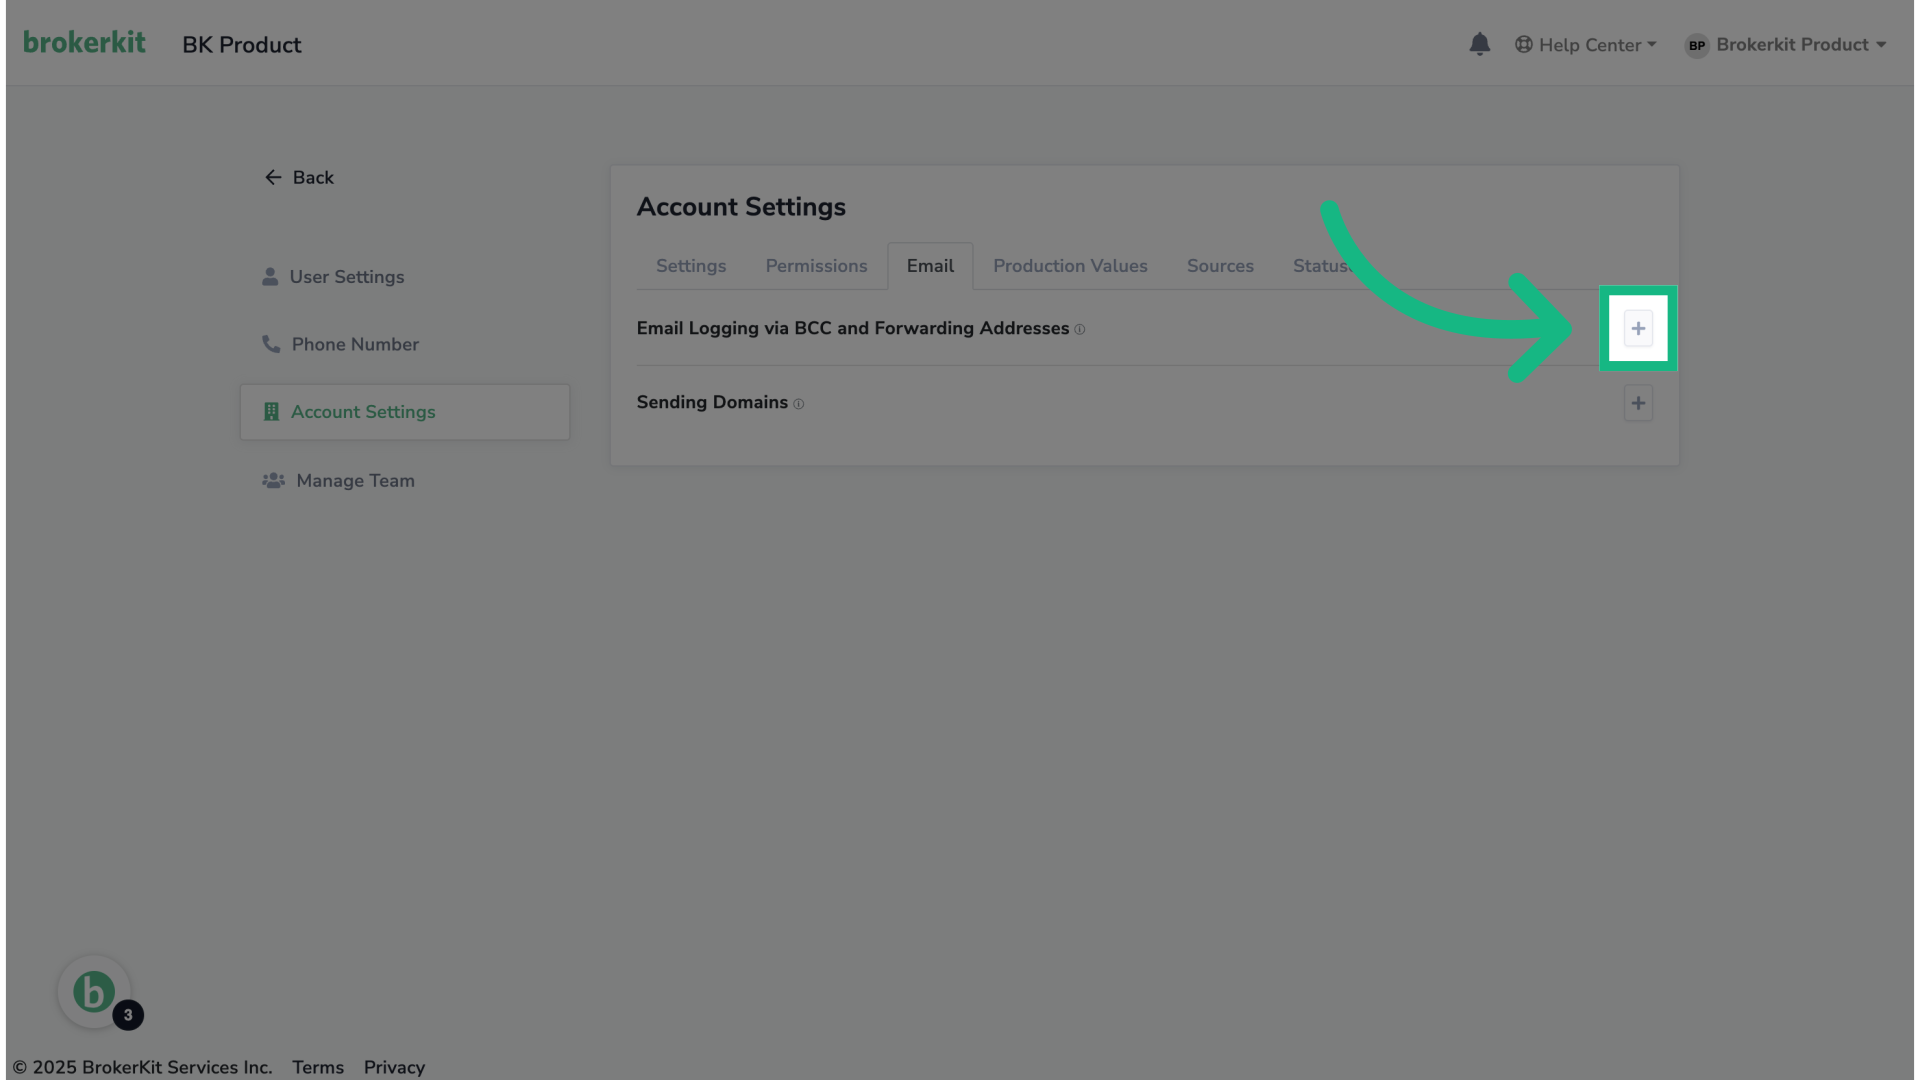
4. Click + to expand
Click the plus sign to expand the email settings section.
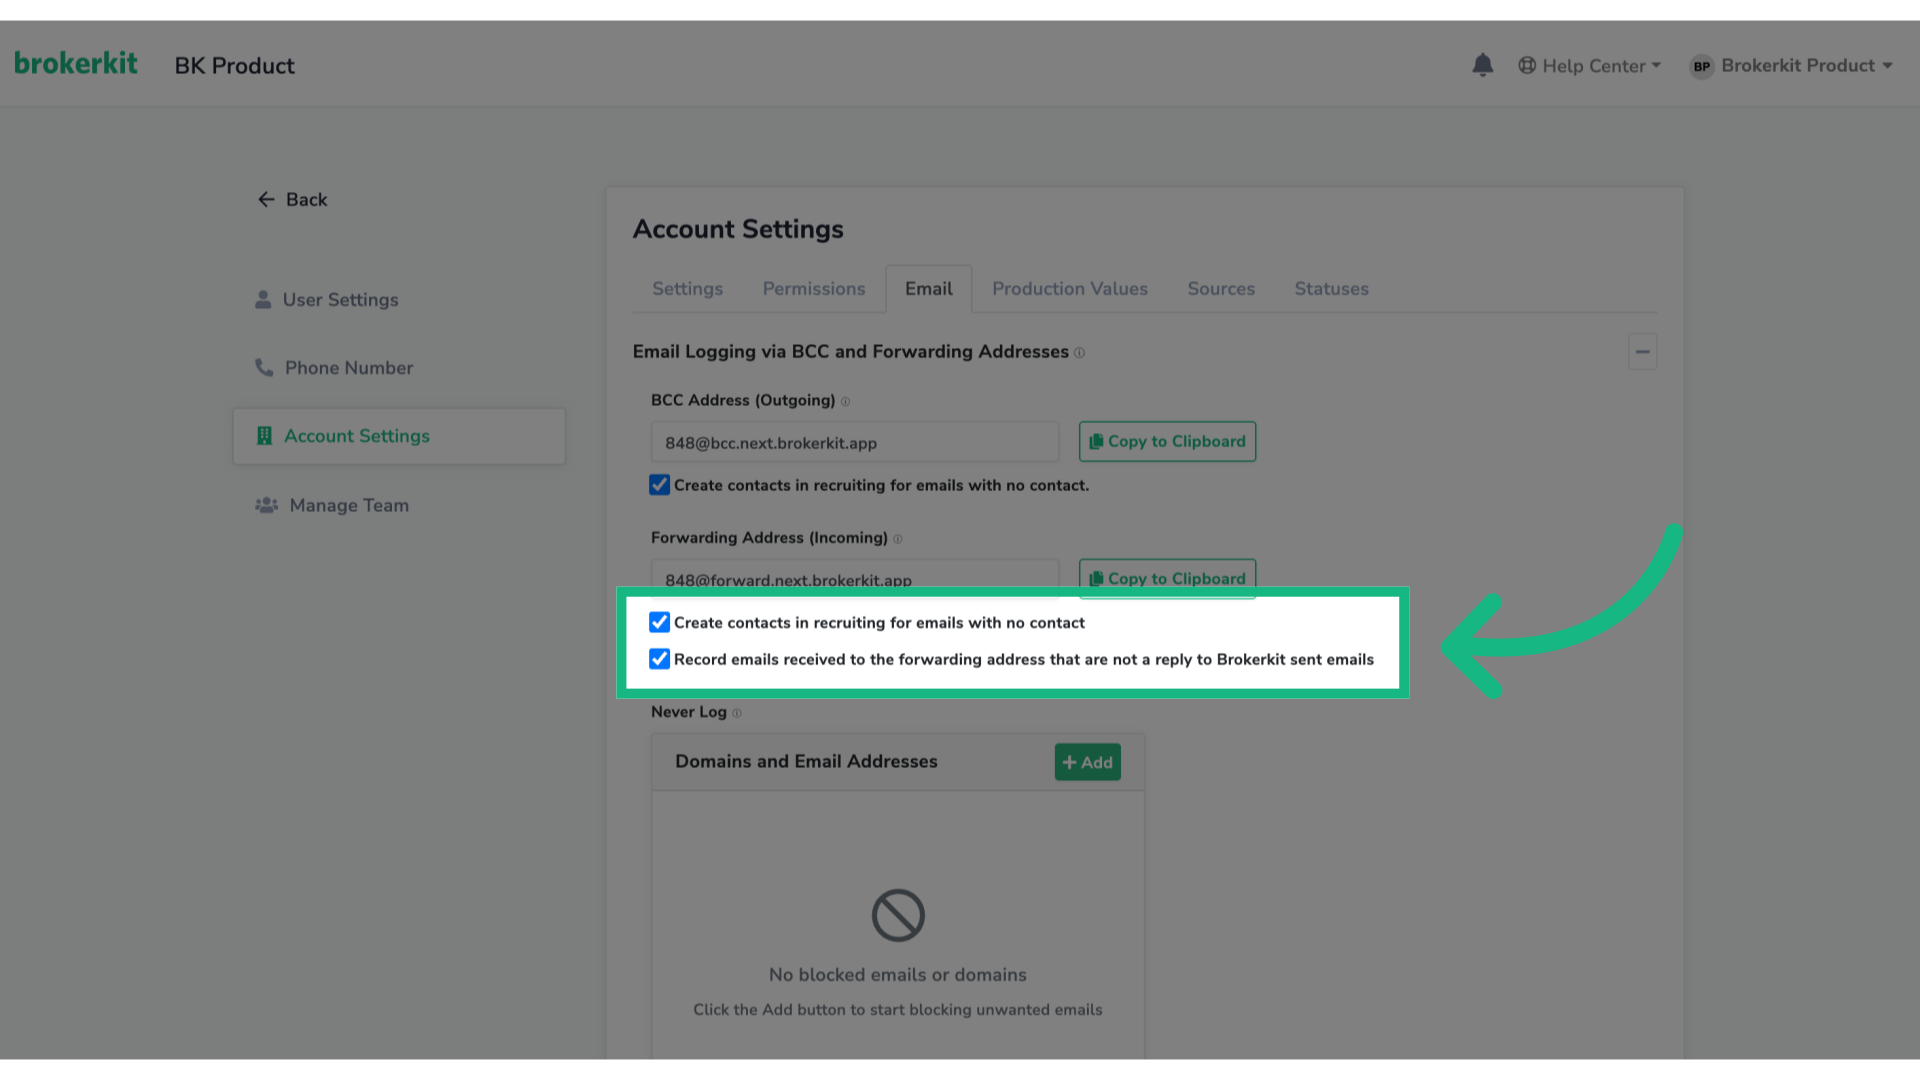
5. Choose what Brokerkit should record
The two forwarding controls are independent:
- Create contacts in recruiting for emails with no contact creates a recruiting contact for an unmatched address.
- Record emails received to the forwarding address that are not a reply to Brokerkit sent emails also records non-reply inbound messages.
Leave the second setting off if you only want replies to Brokerkit-sent emails. Turning this setting off still allows replies to Brokerkit-sent emails to be logged. To stop automatic forwarding from Gmail to Brokerkit, disable or remove the Gmail forwarding rule. This article does not document equivalent Outlook rule-removal steps. Turn it on for broader inbound forwarding; matching non-replies may then appear on contact records. Use Never Log to exclude specific addresses or domains.
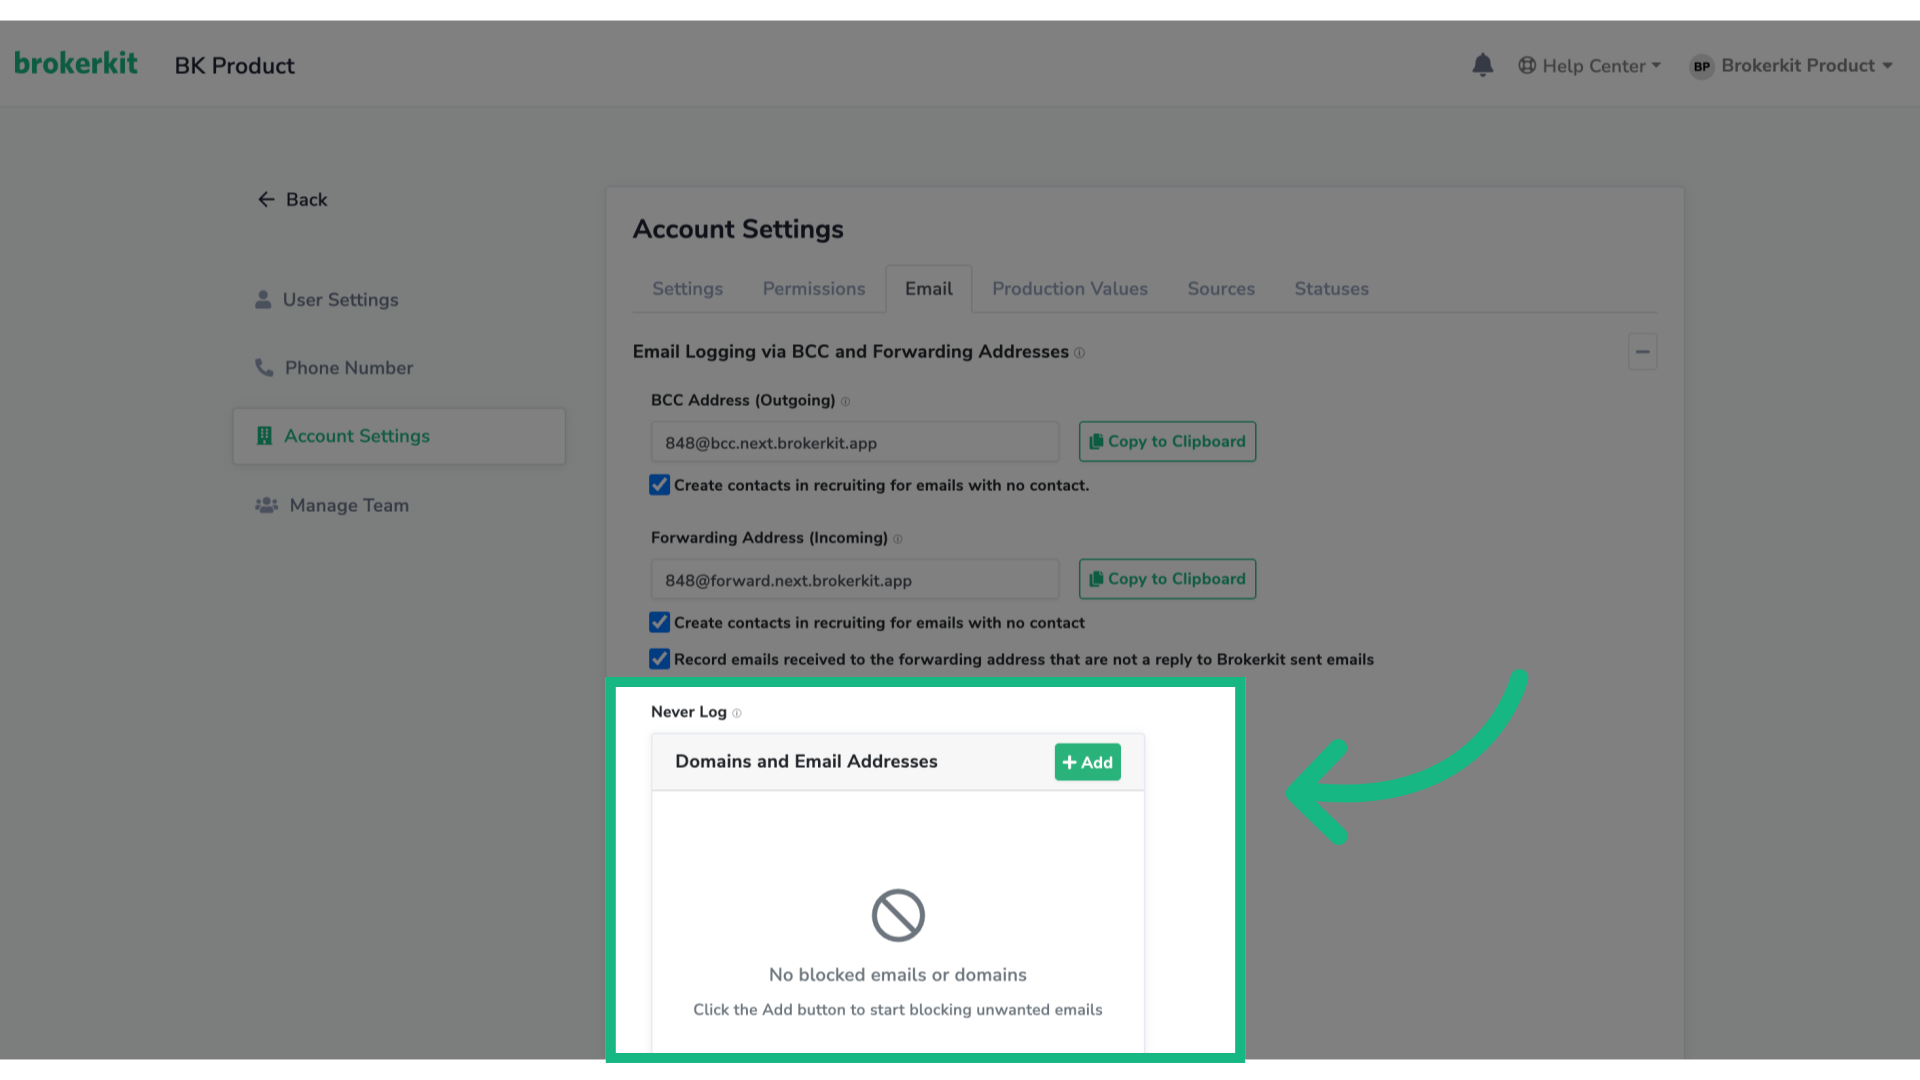
6. Add email addresses or domains to avoid forwarding emails to Brokerkit
If you want to avoid forwarding emails from specific email address or domains, you can add them to the Never Log section.
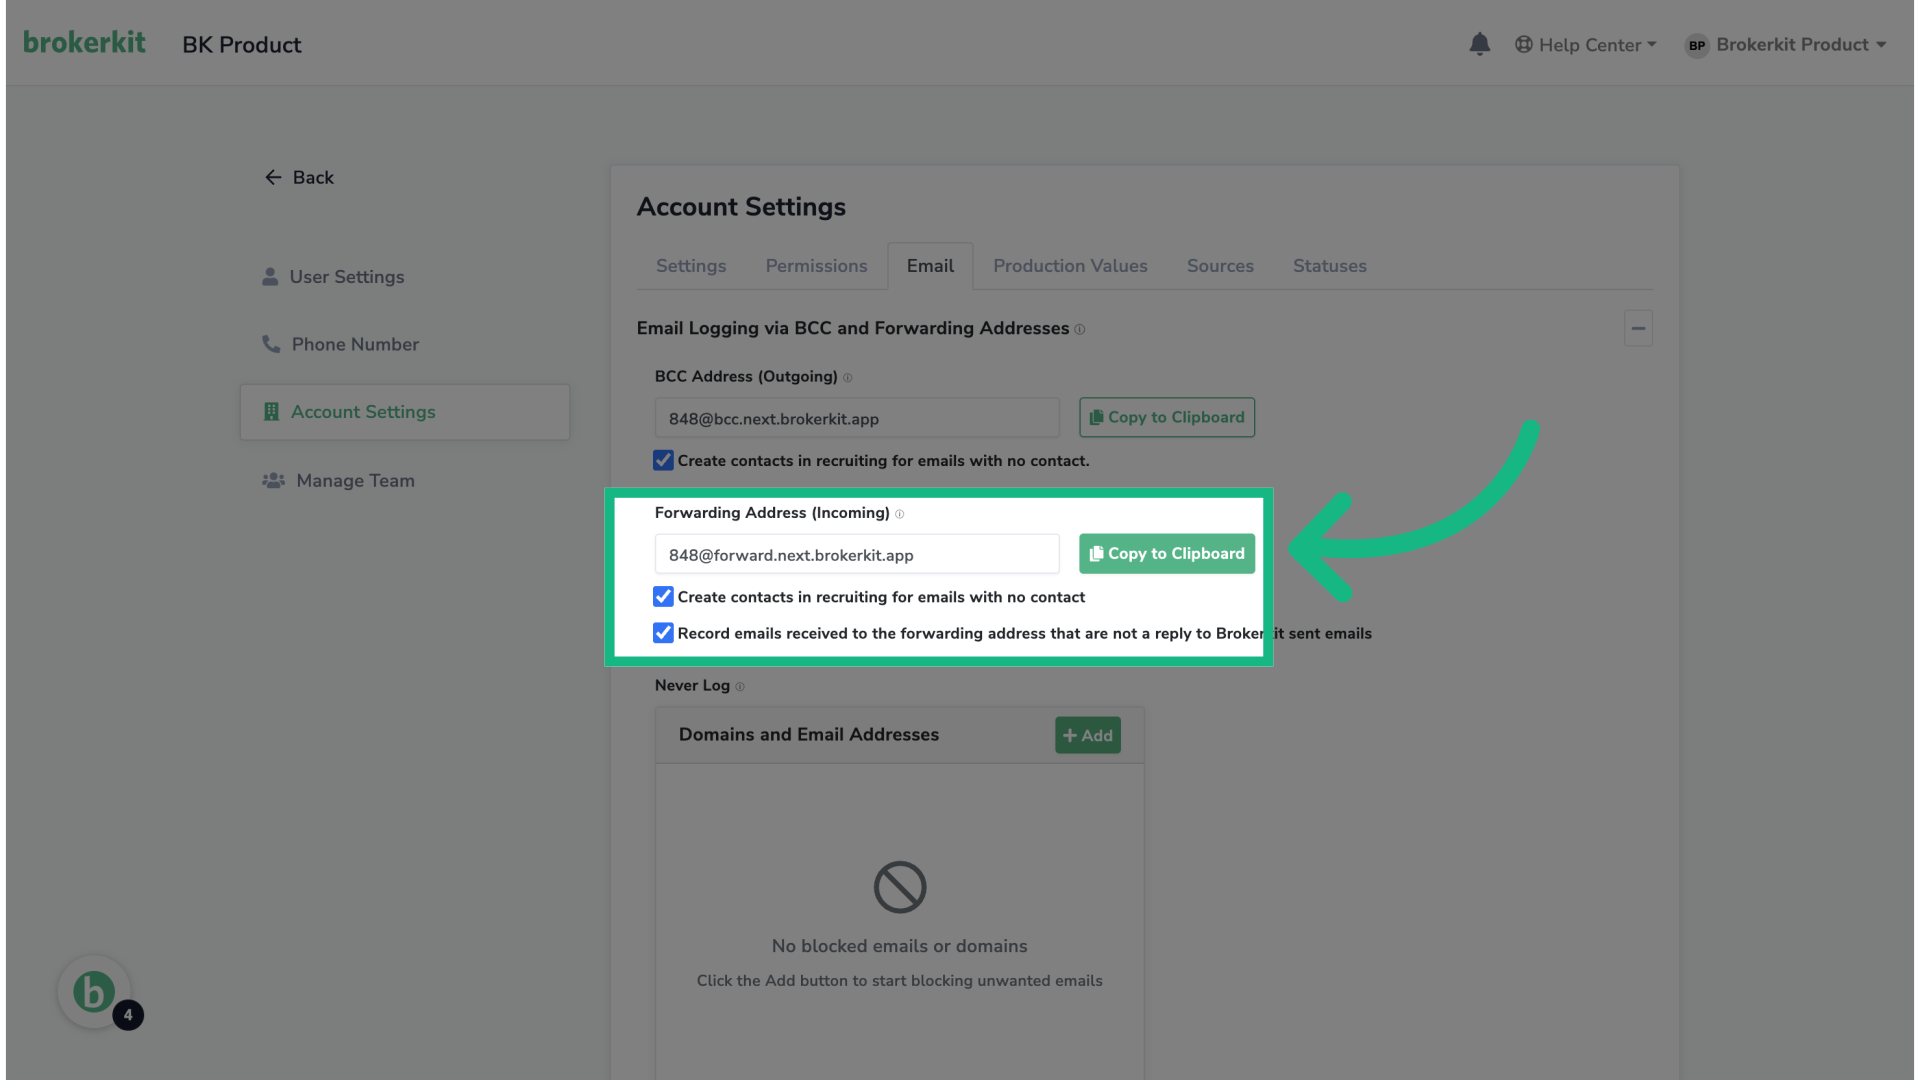
7. Click "Copy to Clipboard"
Navigate to the Forwarding Address section and copy Brokerkit's forwarding address by clicking the button Copy to Clipboard.
8. Go to your Gmail inbox
Go to your Gmail inbox
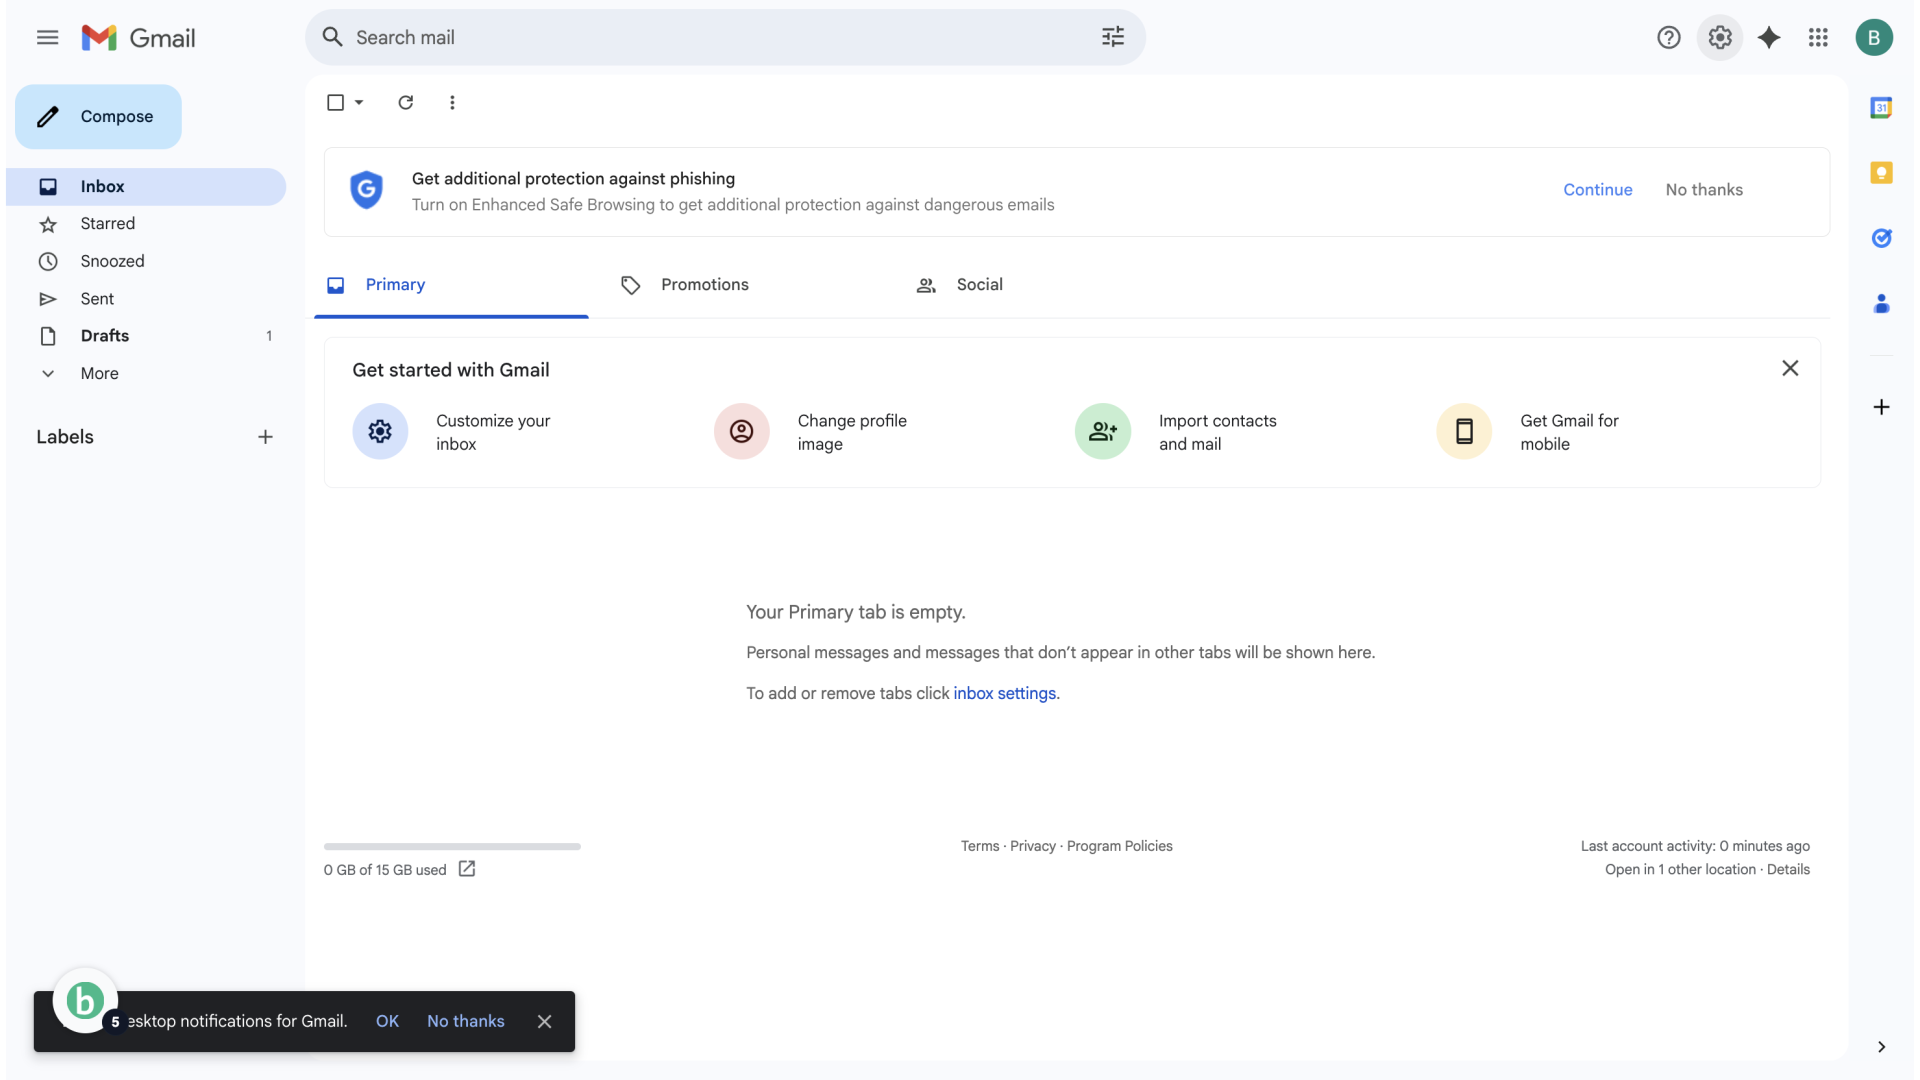
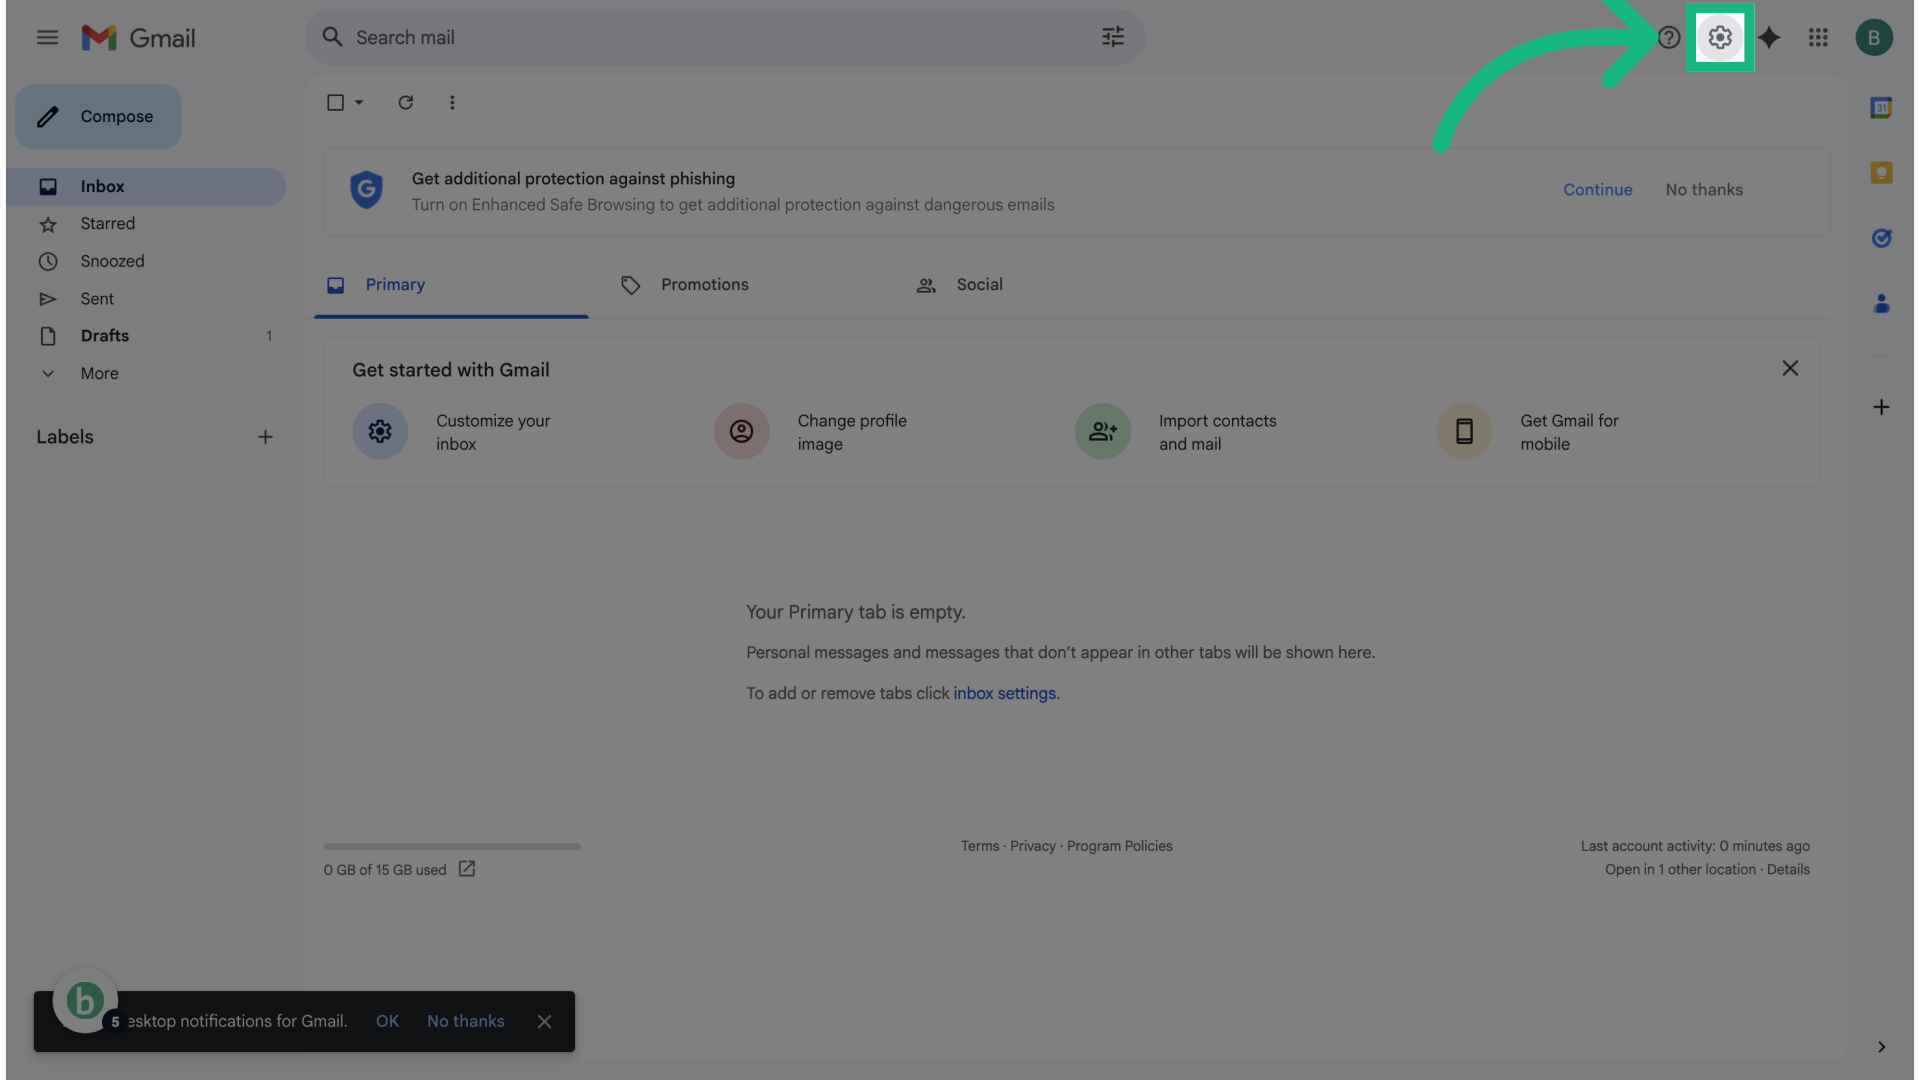
9. Click ⚙️ icon
Click the gear icon in the top right corner.
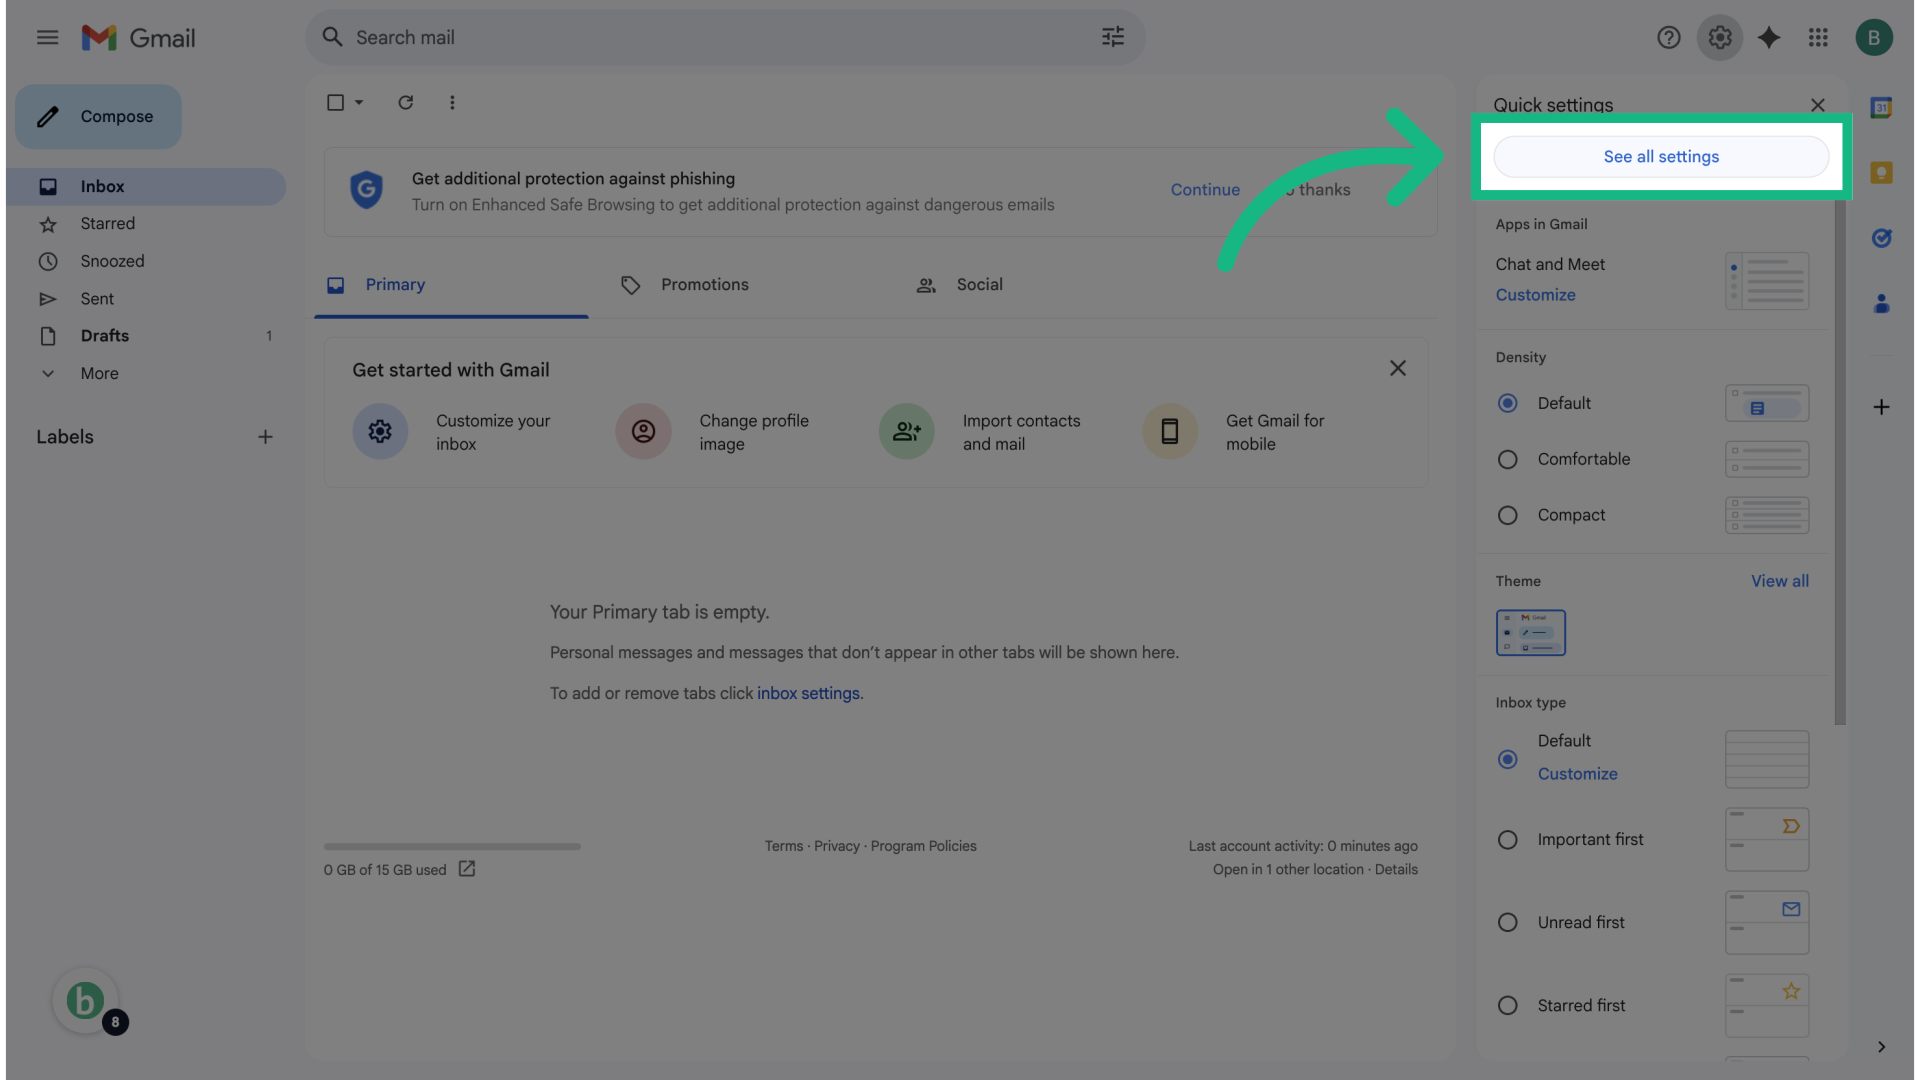
10. Click "See all settings"
Then, navigate to the settings menu.
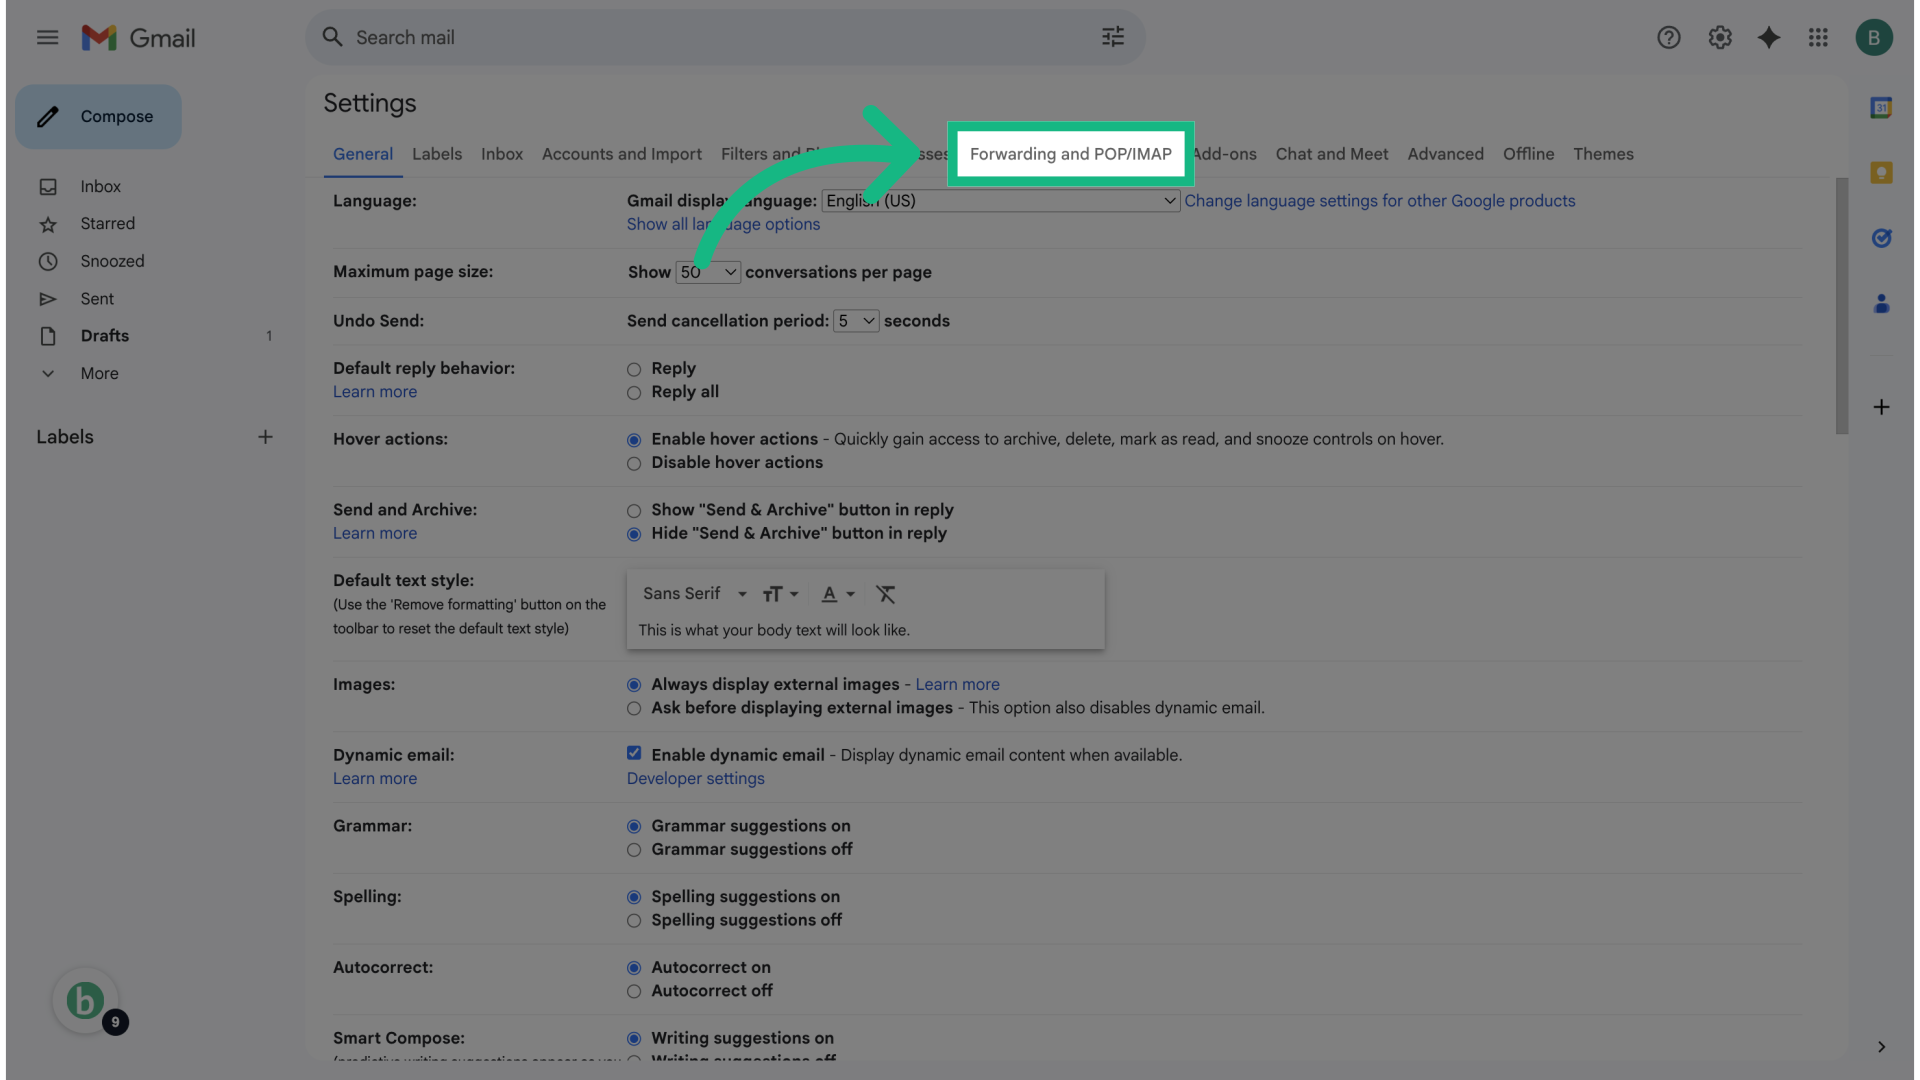
11. Click "Forwarding and POP/IMAP"
Go to the tab "Forwarding and POP/IMAP" to set up forwarding.
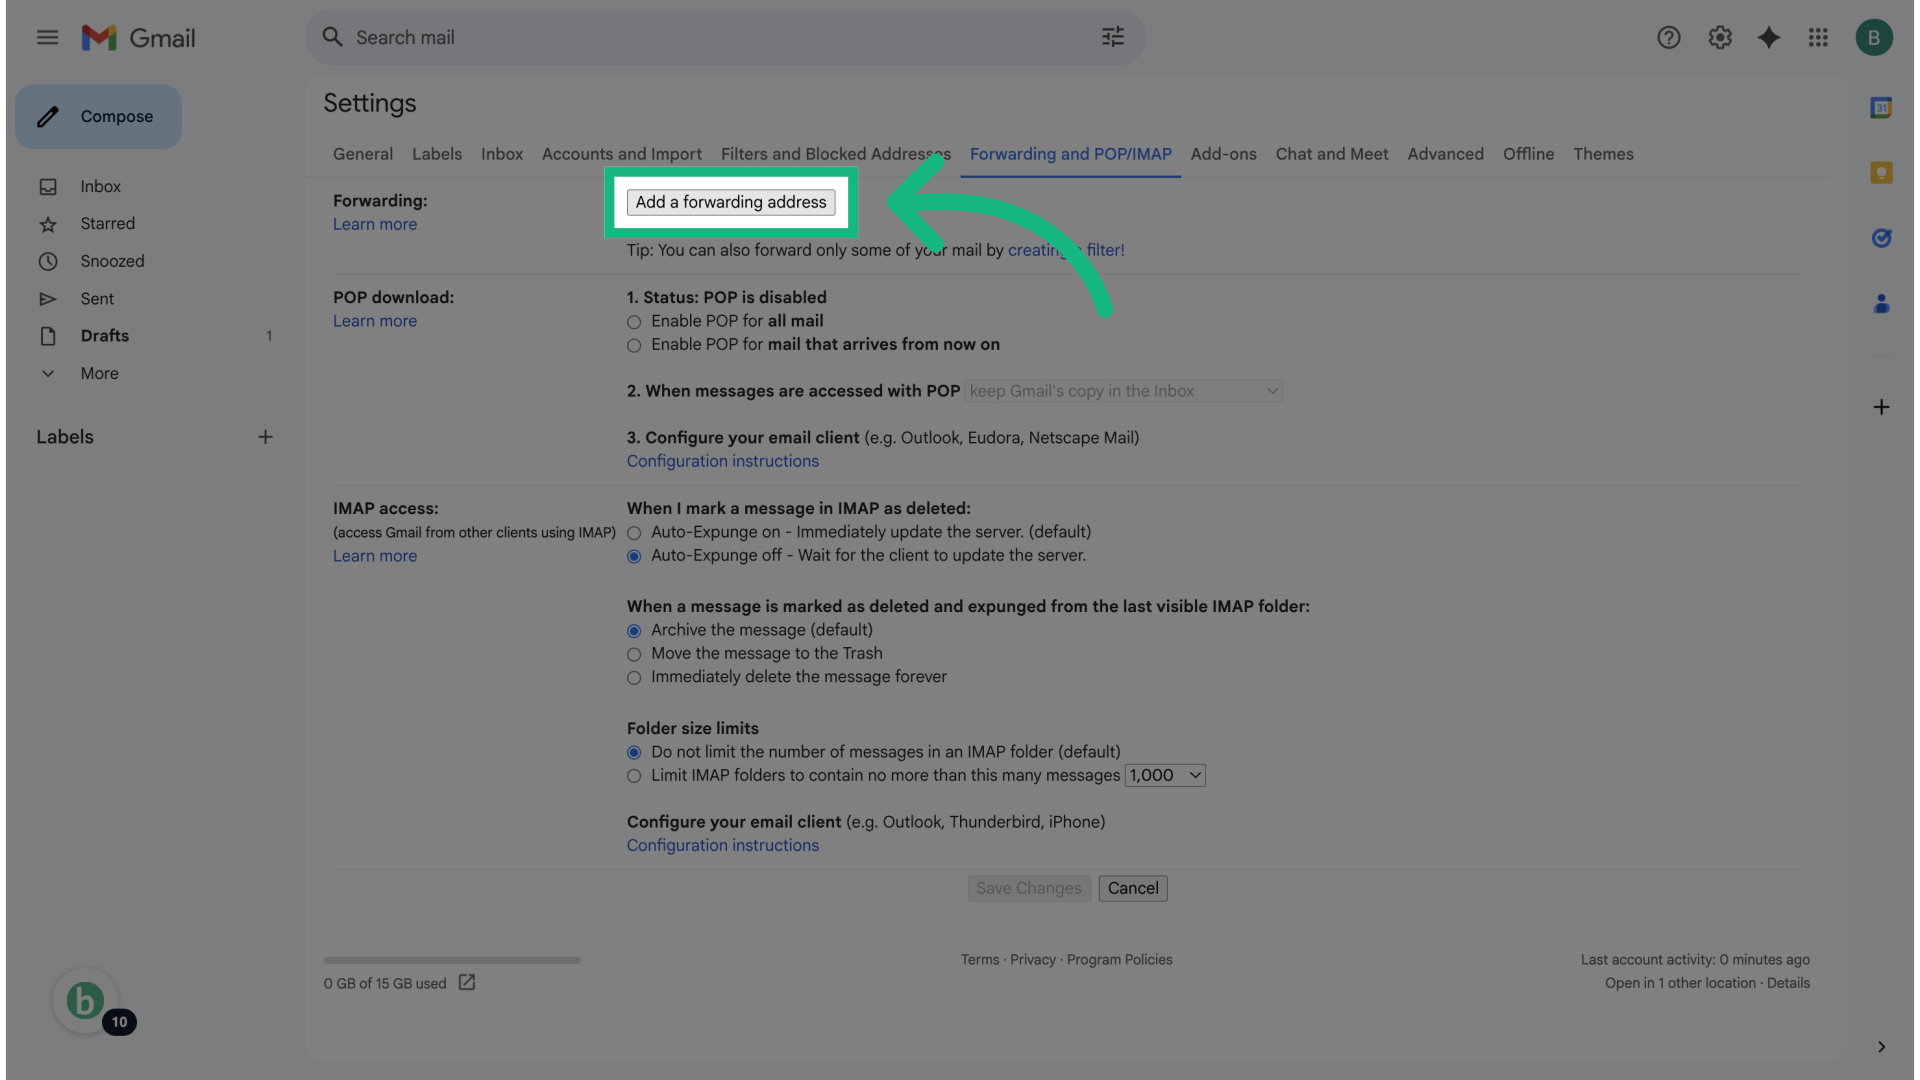
12. Click "Add a forwarding address"
Click the button "Add a forwarding address".
13. Paste Brokerkit's forwarding address
Paste Brokerkit's forwarding address, ensure there are no typos.
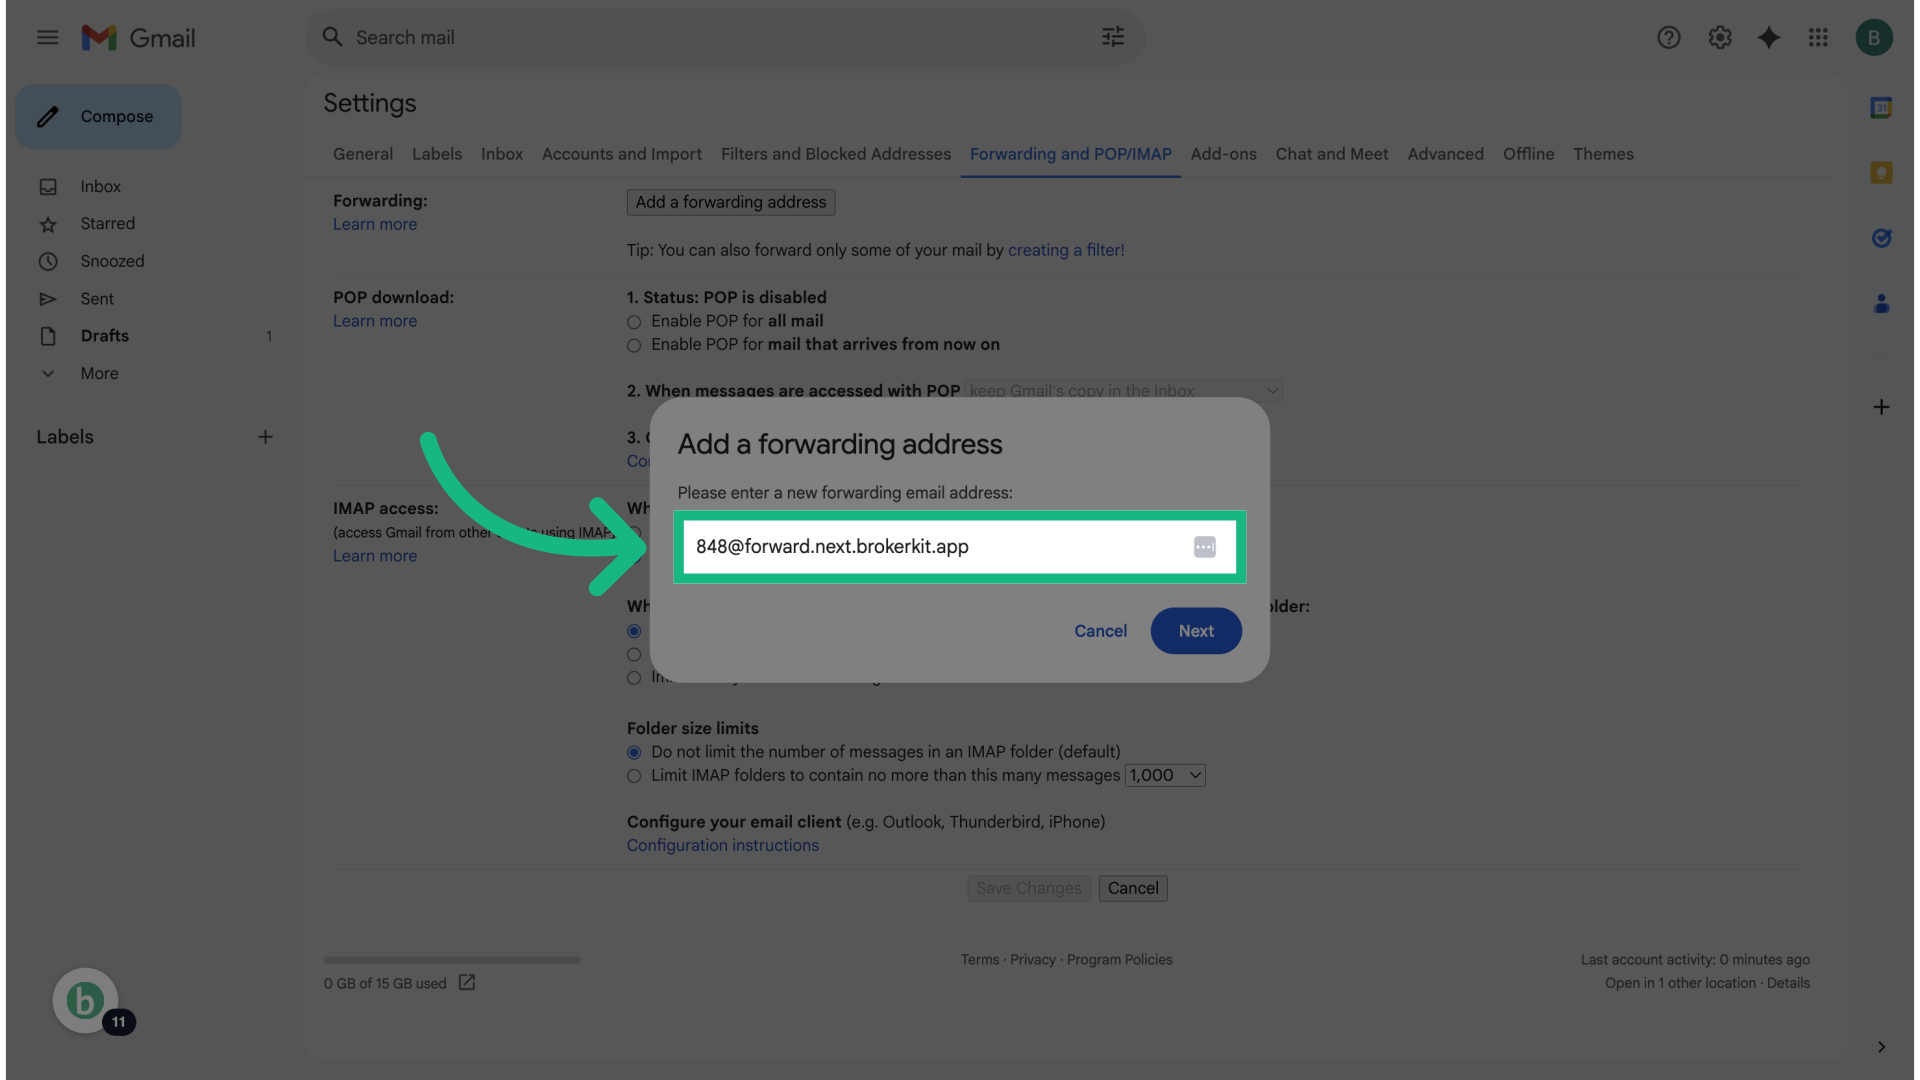
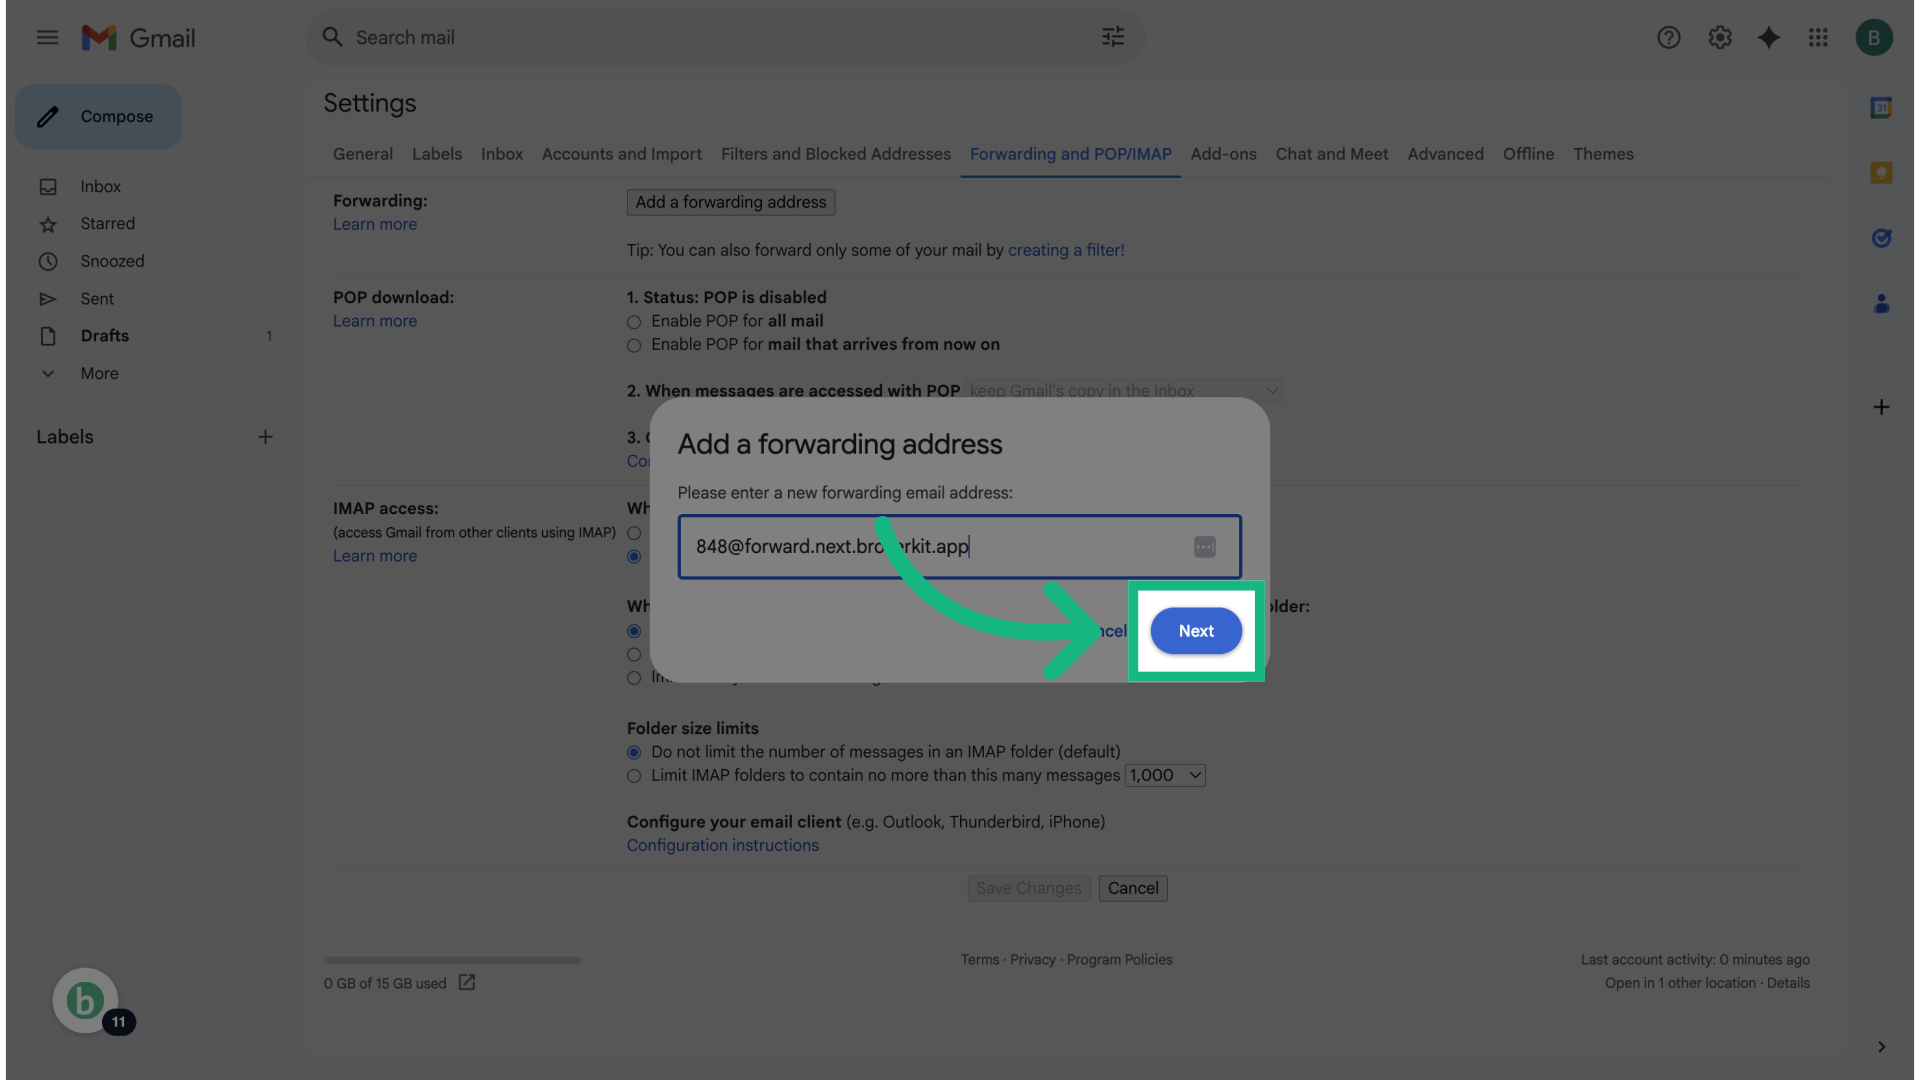
14. Click "Next"
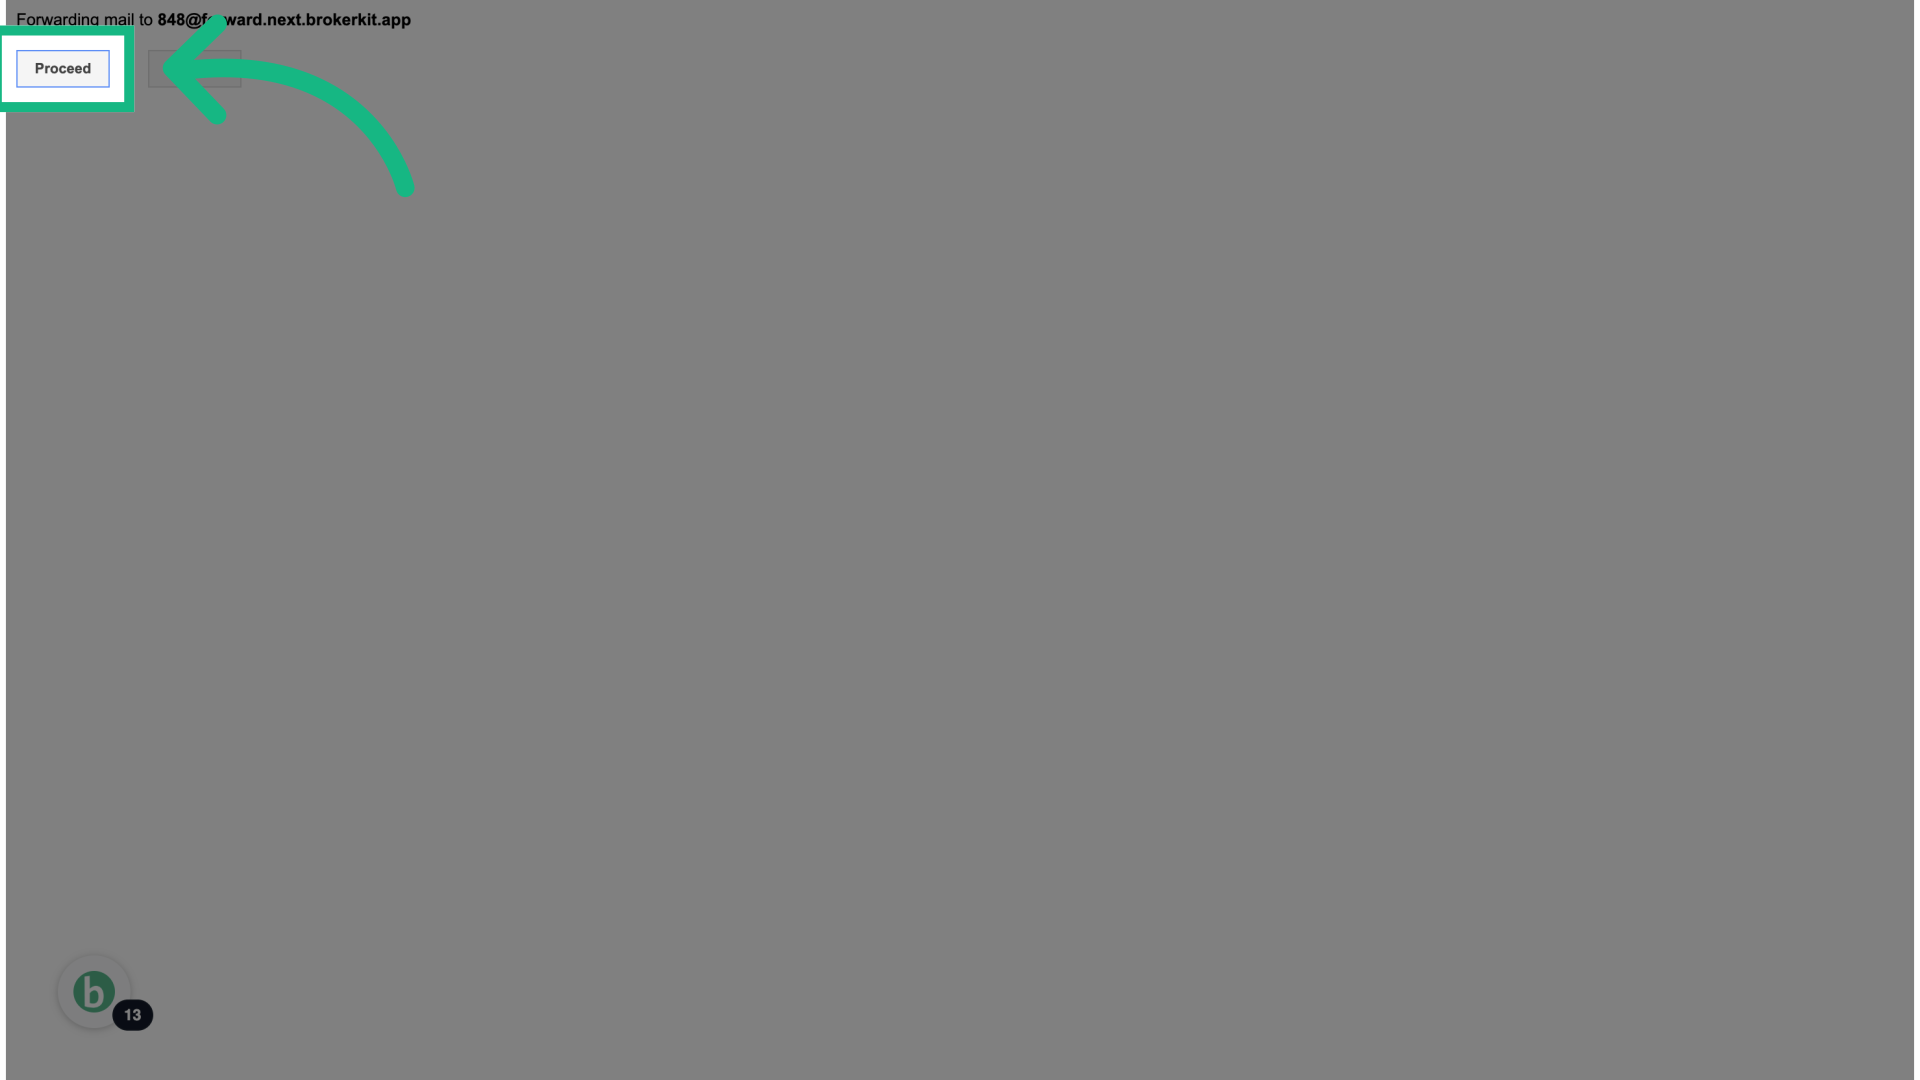
When you click "Next", a pop-up window will appear.
15. Click "Proceed"
By clicking "Proceed", Gmail will send a confirmation email to the forwarding address's inbox, in this case to Brokerkit's inbox.
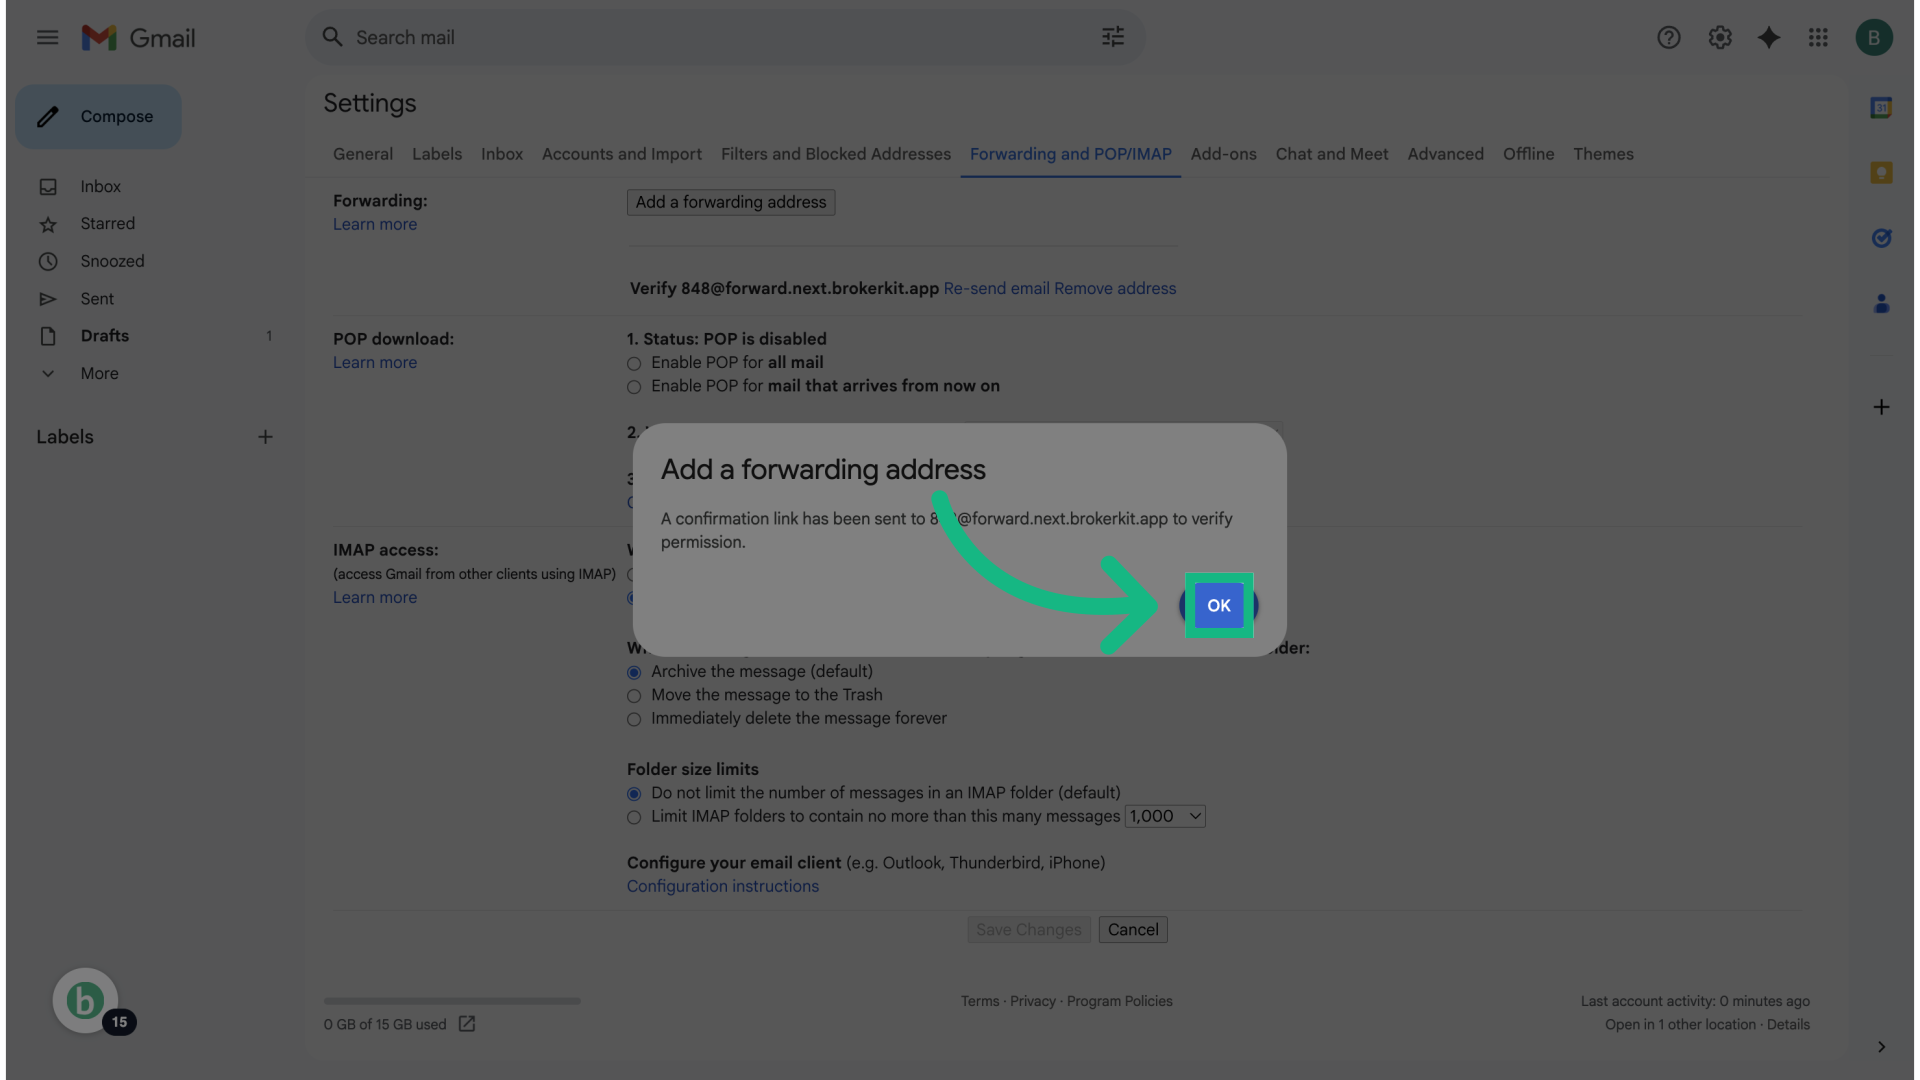
16. Click "OK"
Click "OK".
17. Go back to your Brokerkit platform
Go back to your Brokerkit platform in order to find the Gmail confirmation email that was just sent.
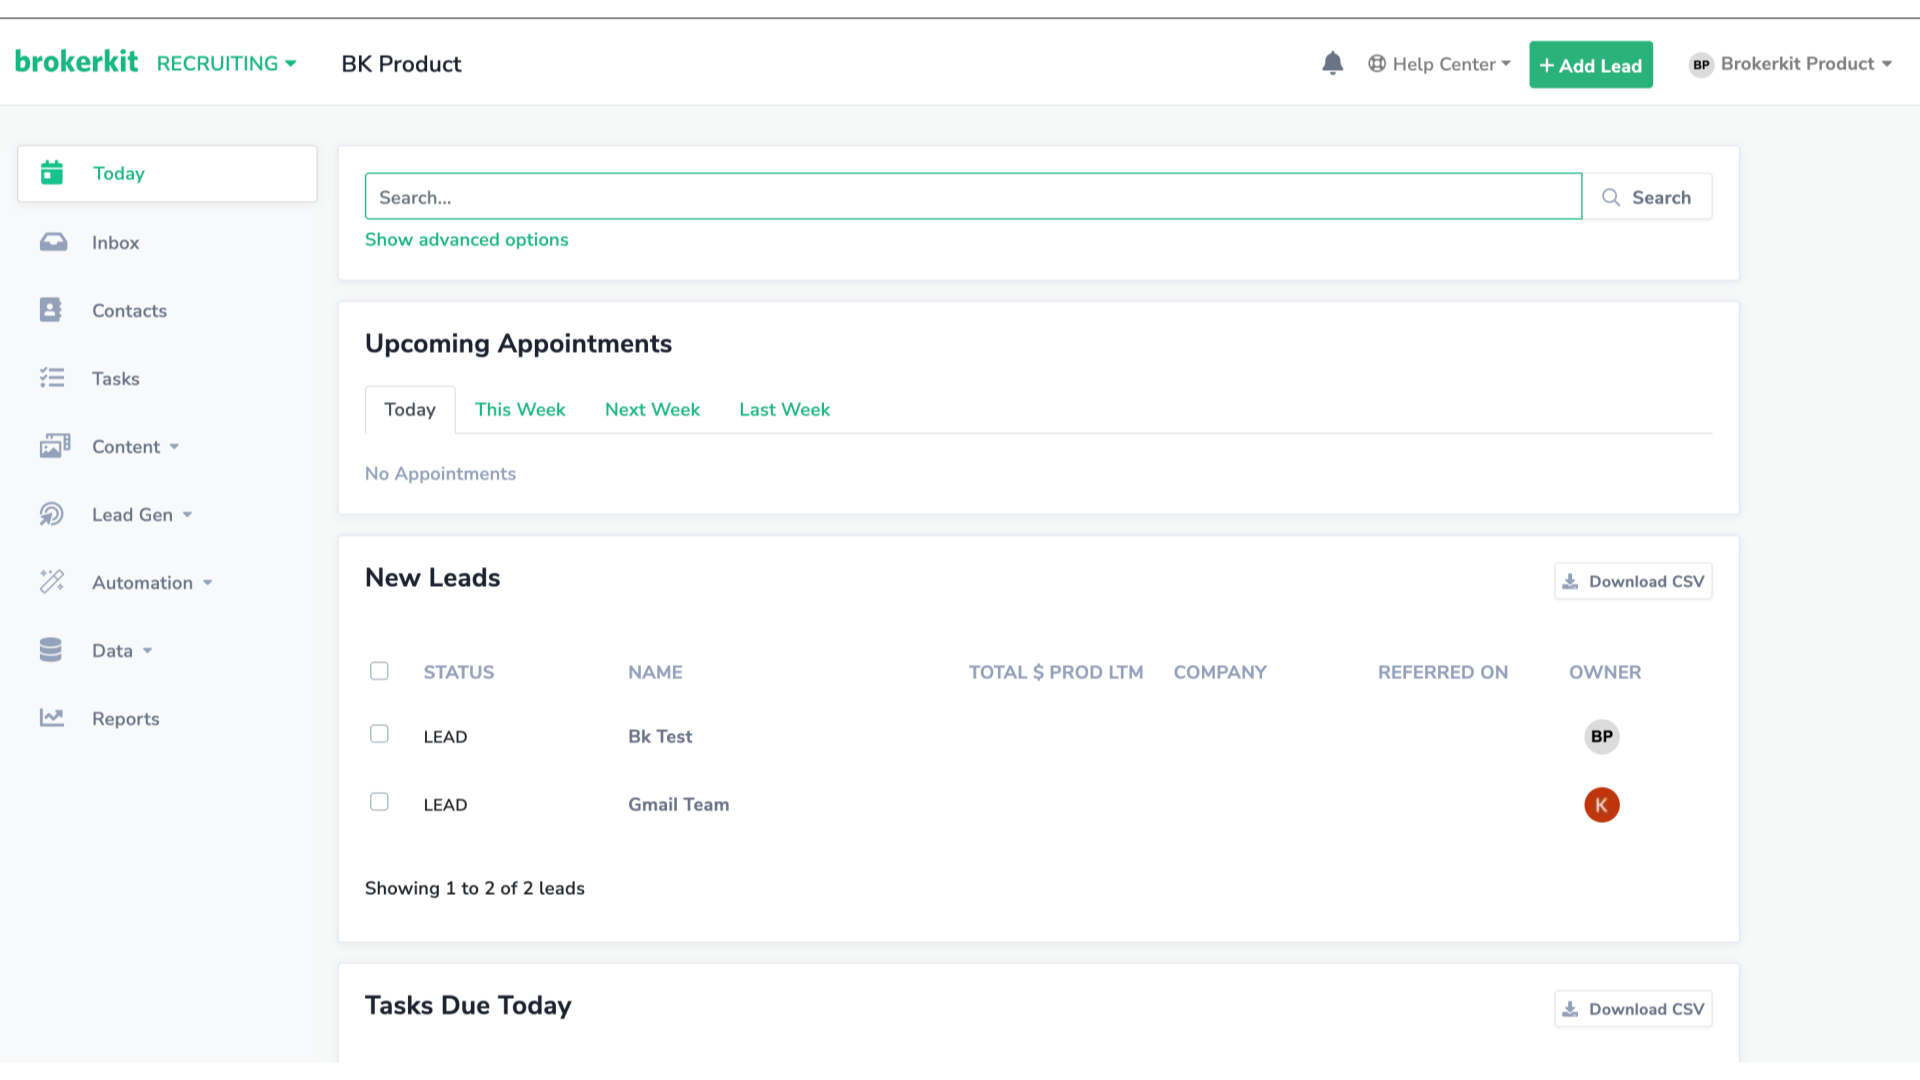
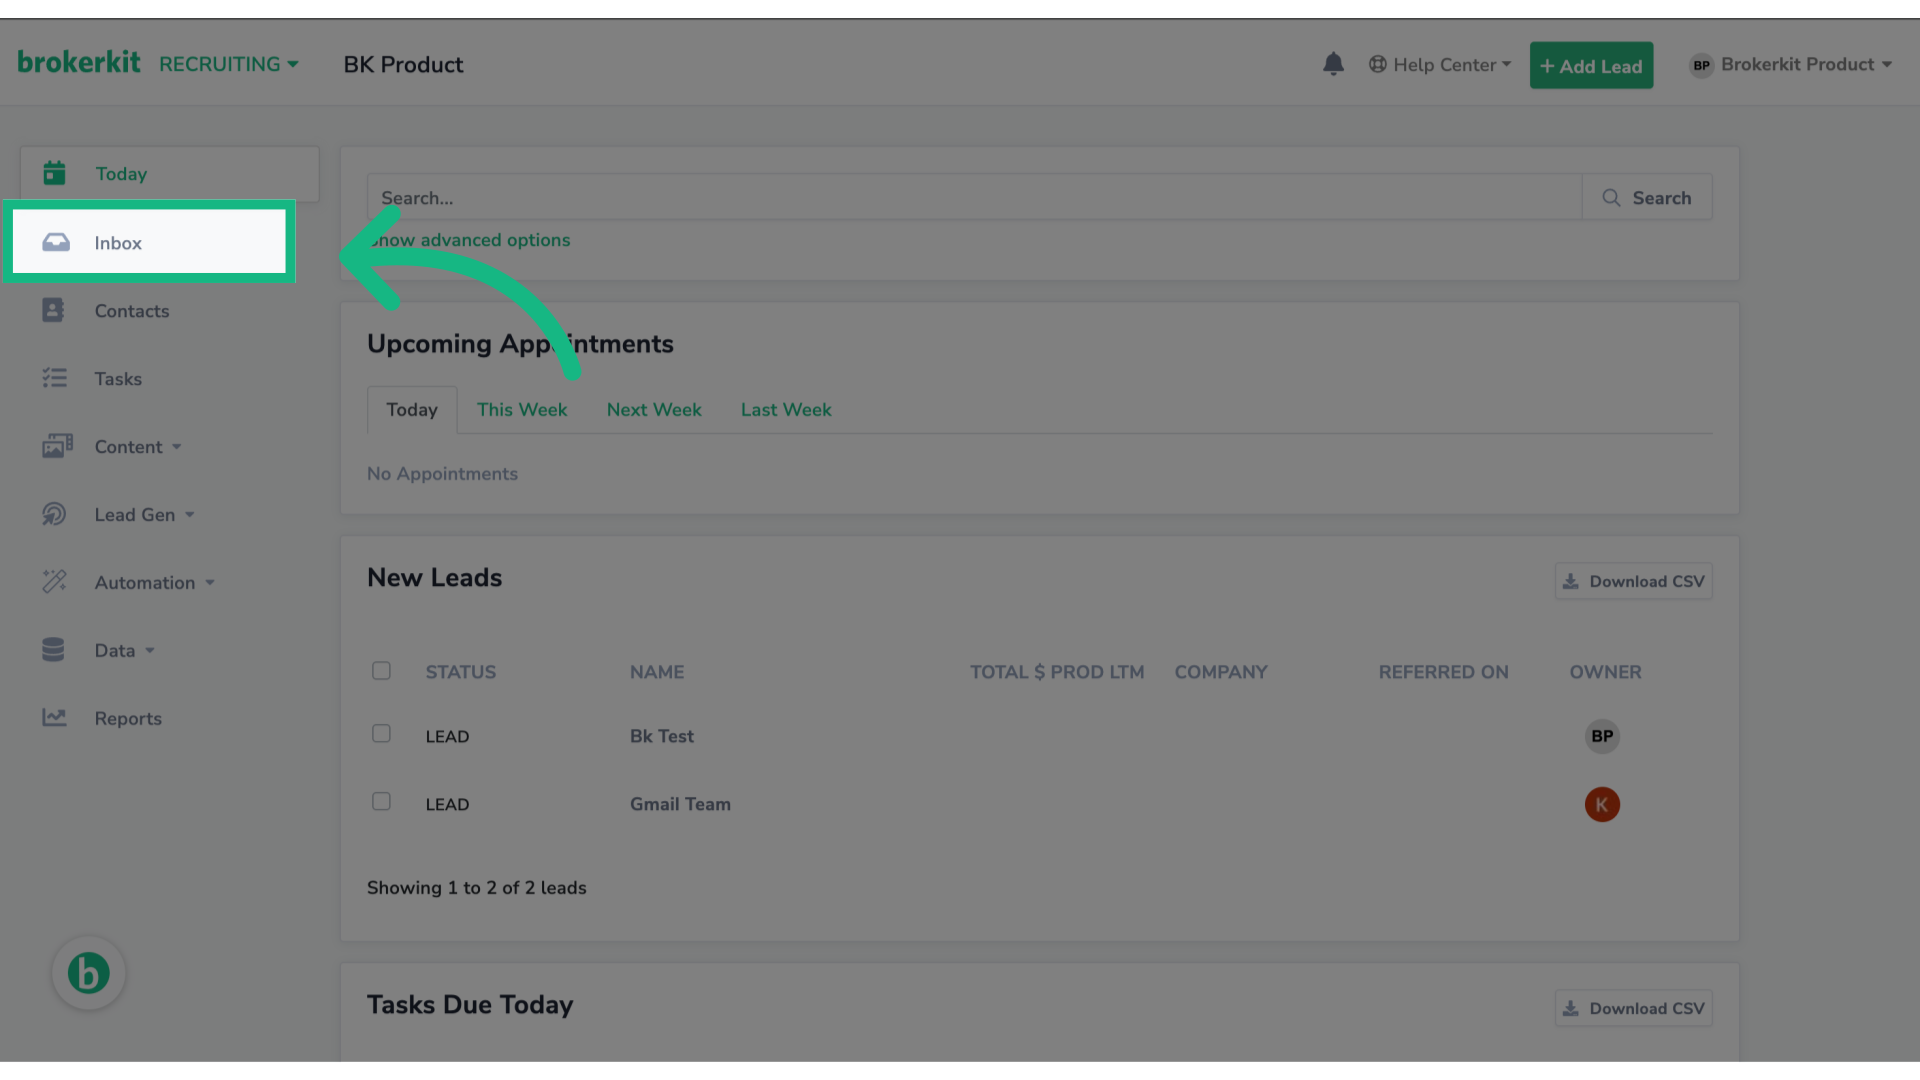
18. Click "Inbox"
Select Inbox from the left menu.
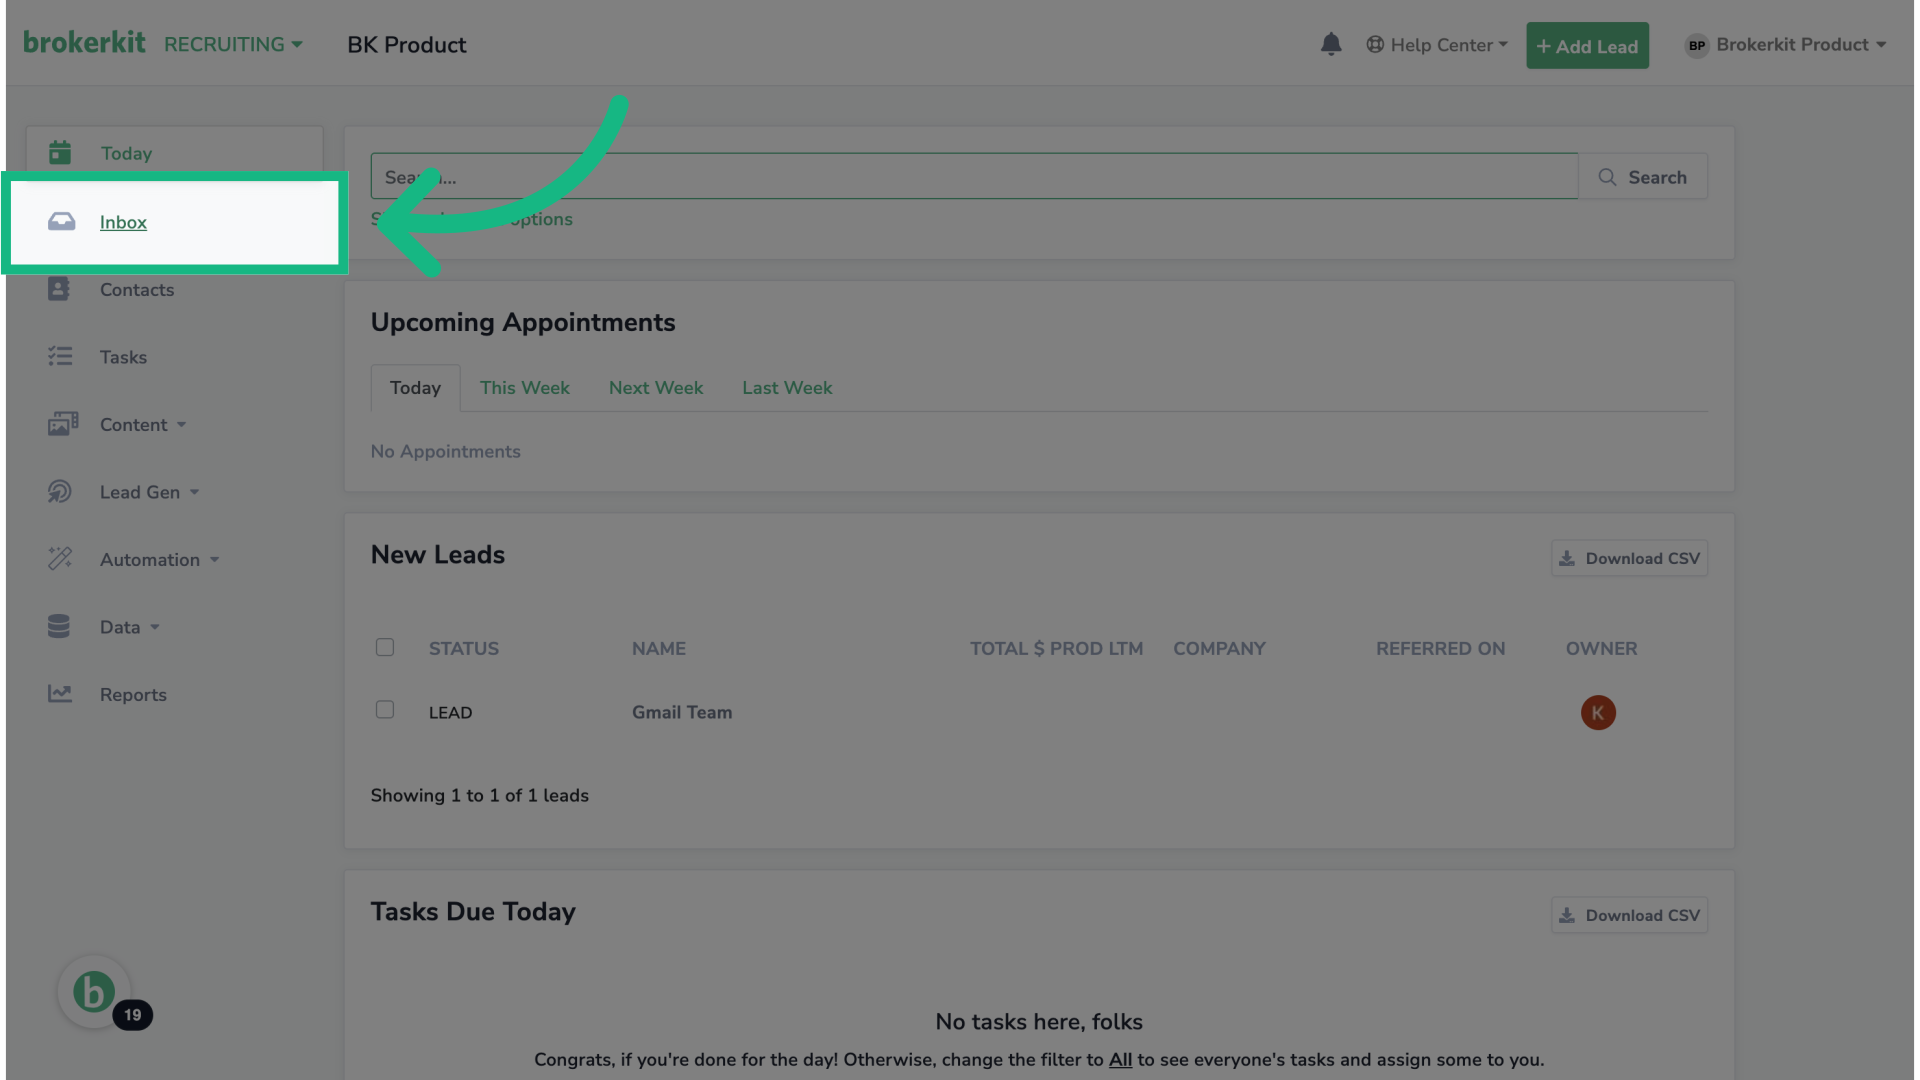
19. Click "All Conversations"
Go to All Conversations in order to view all emails that have arrived. Keep in mind that only admin users or the account POC have access to view All Conversations, which means only they can see the Gmail confirmation email. If you are a staff member, please reach out to an admin user for assistance.
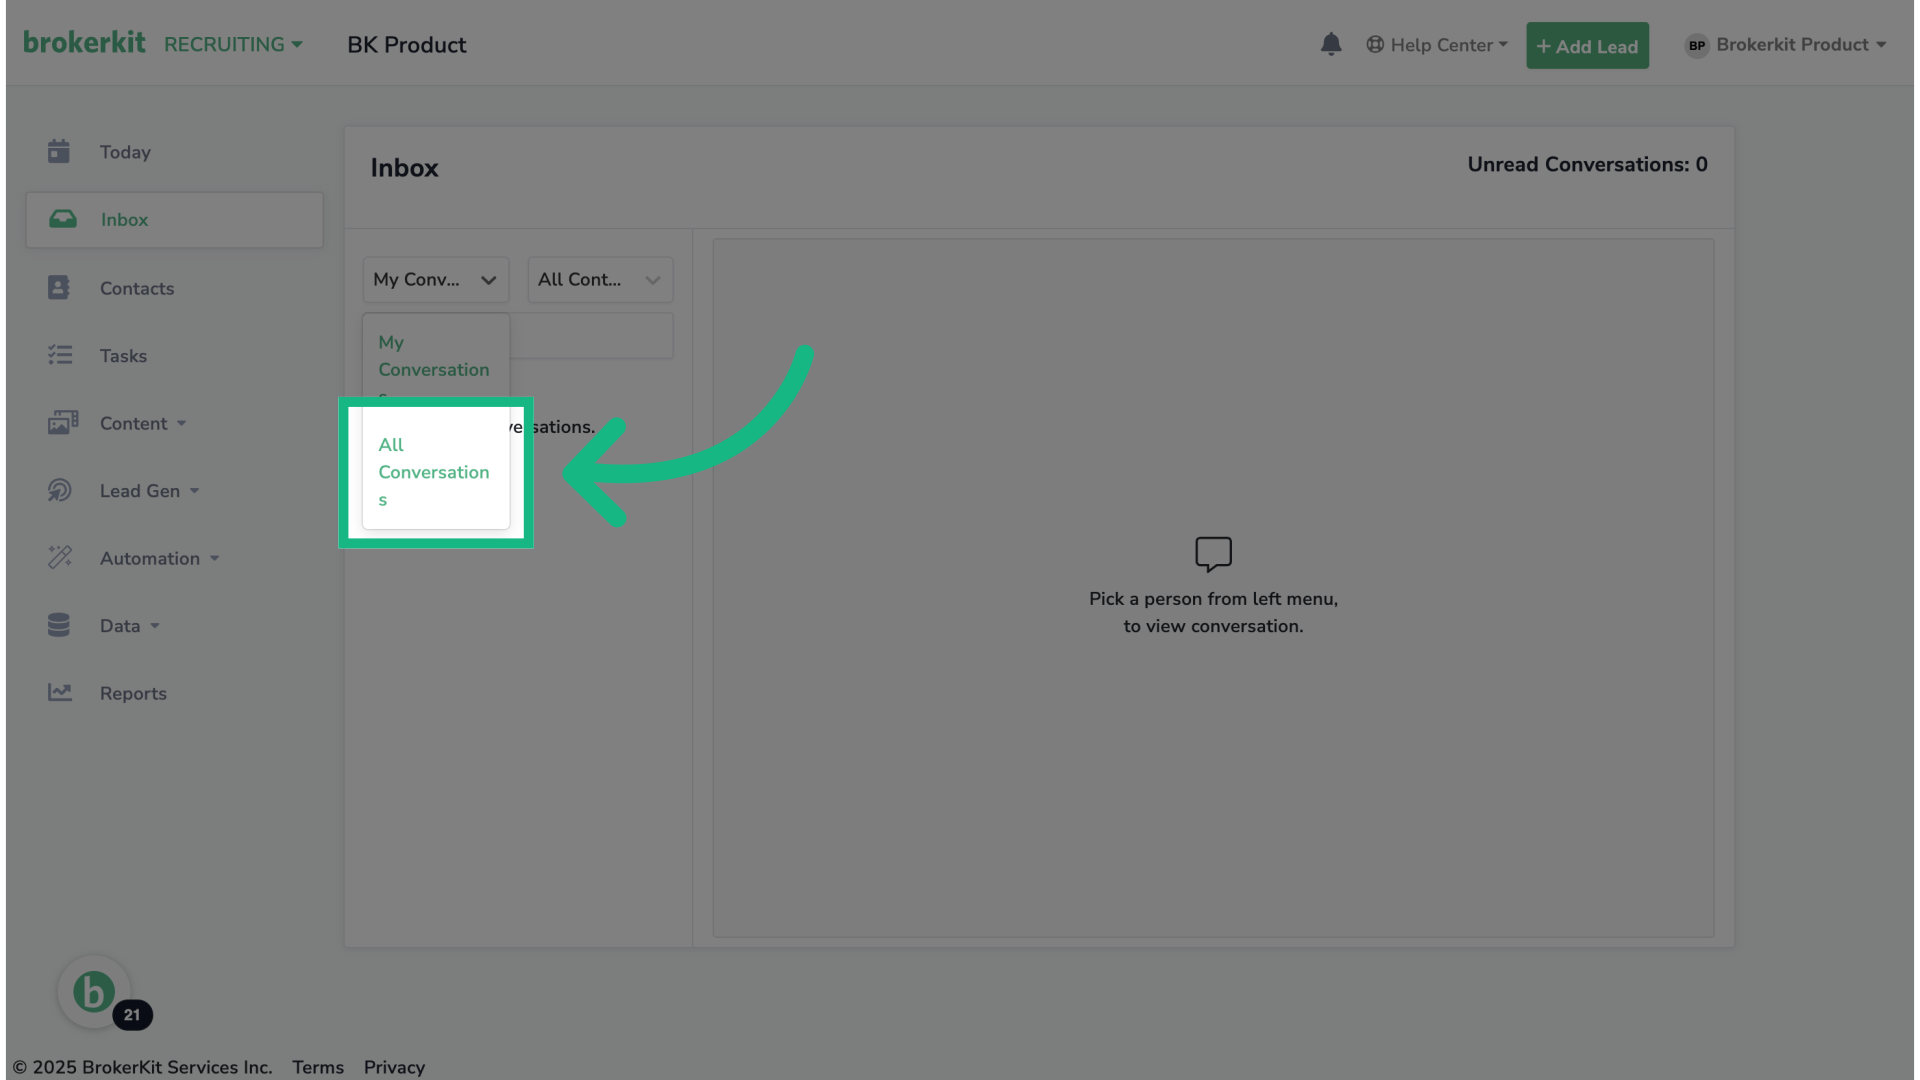
20. Find the email
Look for the Gmail confirmation email.
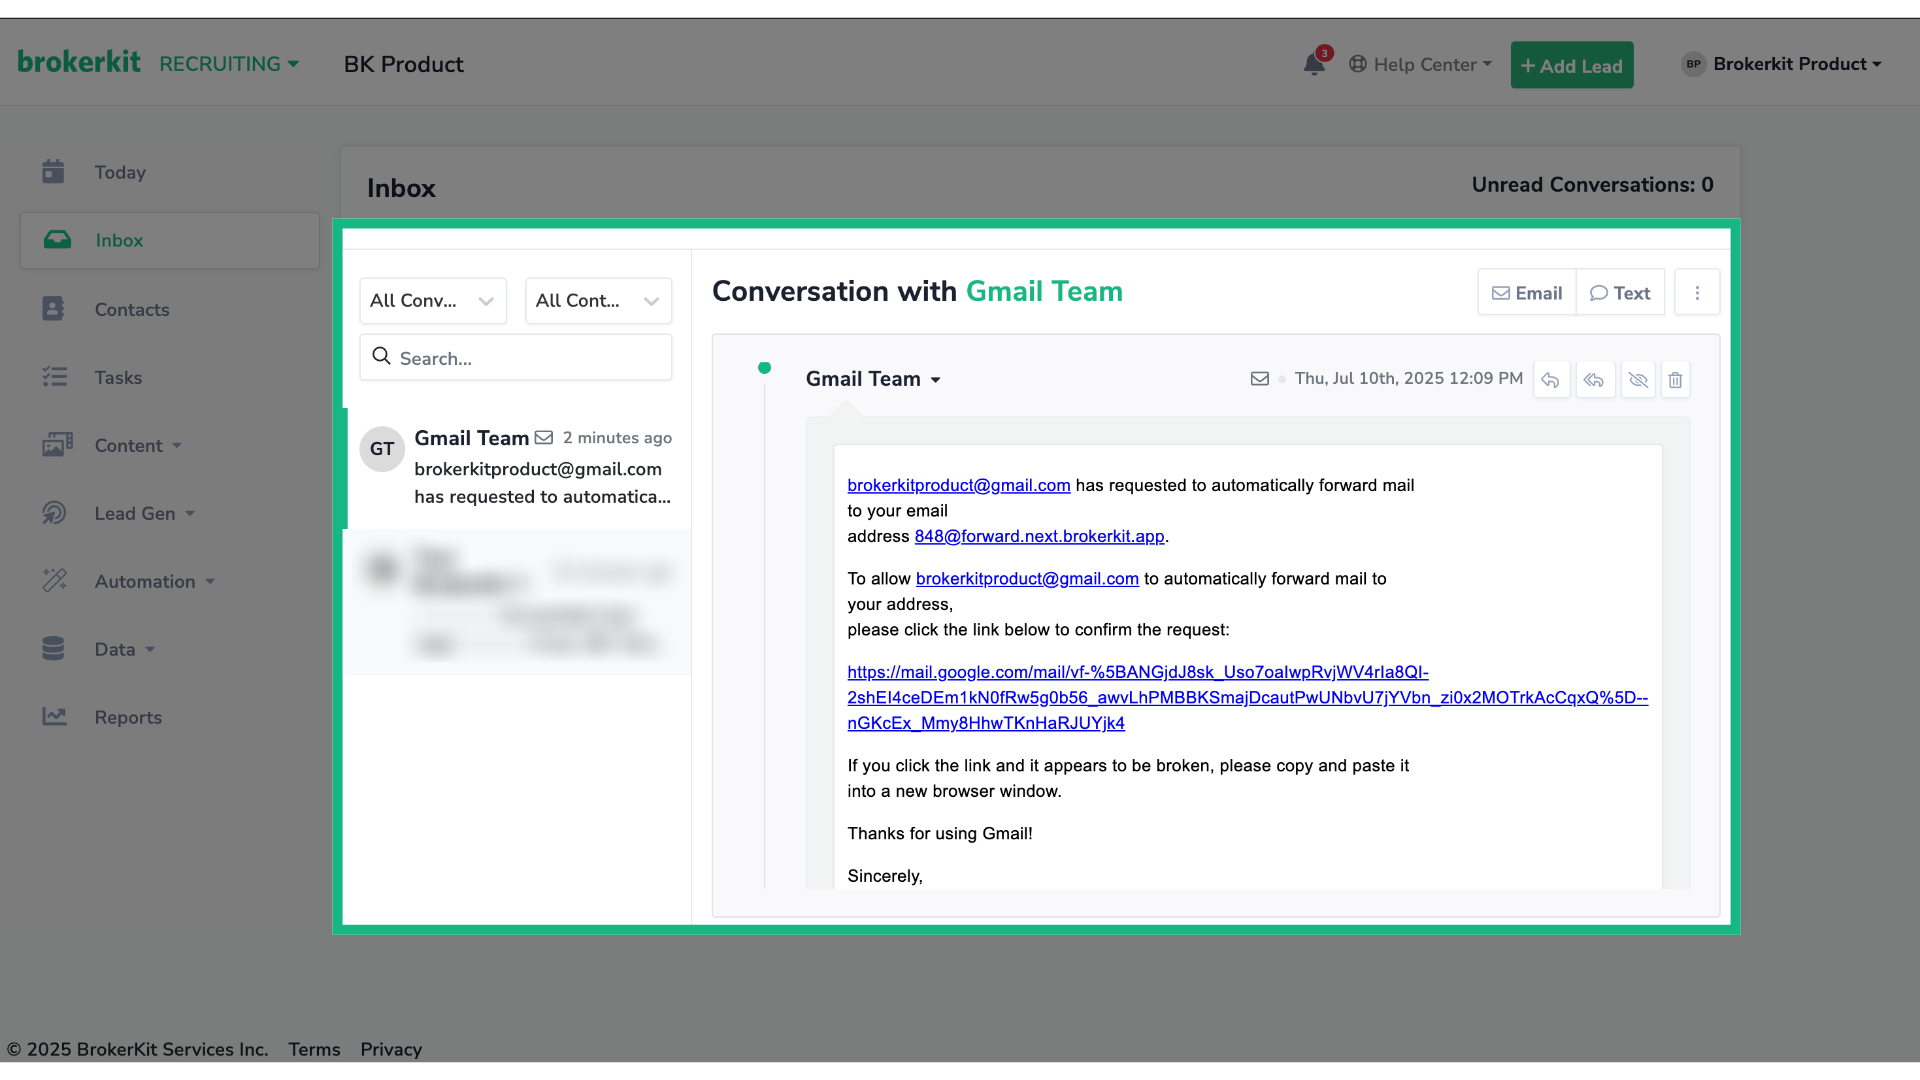
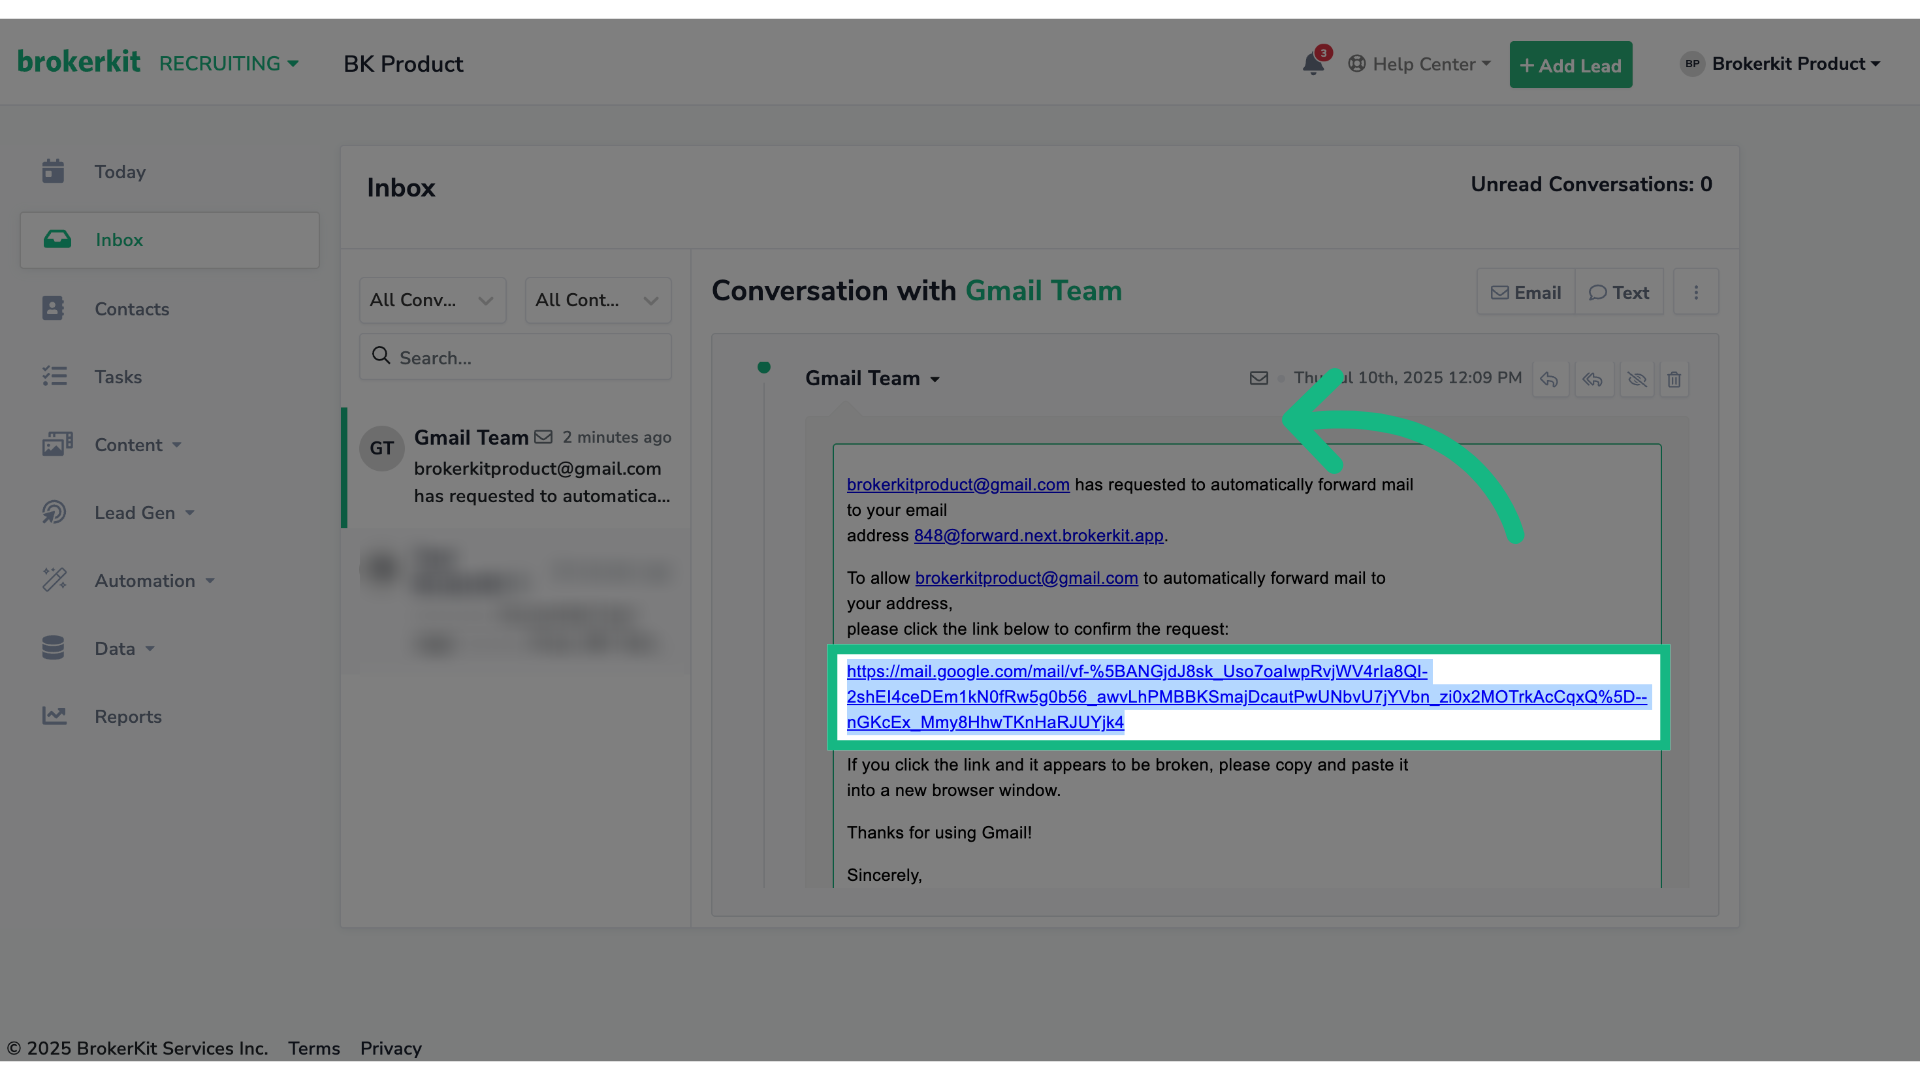
21. Click the confirmation link
Open the email and click on the specific link provided in the confirmation email to verify and approve the forwarding address request.
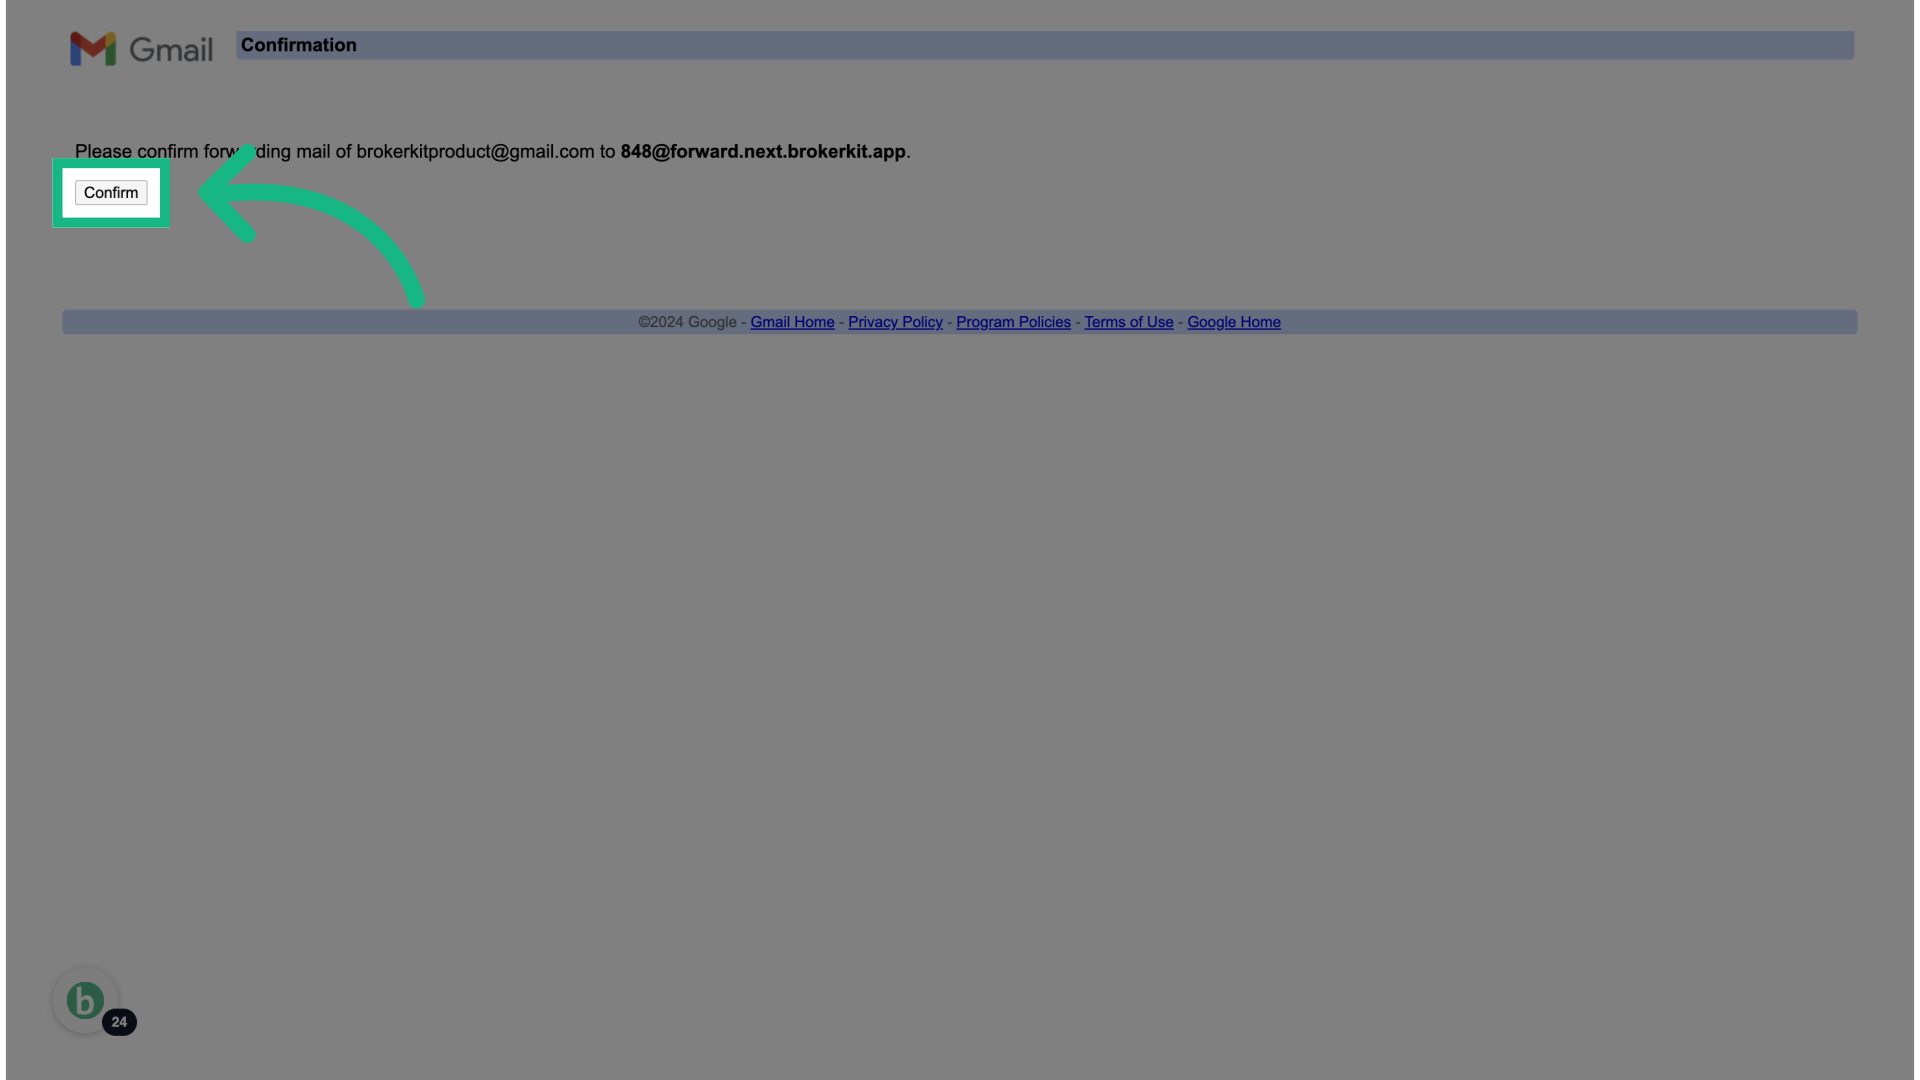
22. Click "Confirm"
Click "Confirm" to finalize the addition of your forwarding address.
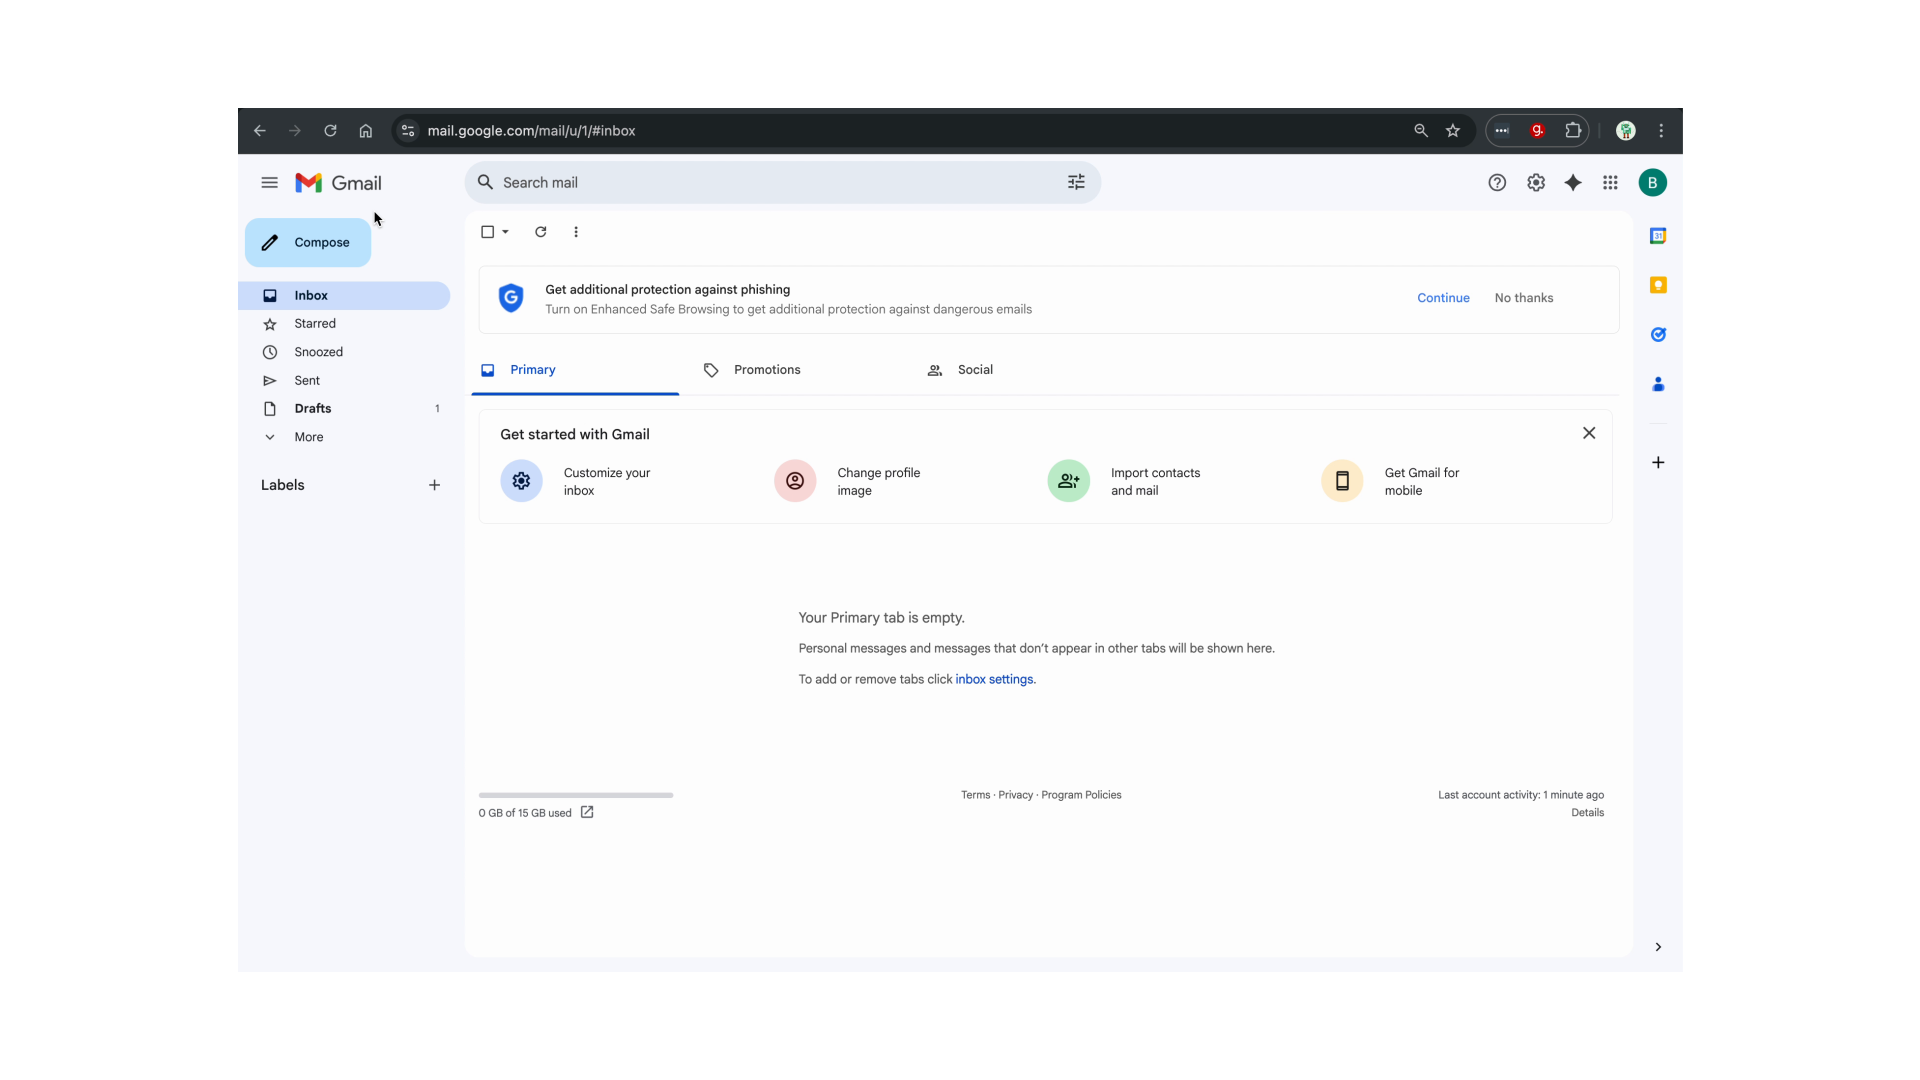
23. Go back to your Gmail inbox
Return to your Gmail inbox and refresh the page to load the changes, then go back to the forwarding settings.
24. Select "Forward a copy of incoming mail to"
Select the option "Forward a copy of incoming mail to" and ensure that the Brokerkit's forwarding address is selected.
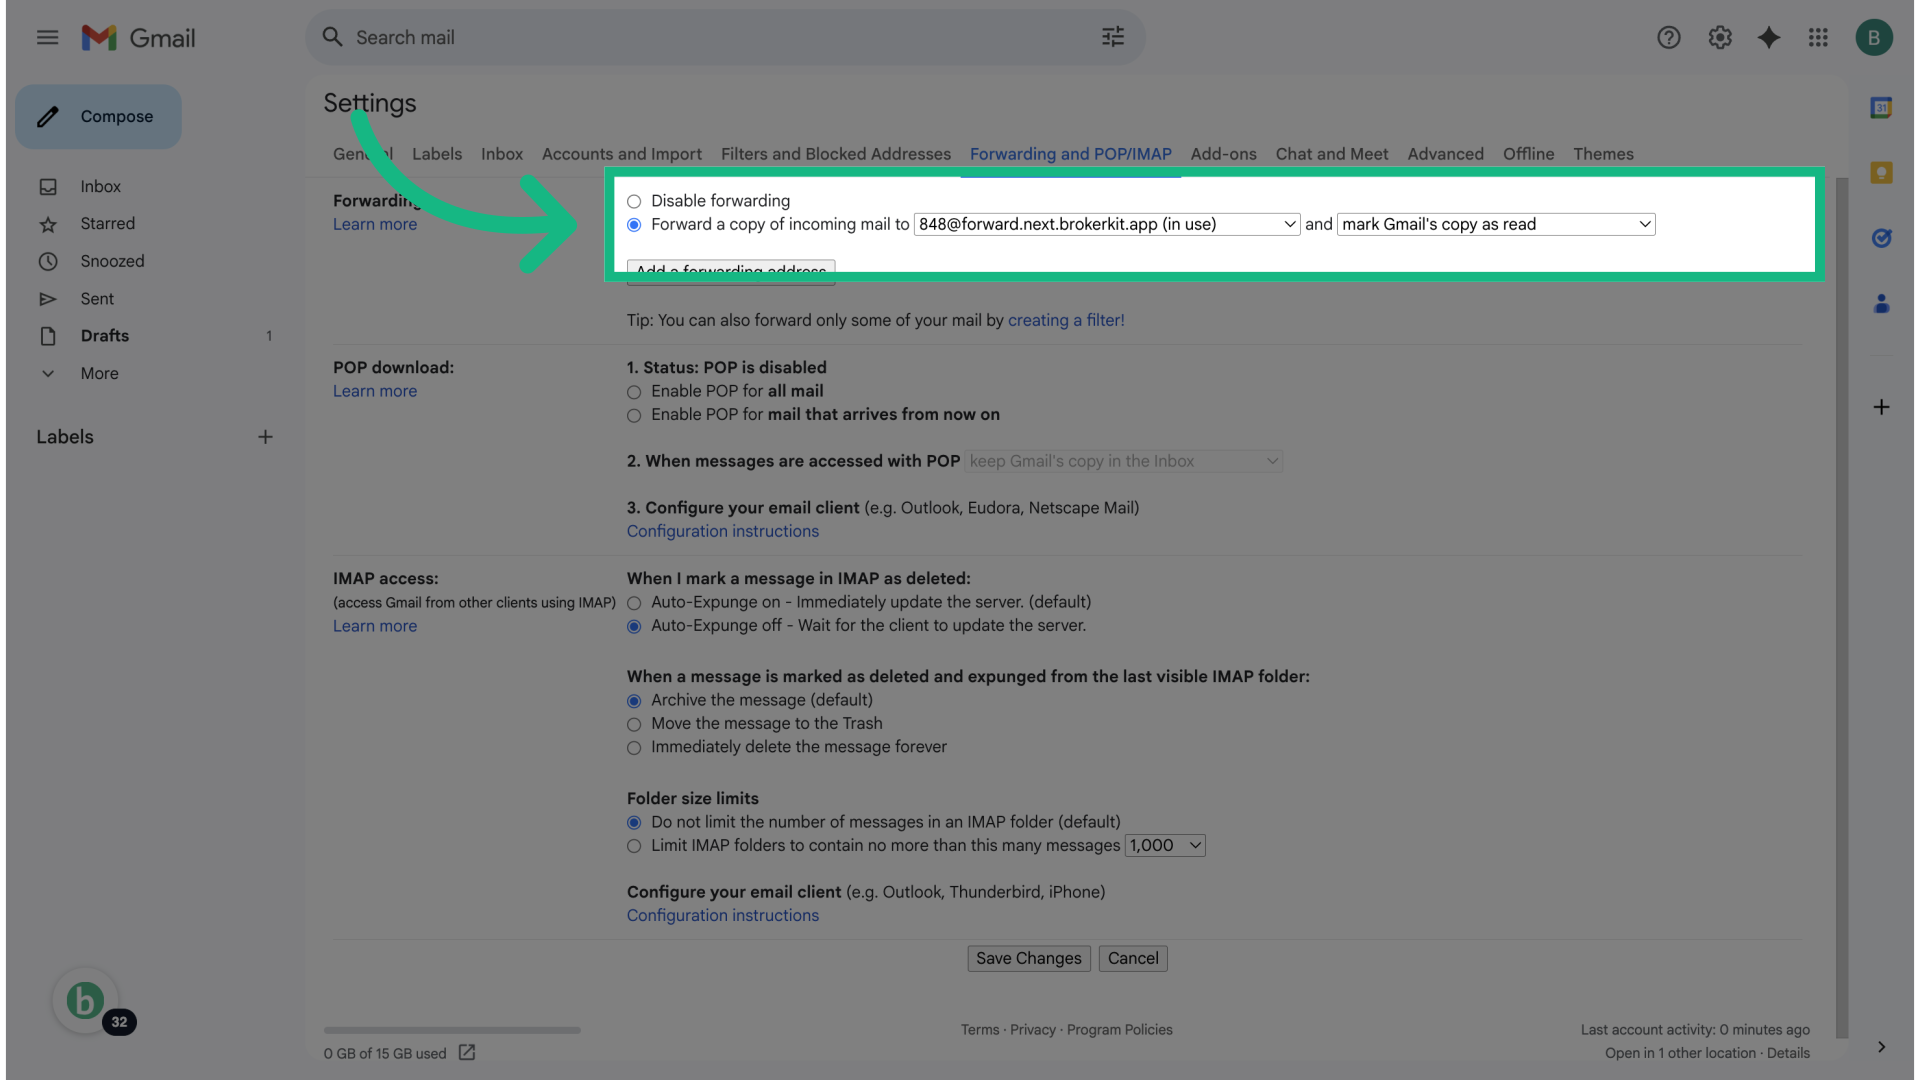
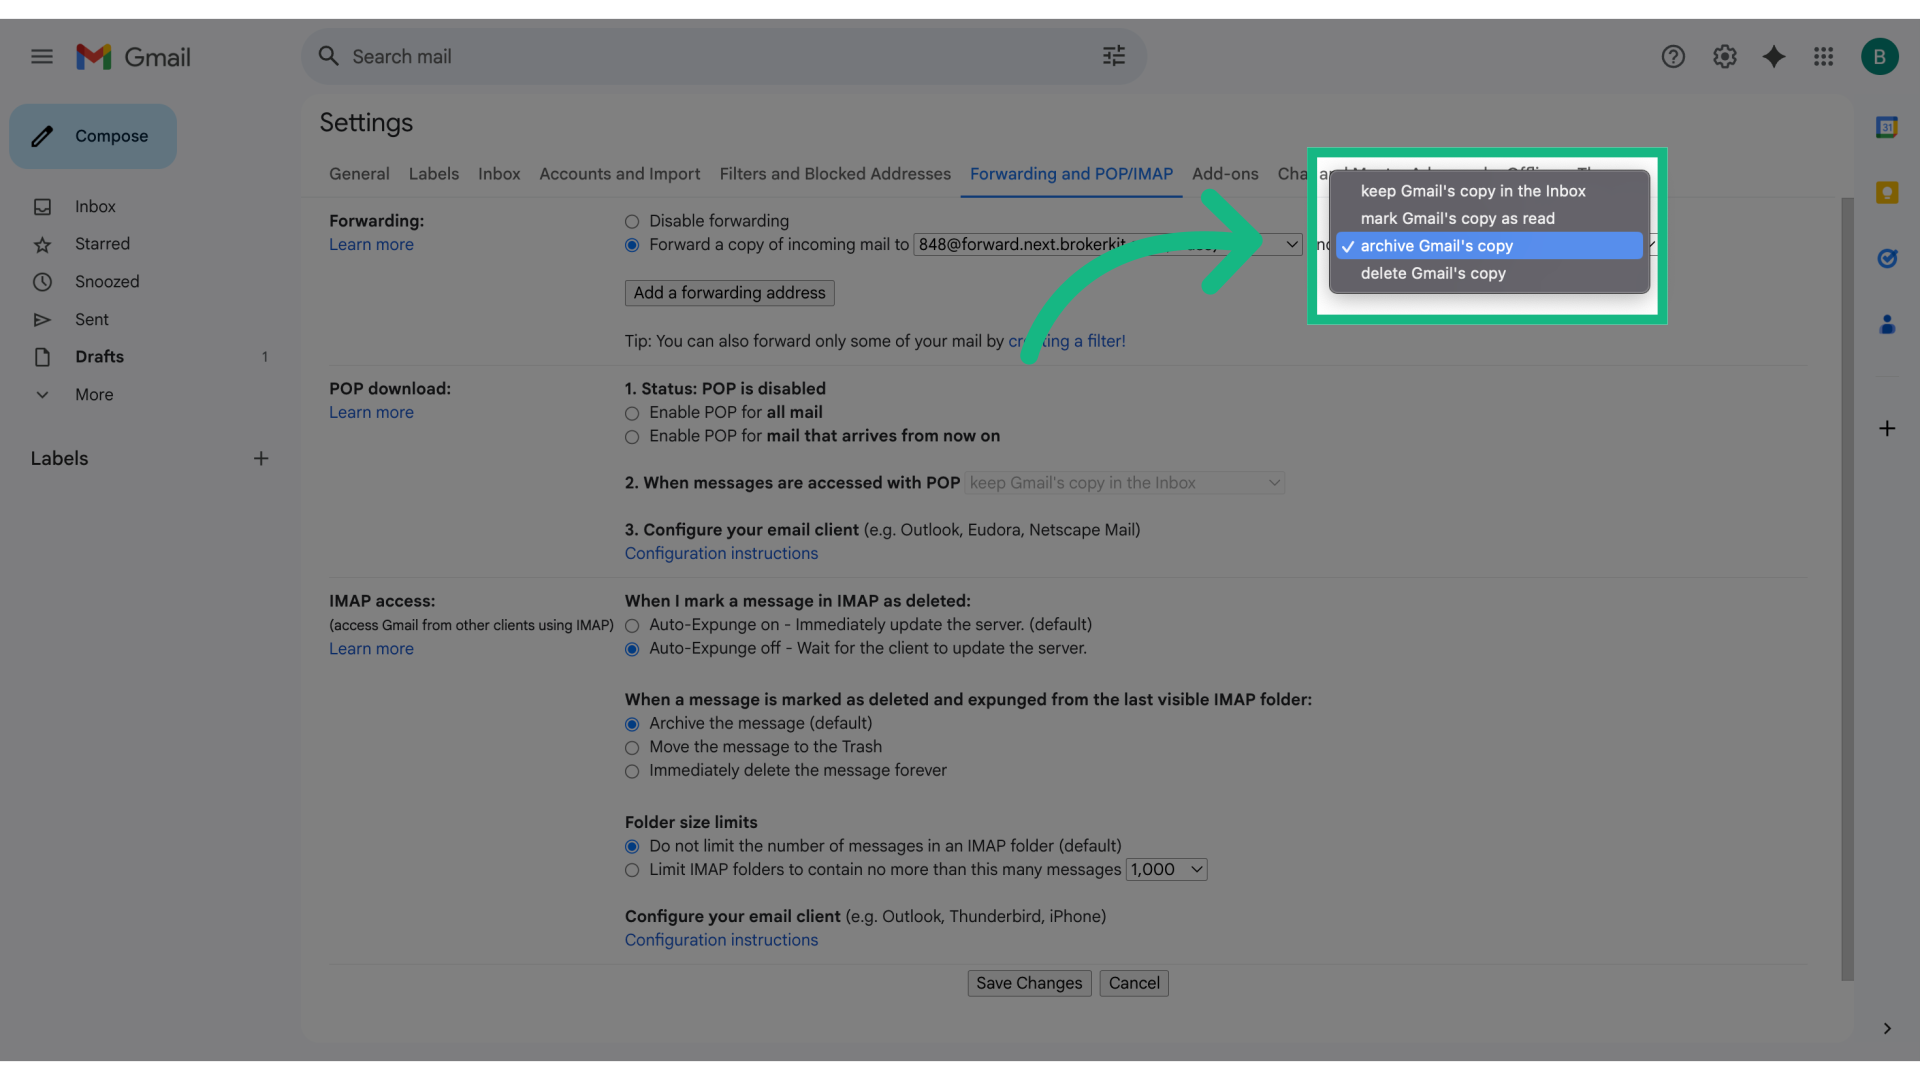
25. Decide how Gmail should handle forwarded emails
Decide what to do with the email after forwarding it—whether to keep it in the inbox, archive it, mark it as read, or delete it—based on your preference.
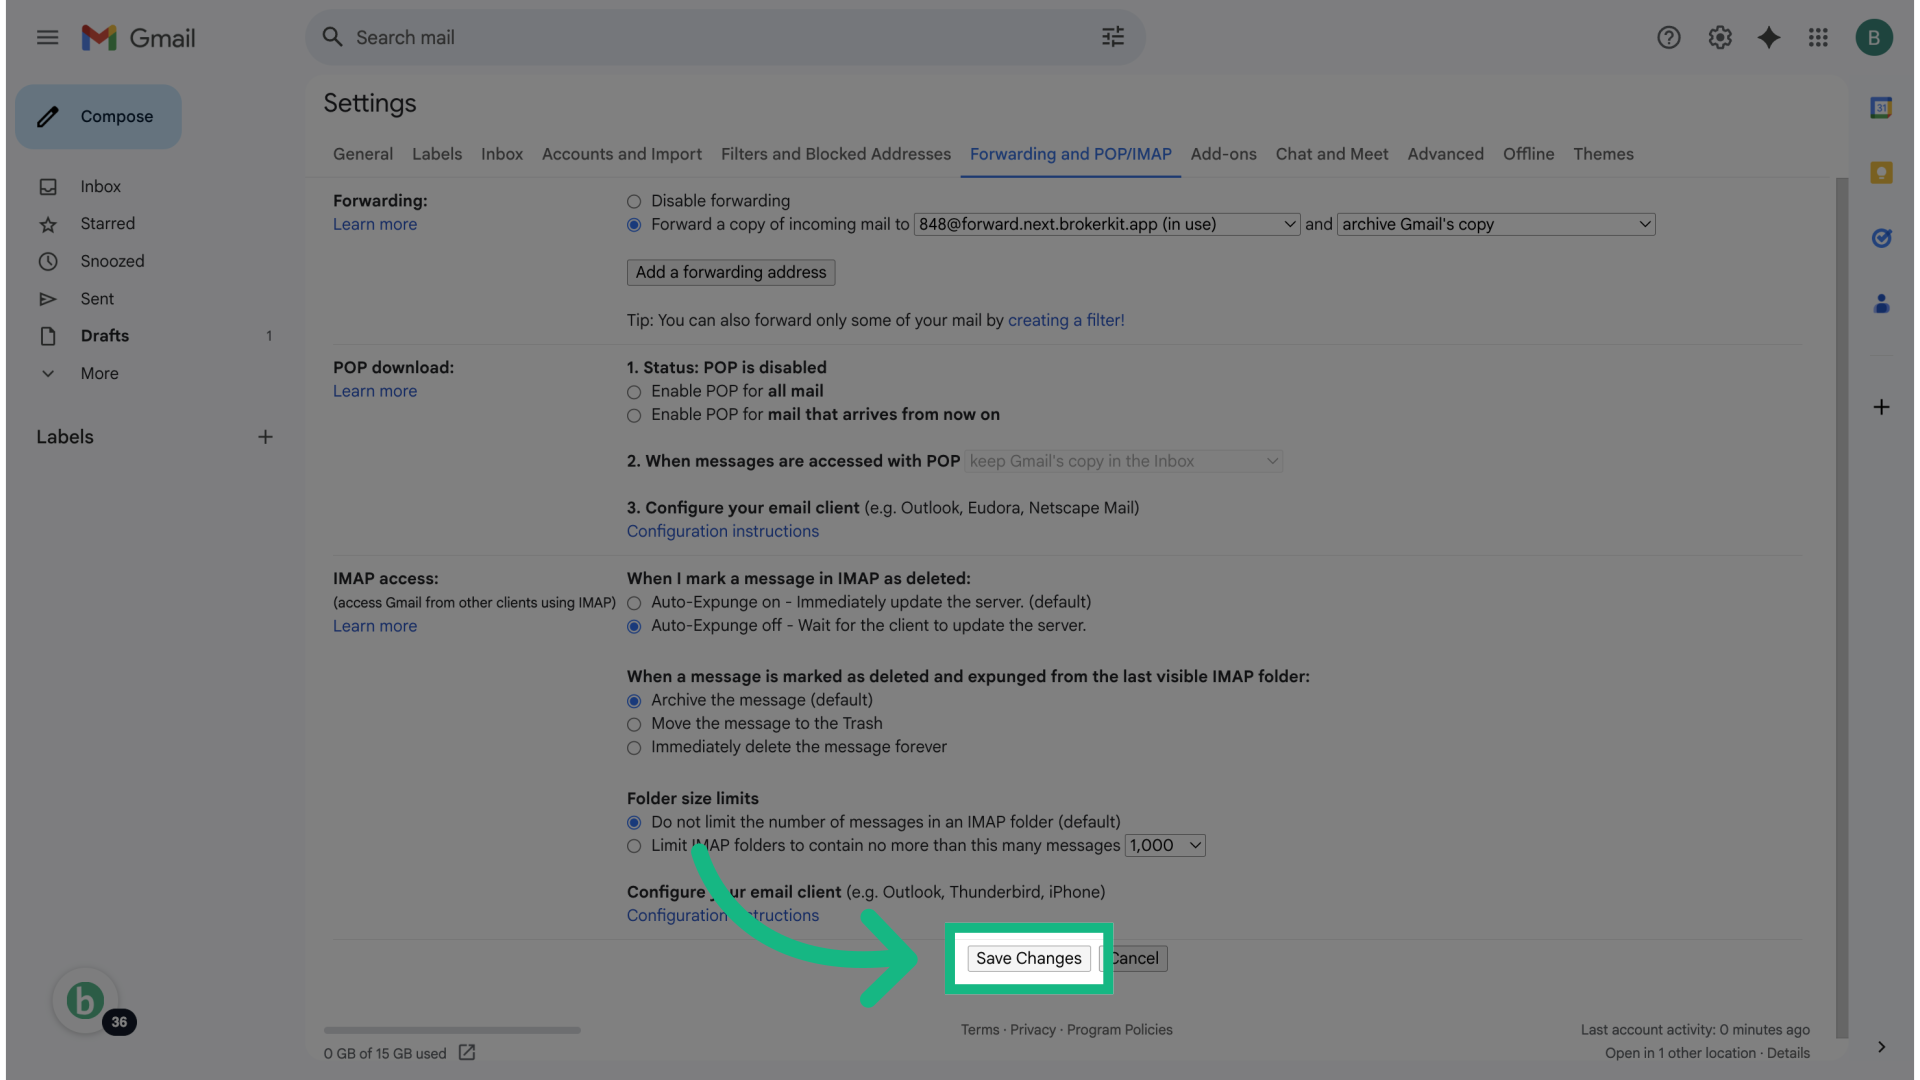
26. Click "Save Changes"
Don't forget to save your changes by clicking "Save Changes" at the bottom of the page.
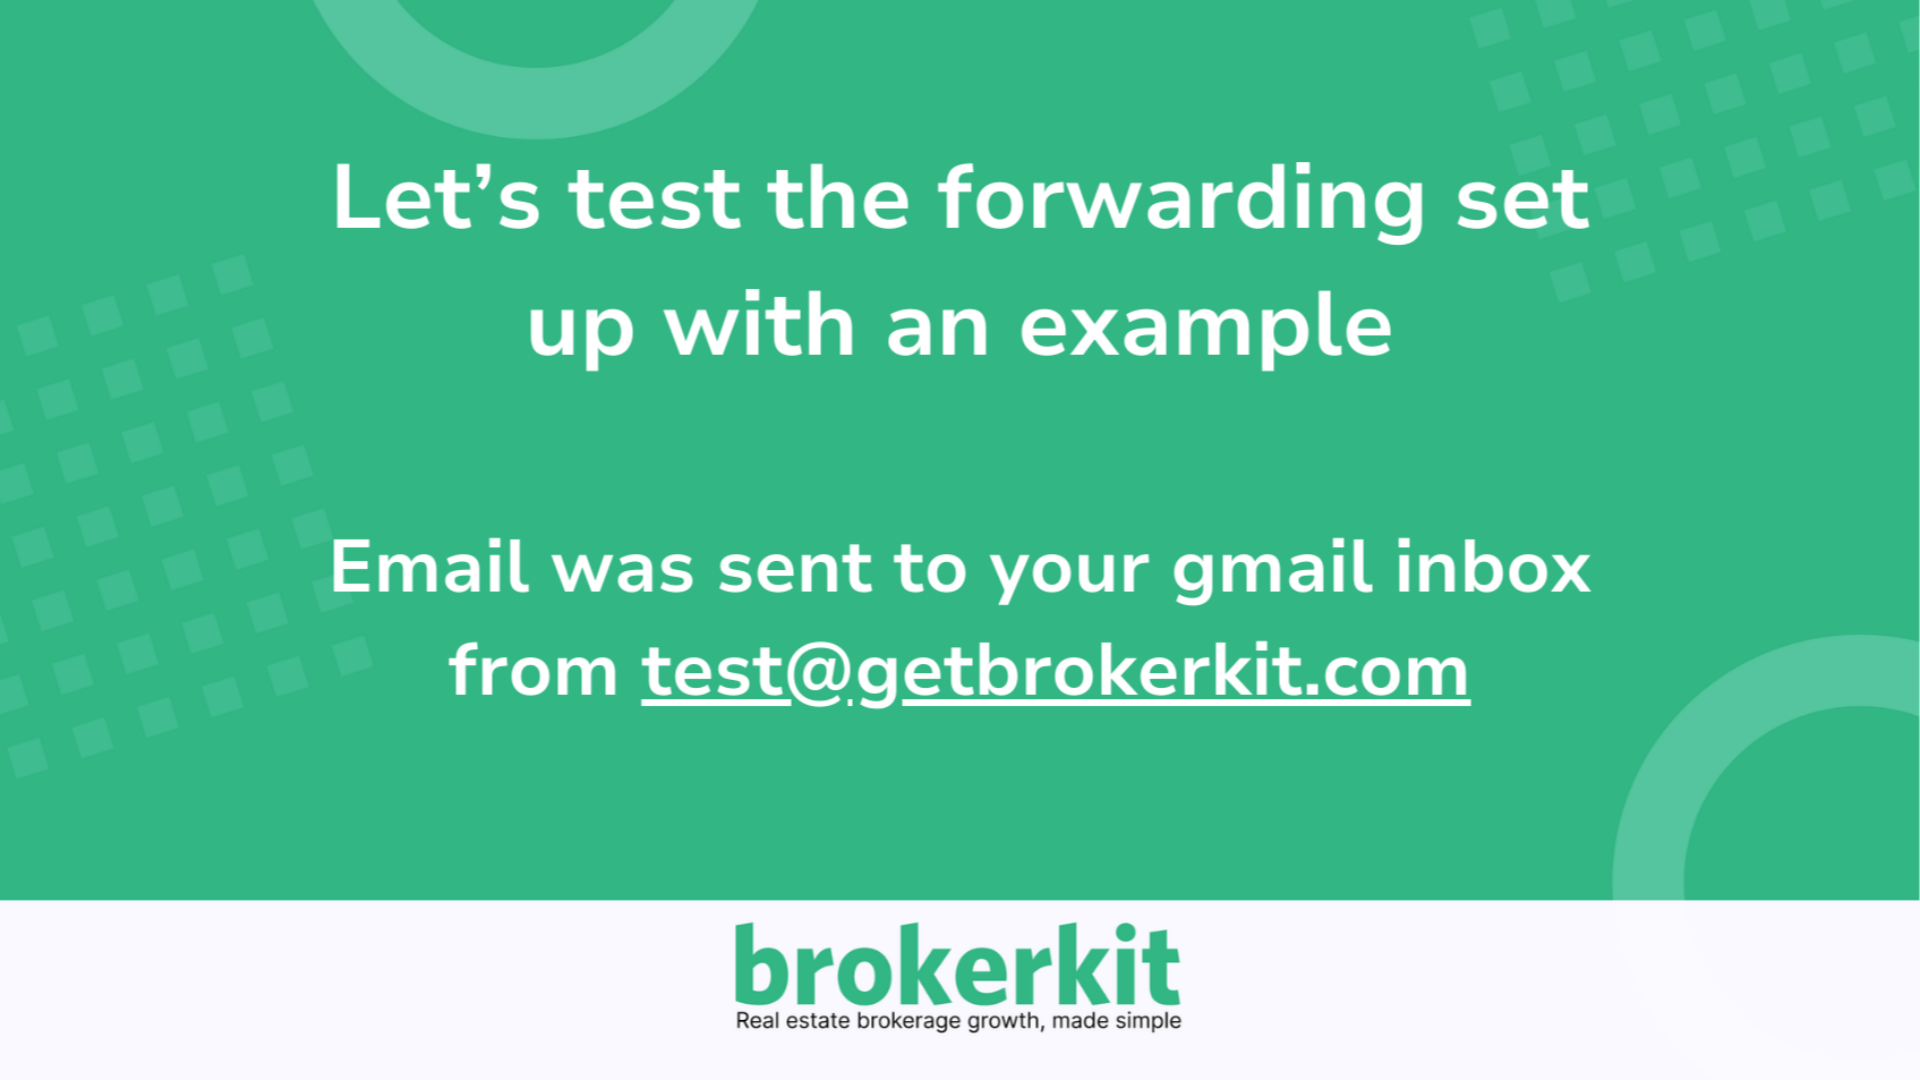
27. Example: Testing the Forwarding Setup
Now that Brokerkit's forwarding address has been set up, let's walk through an example of how it works. An email was sent from test@getbrokerkit.com to my Gmail address. Since forwarding is enabled, this email should now be automatically forwarded to my Brokerkit inbox.
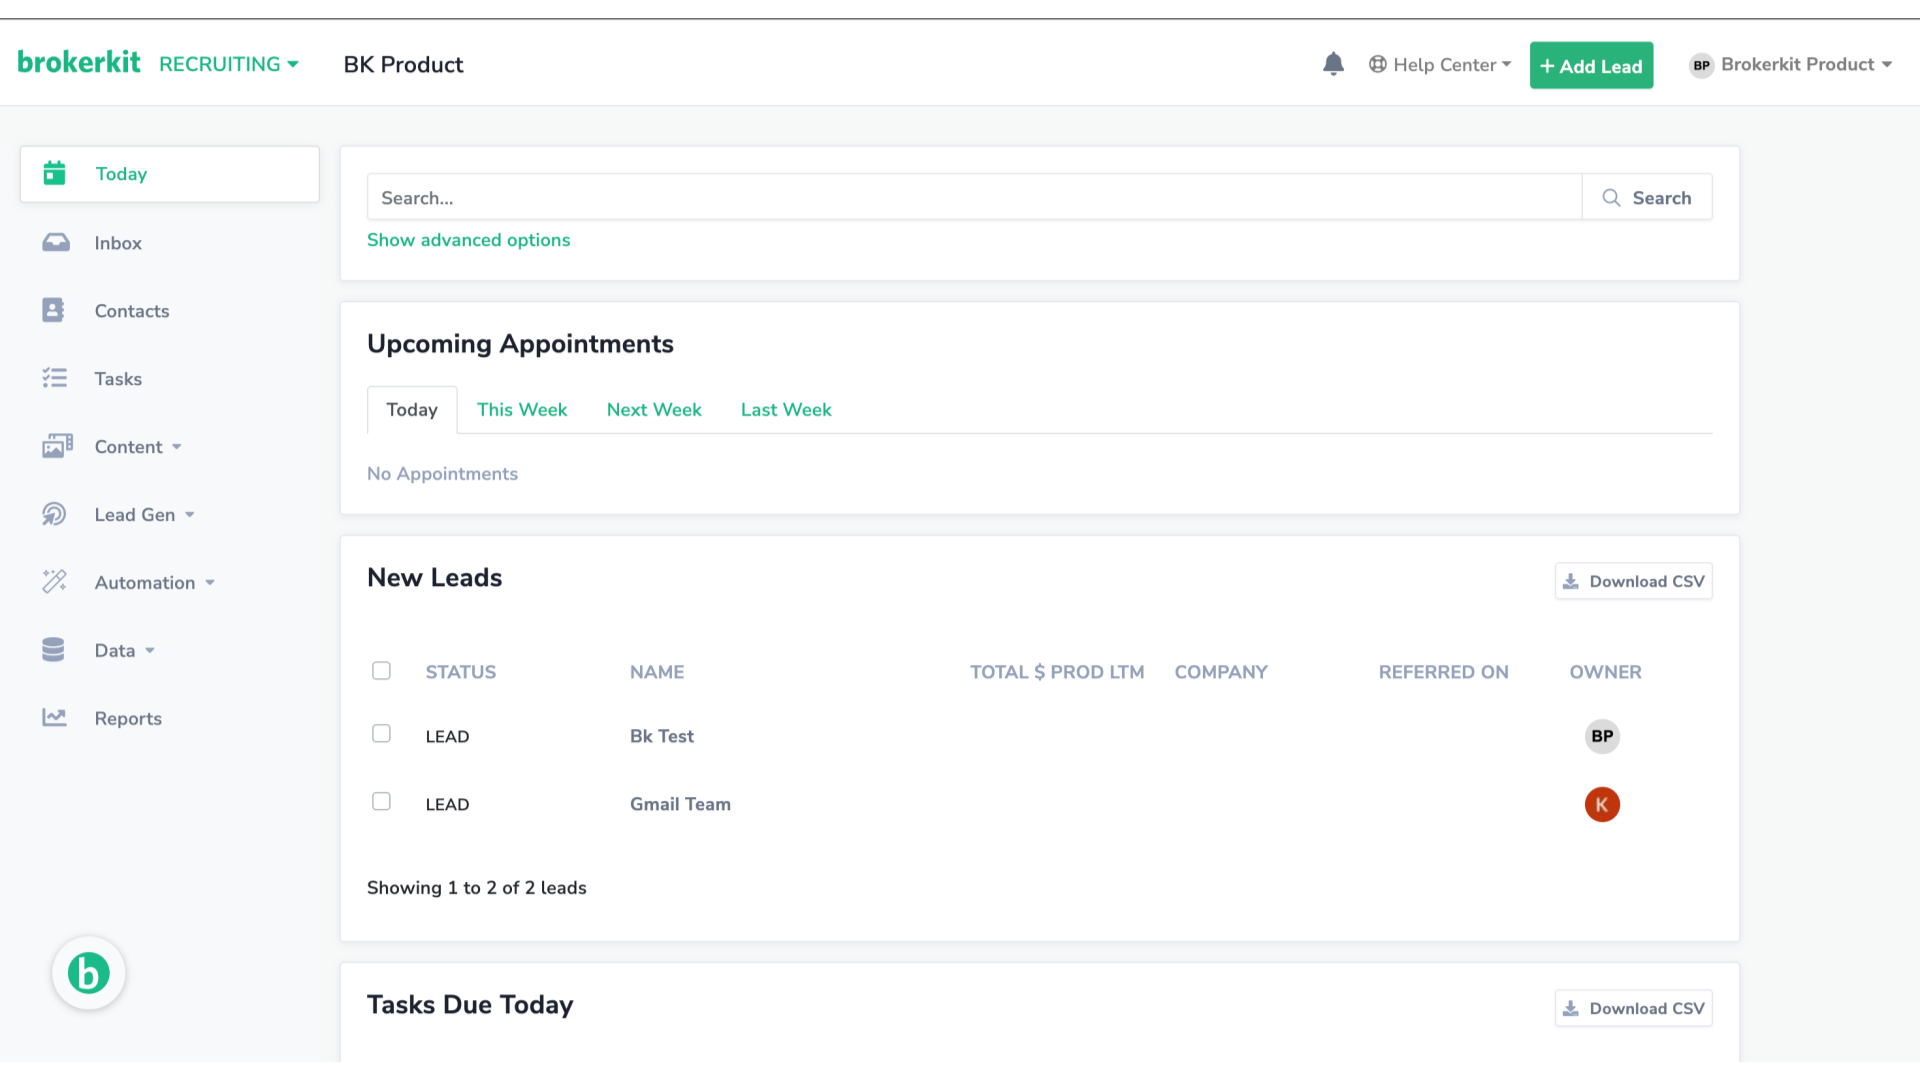
28. Go to your Brokerkit
Open your Brokerkit platform.
29. Click "Inbox"
Select Inbox from the left menu.
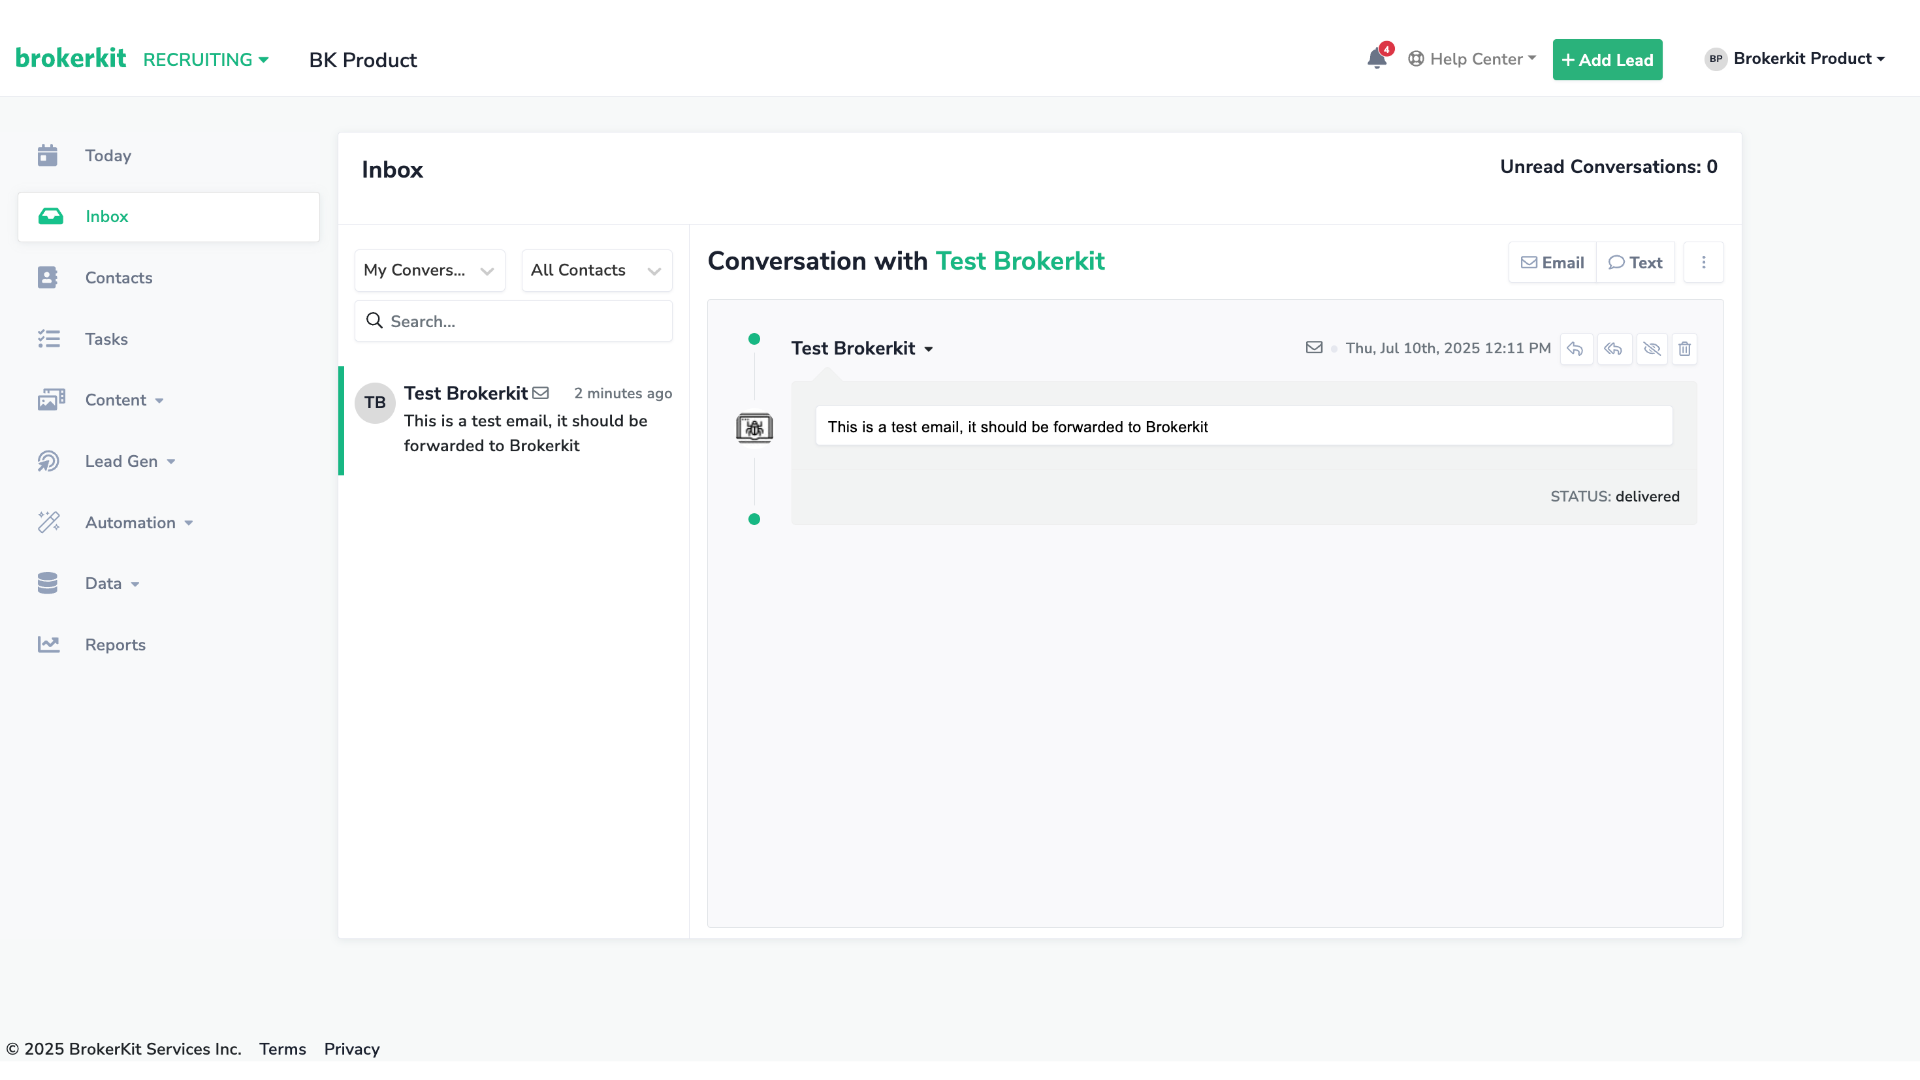
30. The email sent to your Gmail address has been successfully forwarded to Brokerkit — you'll find it in your Inbox.
In this view, you will see the new emails that have arrived, in this case, we see the email that was just sent from test@getbrokerkit.com.
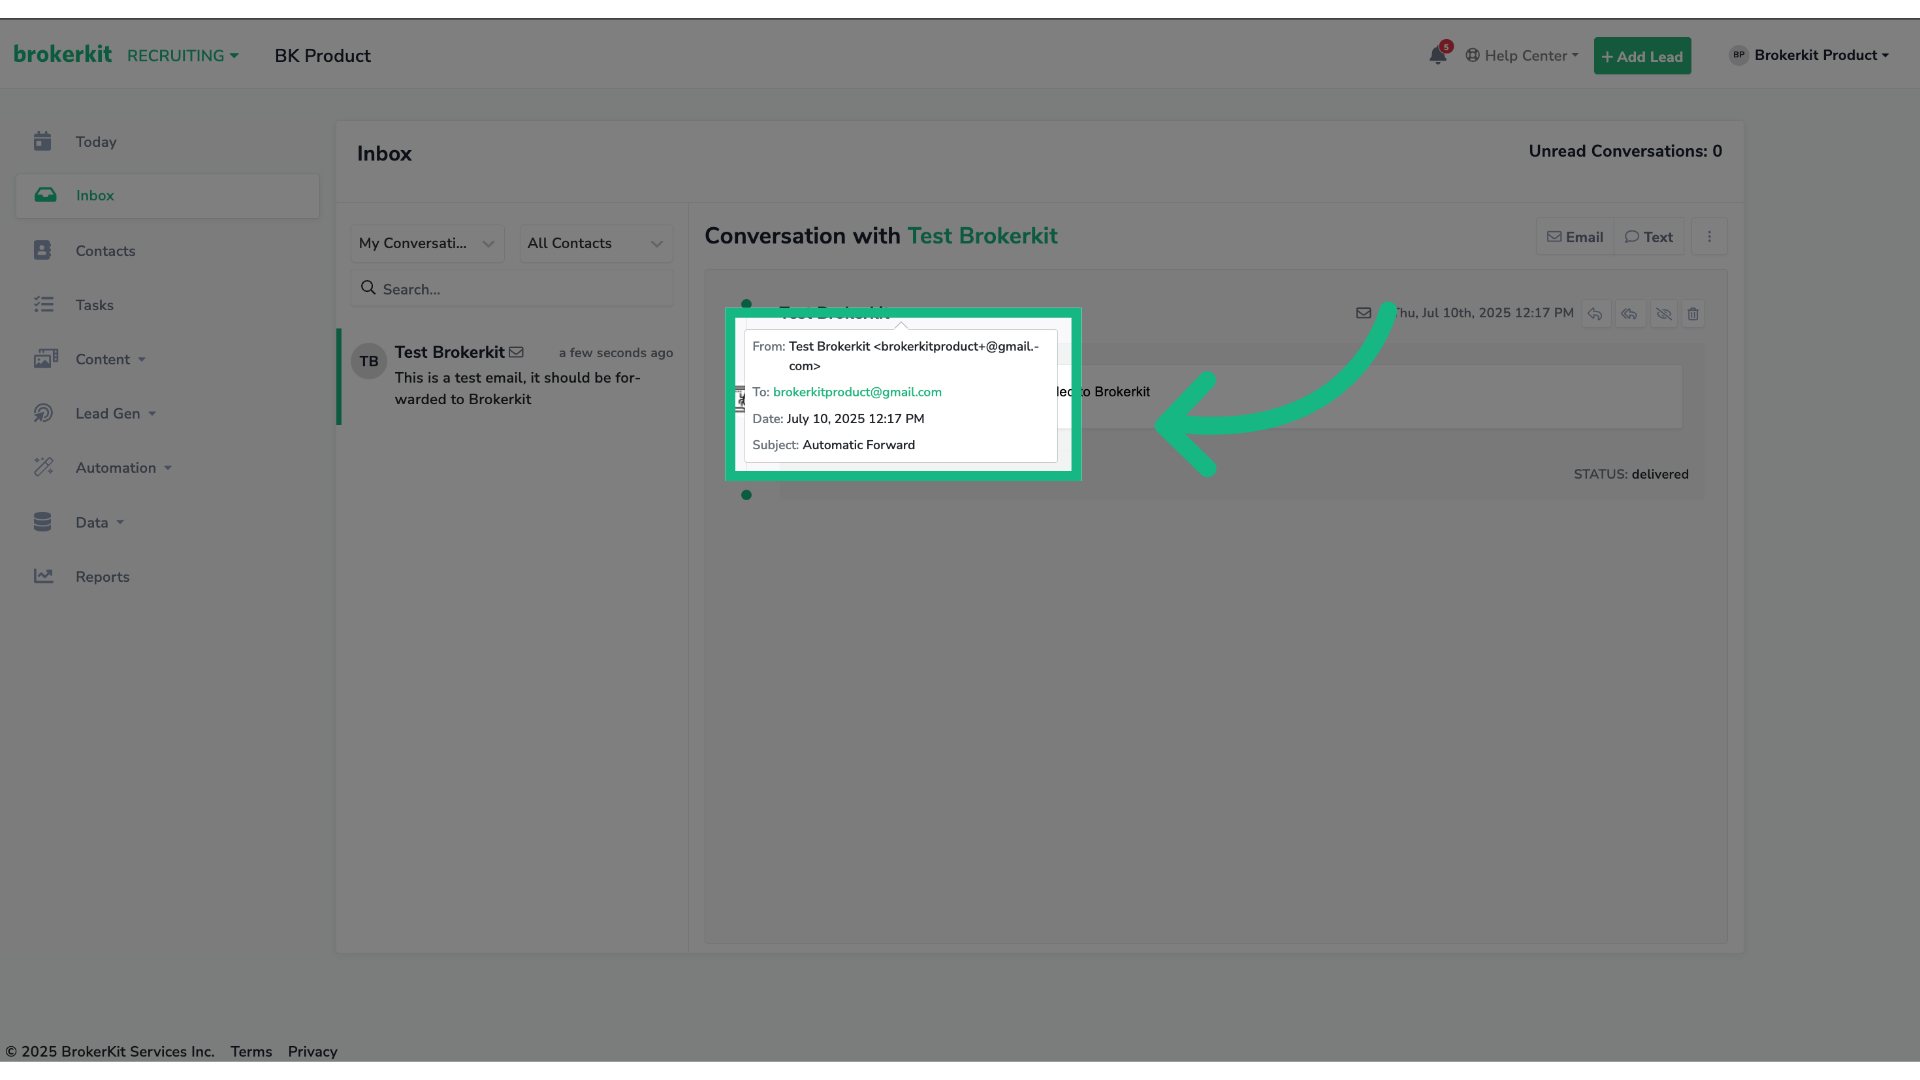
31. Click the small downward arrow to view the email header preview
To view the email header preview, click on that small downward arrow.
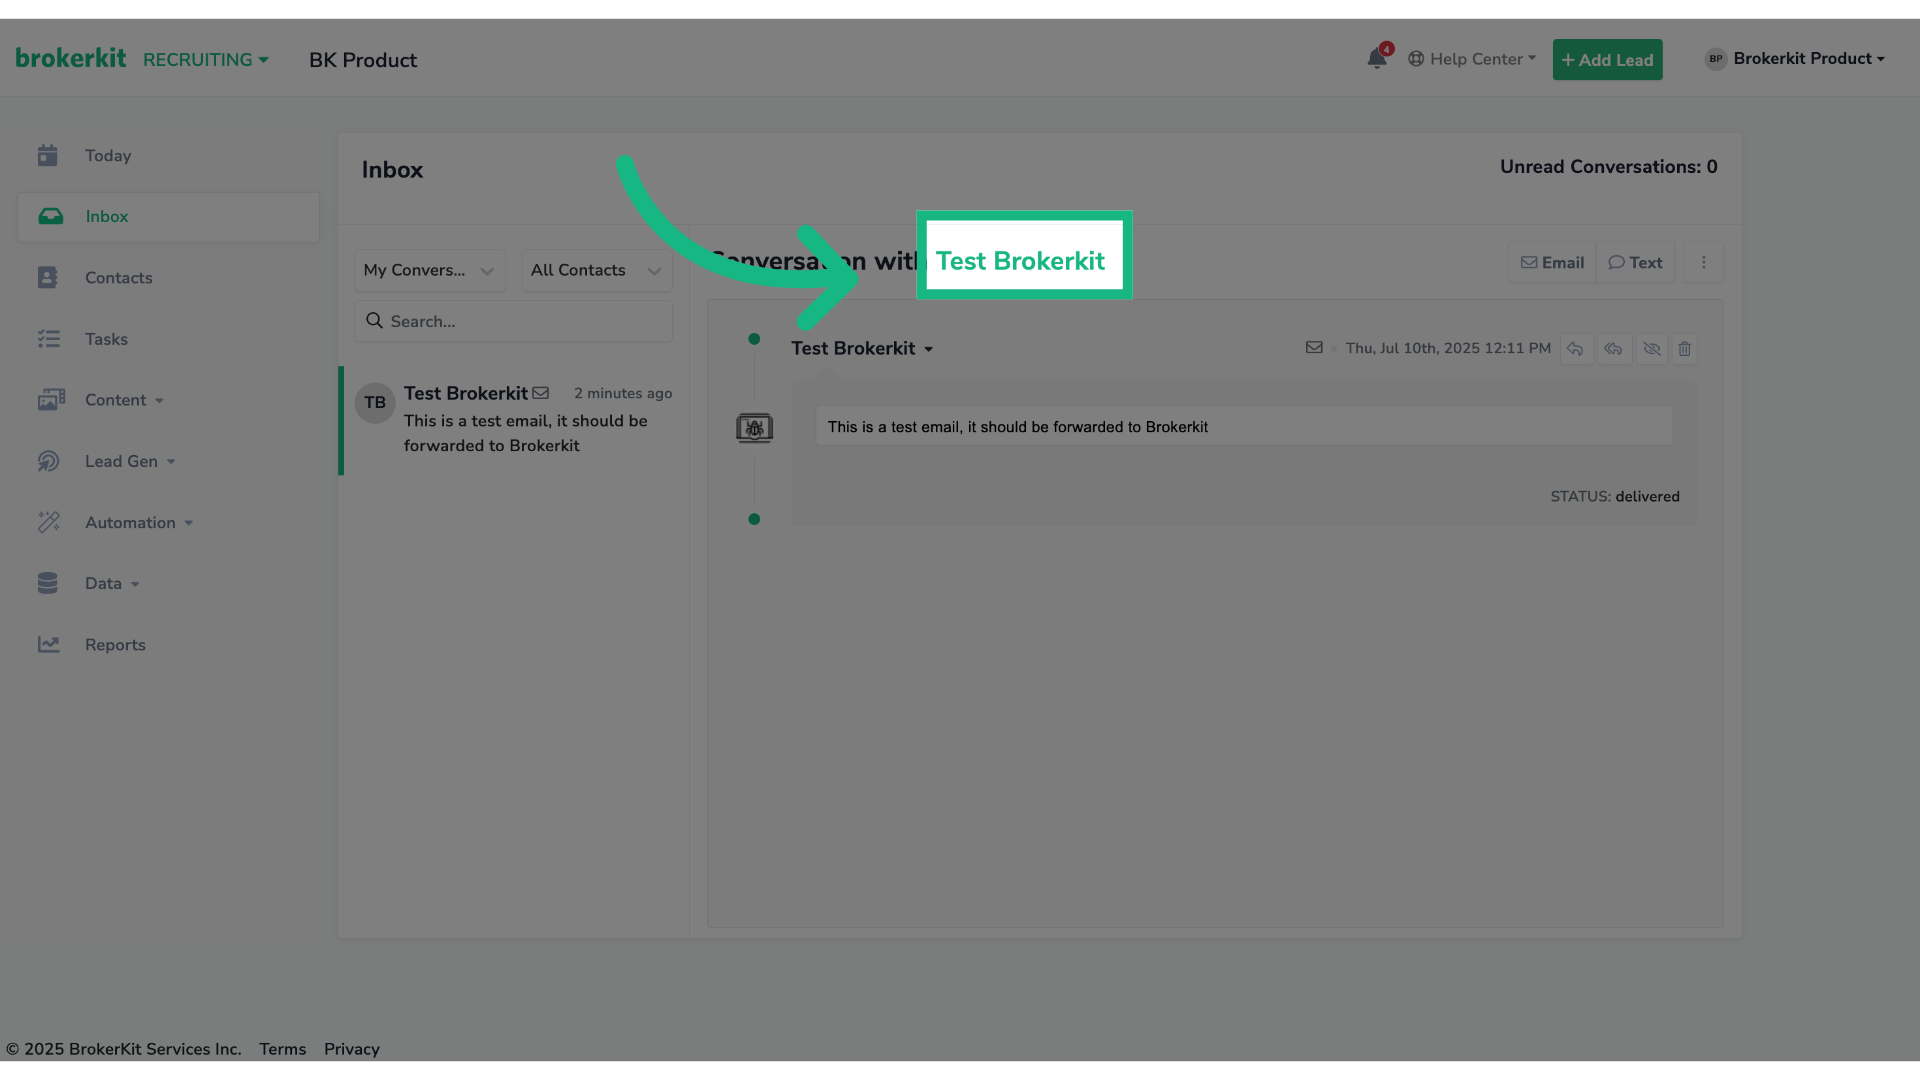
32. Click the contact's name
Click the contact's name to navigate to the contact profile.
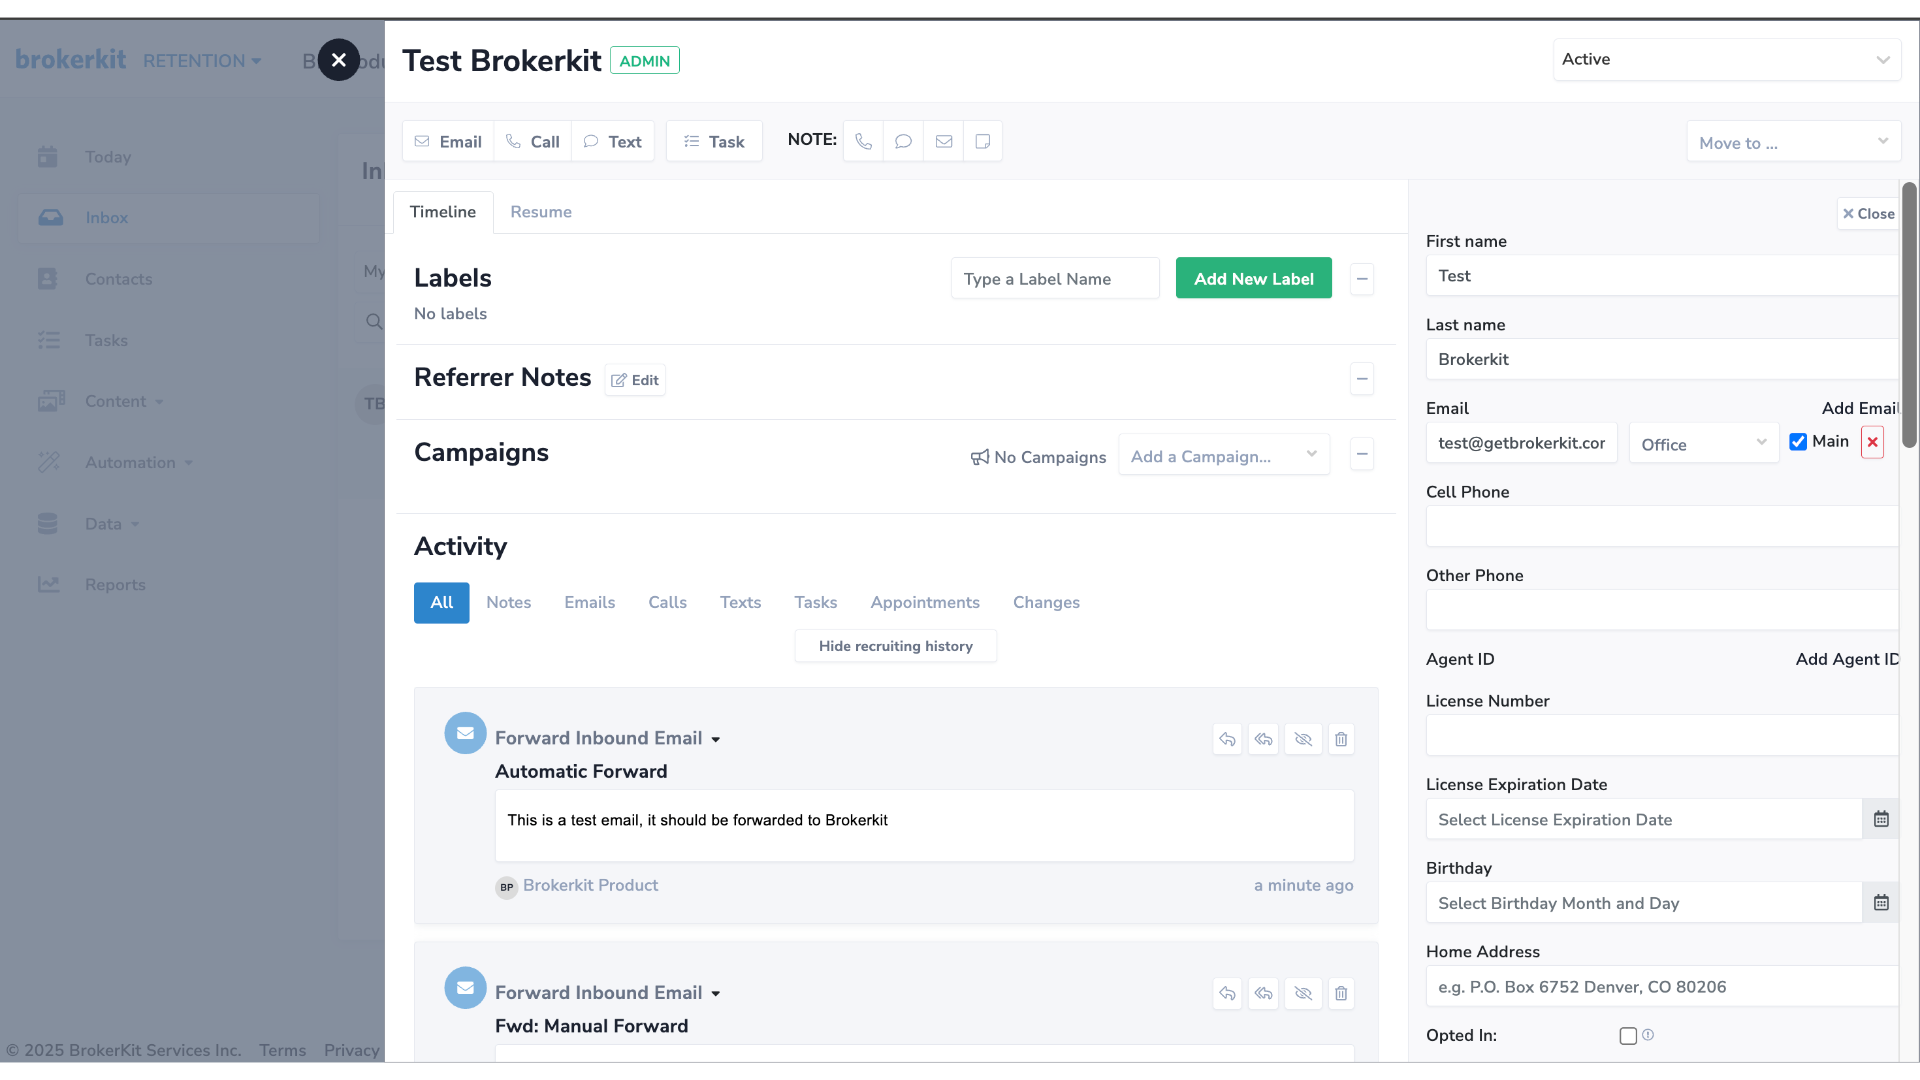
33. The email sent to your Gmail address has been successfully forwarded to Brokerkit — you can also find it in the contact's profile.
Since the email was sent from test@getbrokerkit.com, you will be able to also see the forwarded email logged in the contact's profile.
That concludes this tutorial. If you have any questions, please reach out to our support team at support@brokerkit.com.
2) How to Manually Add Brokerkit Forward address in Gmail?
This feature allows users to redirect incoming emails to the brokerkit forwarding address, allowing selected incoming messages and Brokerkit email replies to be recorded.
1. Introduction
To start, please access the Brokerkit platform
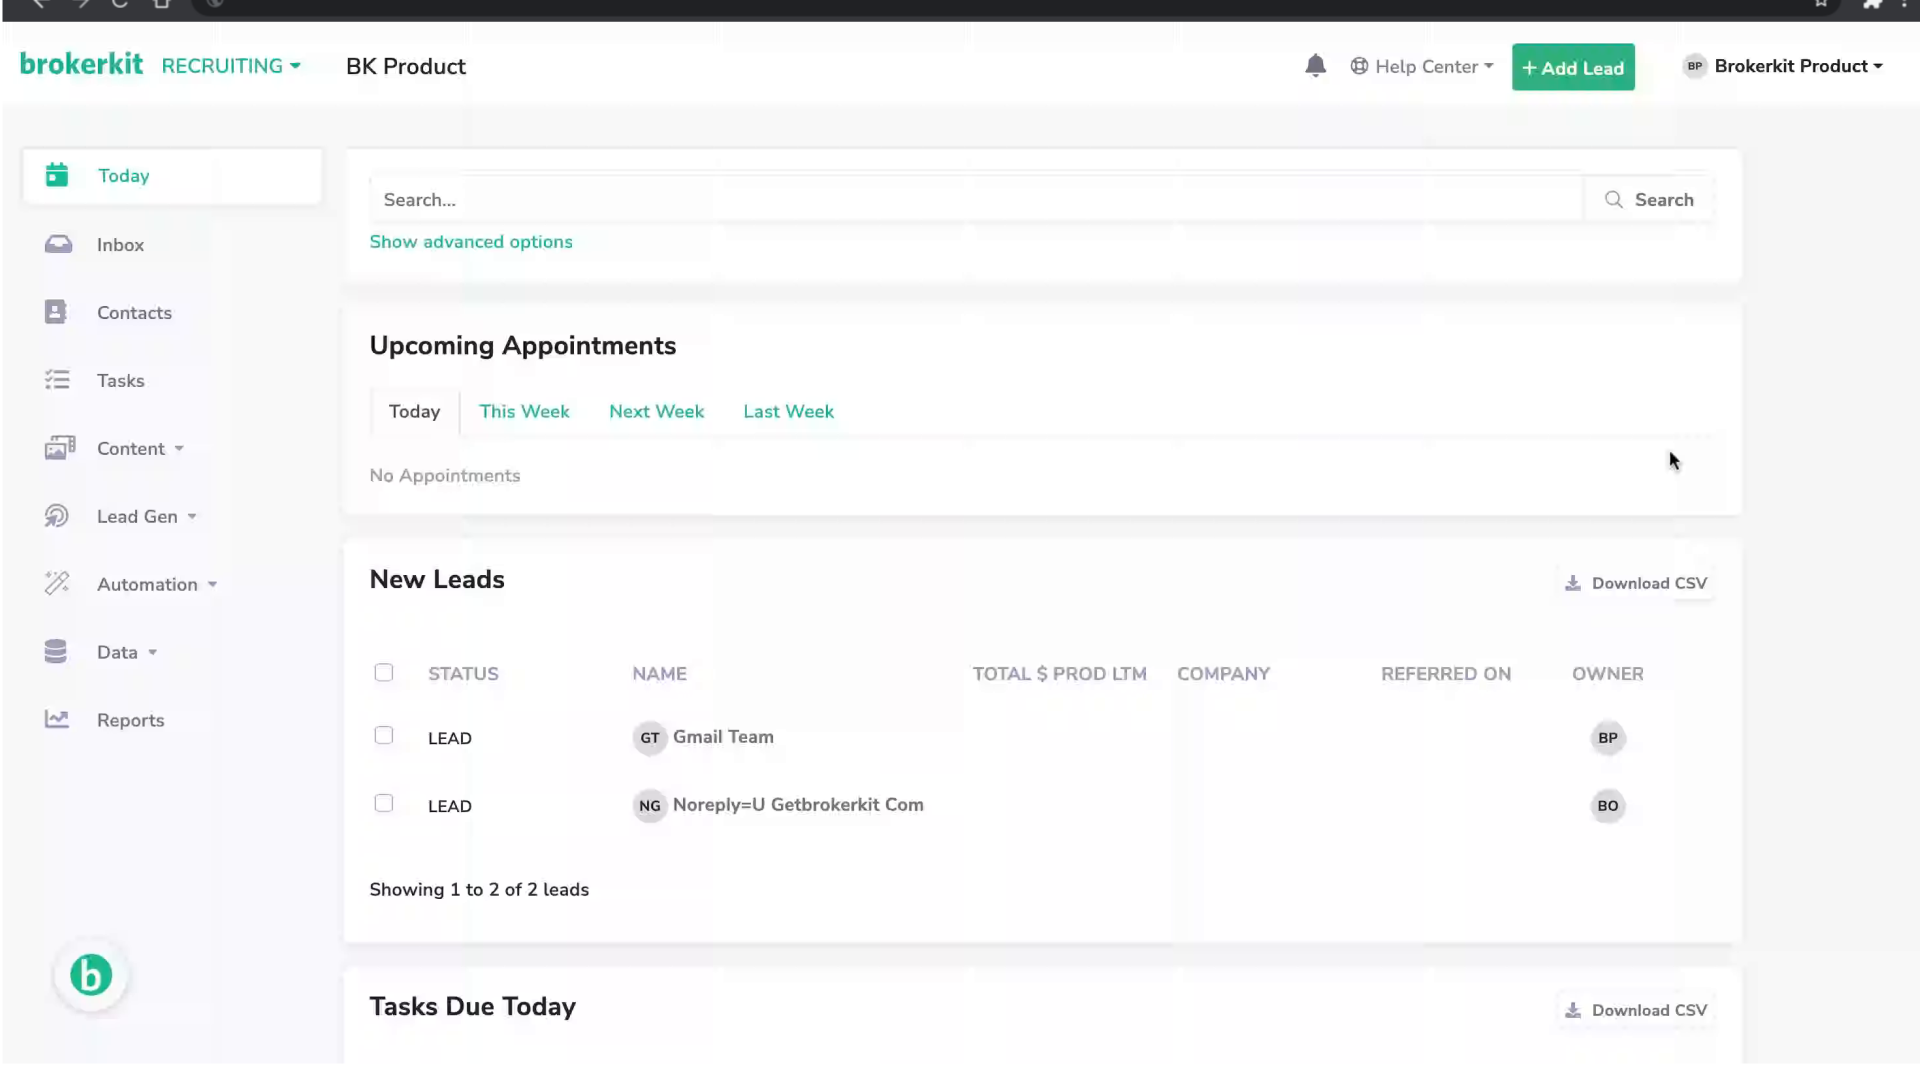
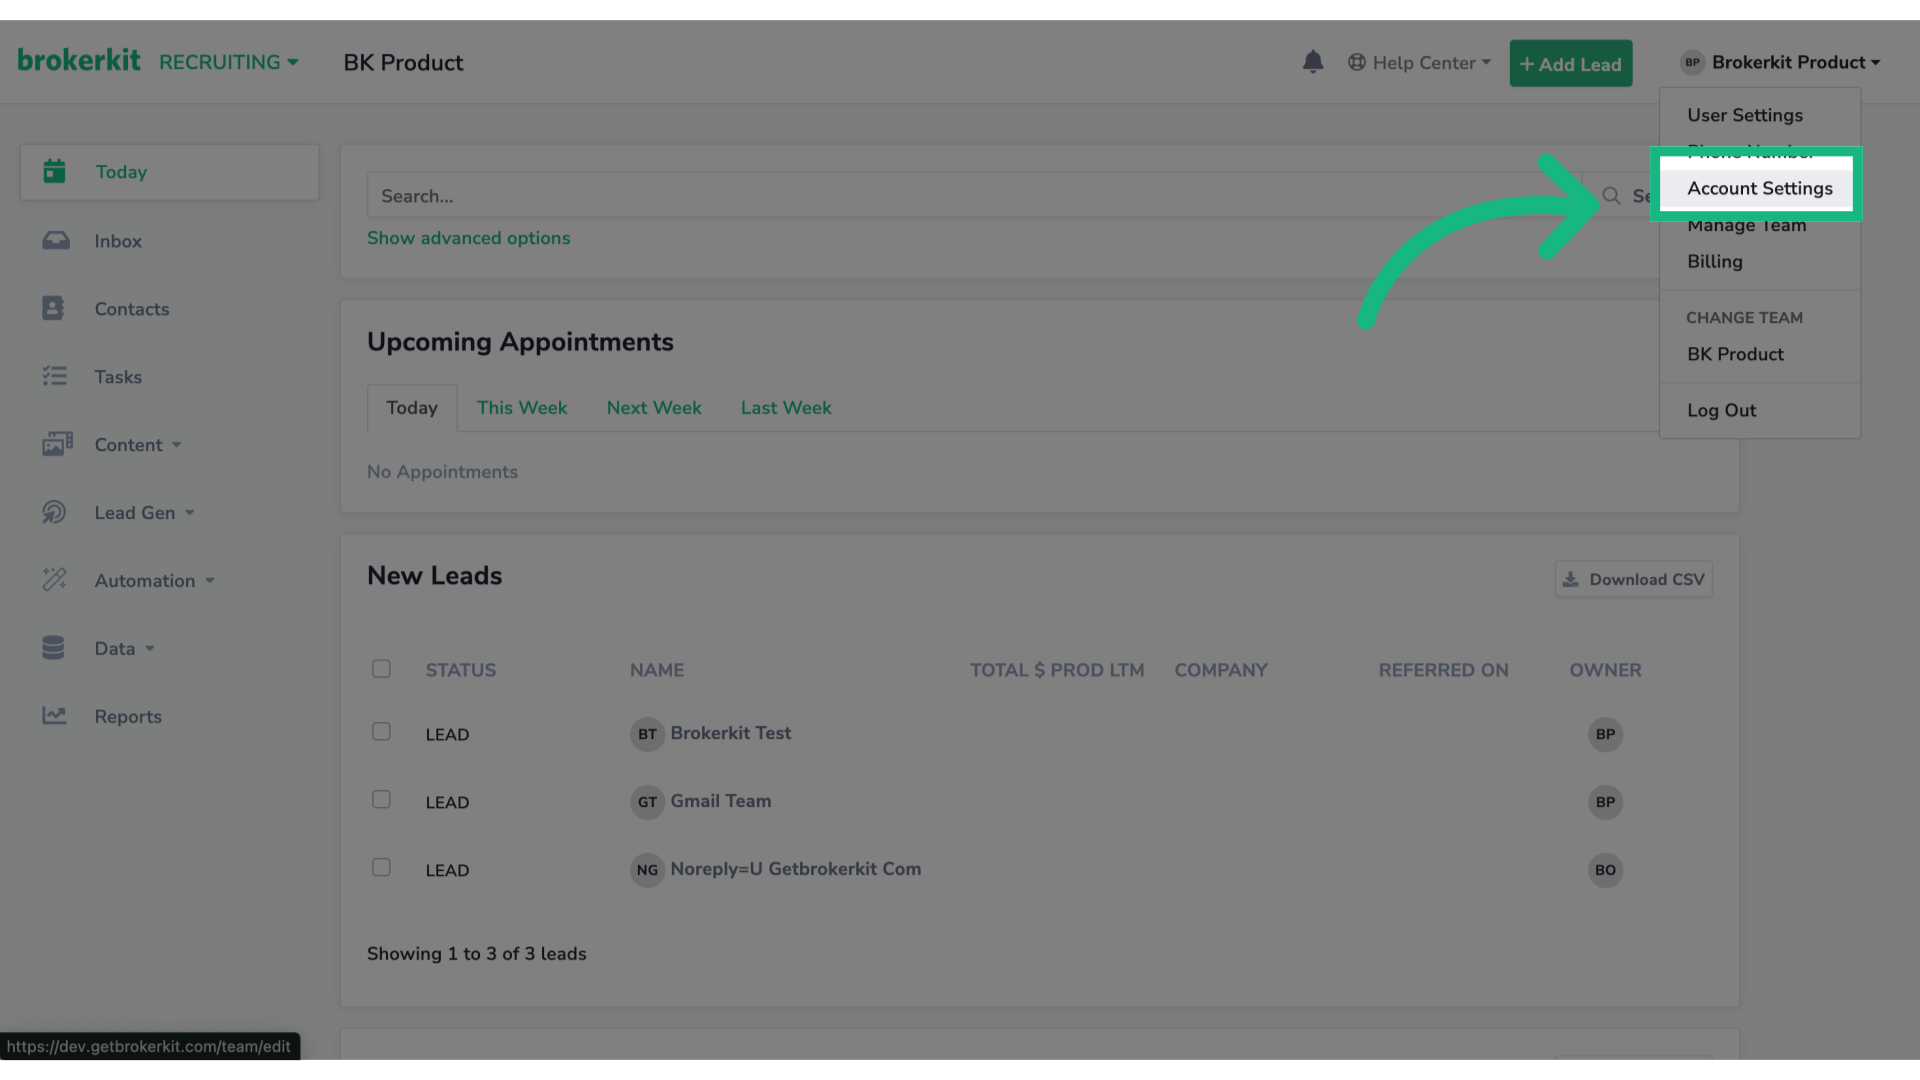
2. Click "Account Settings"
Go to the option Account Settings.
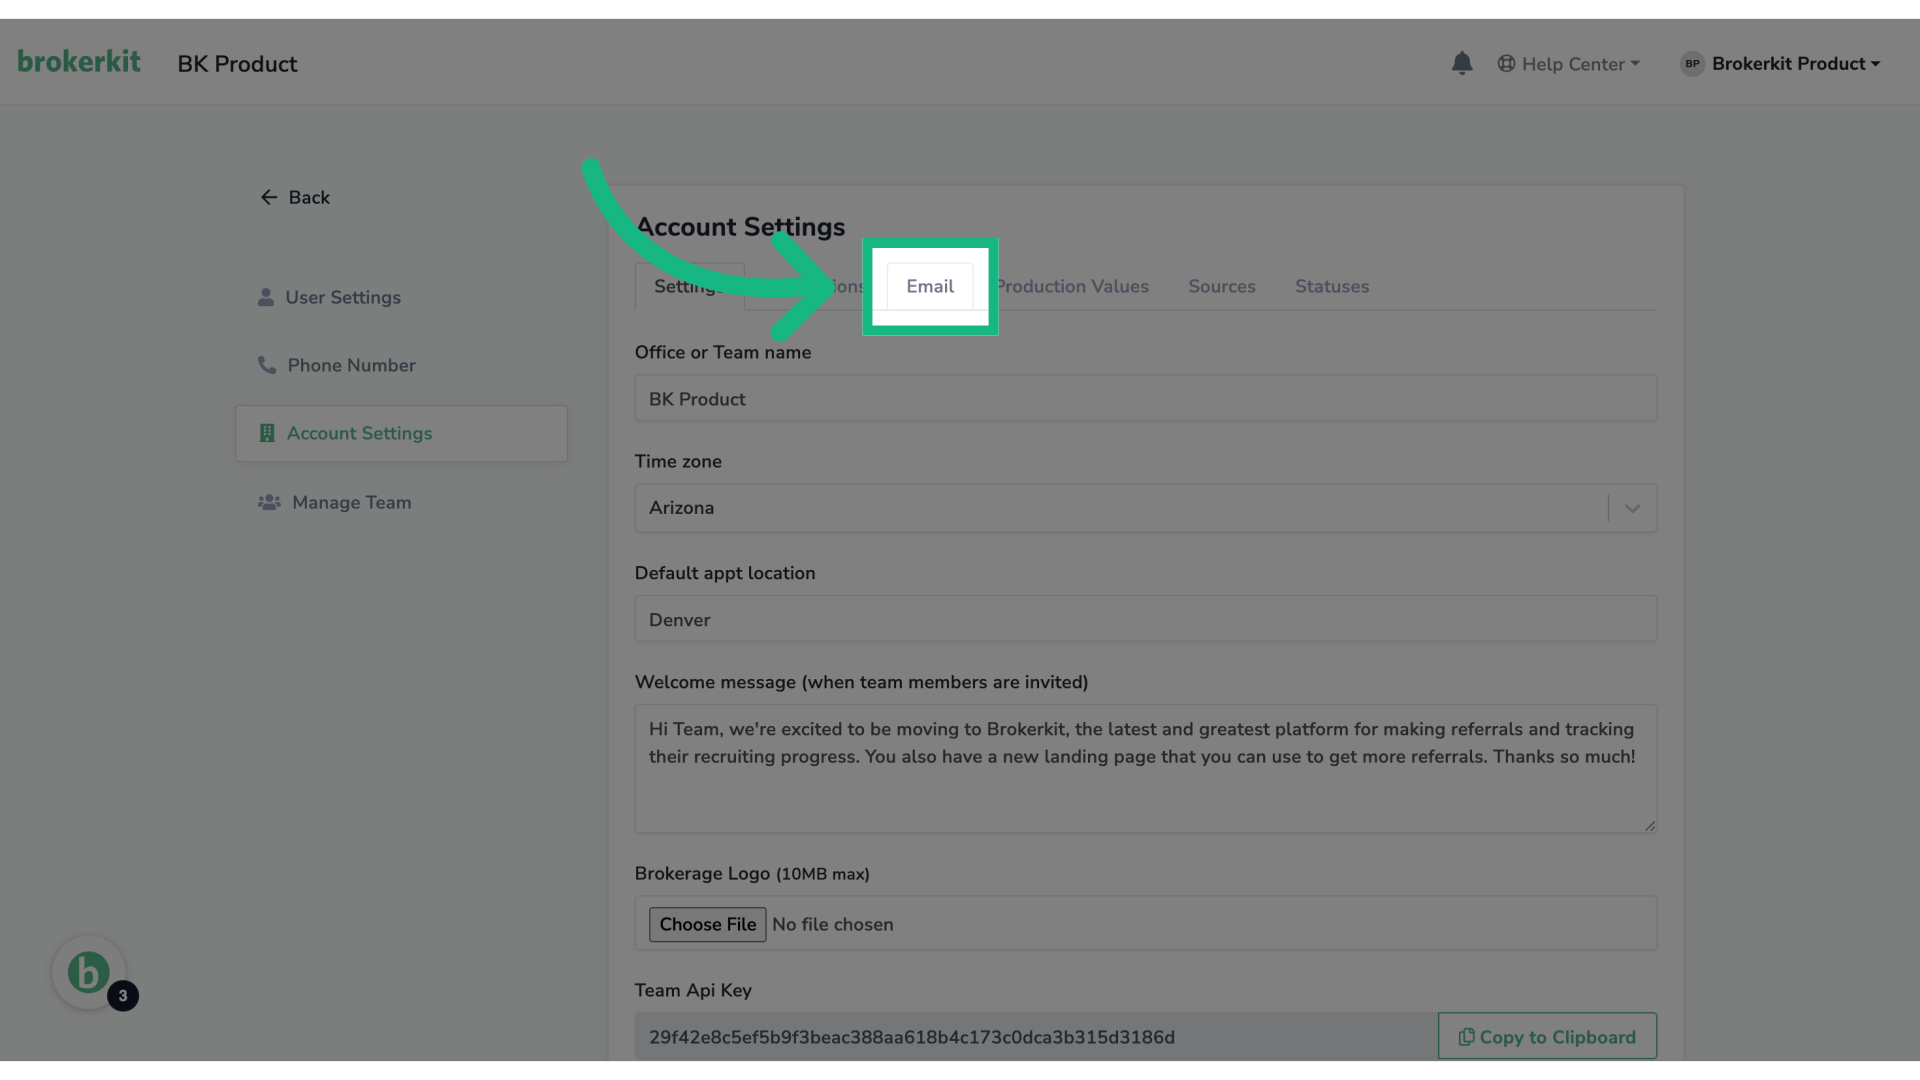
3. Click "Email"
Then, go to the tab Email to see the email settings.
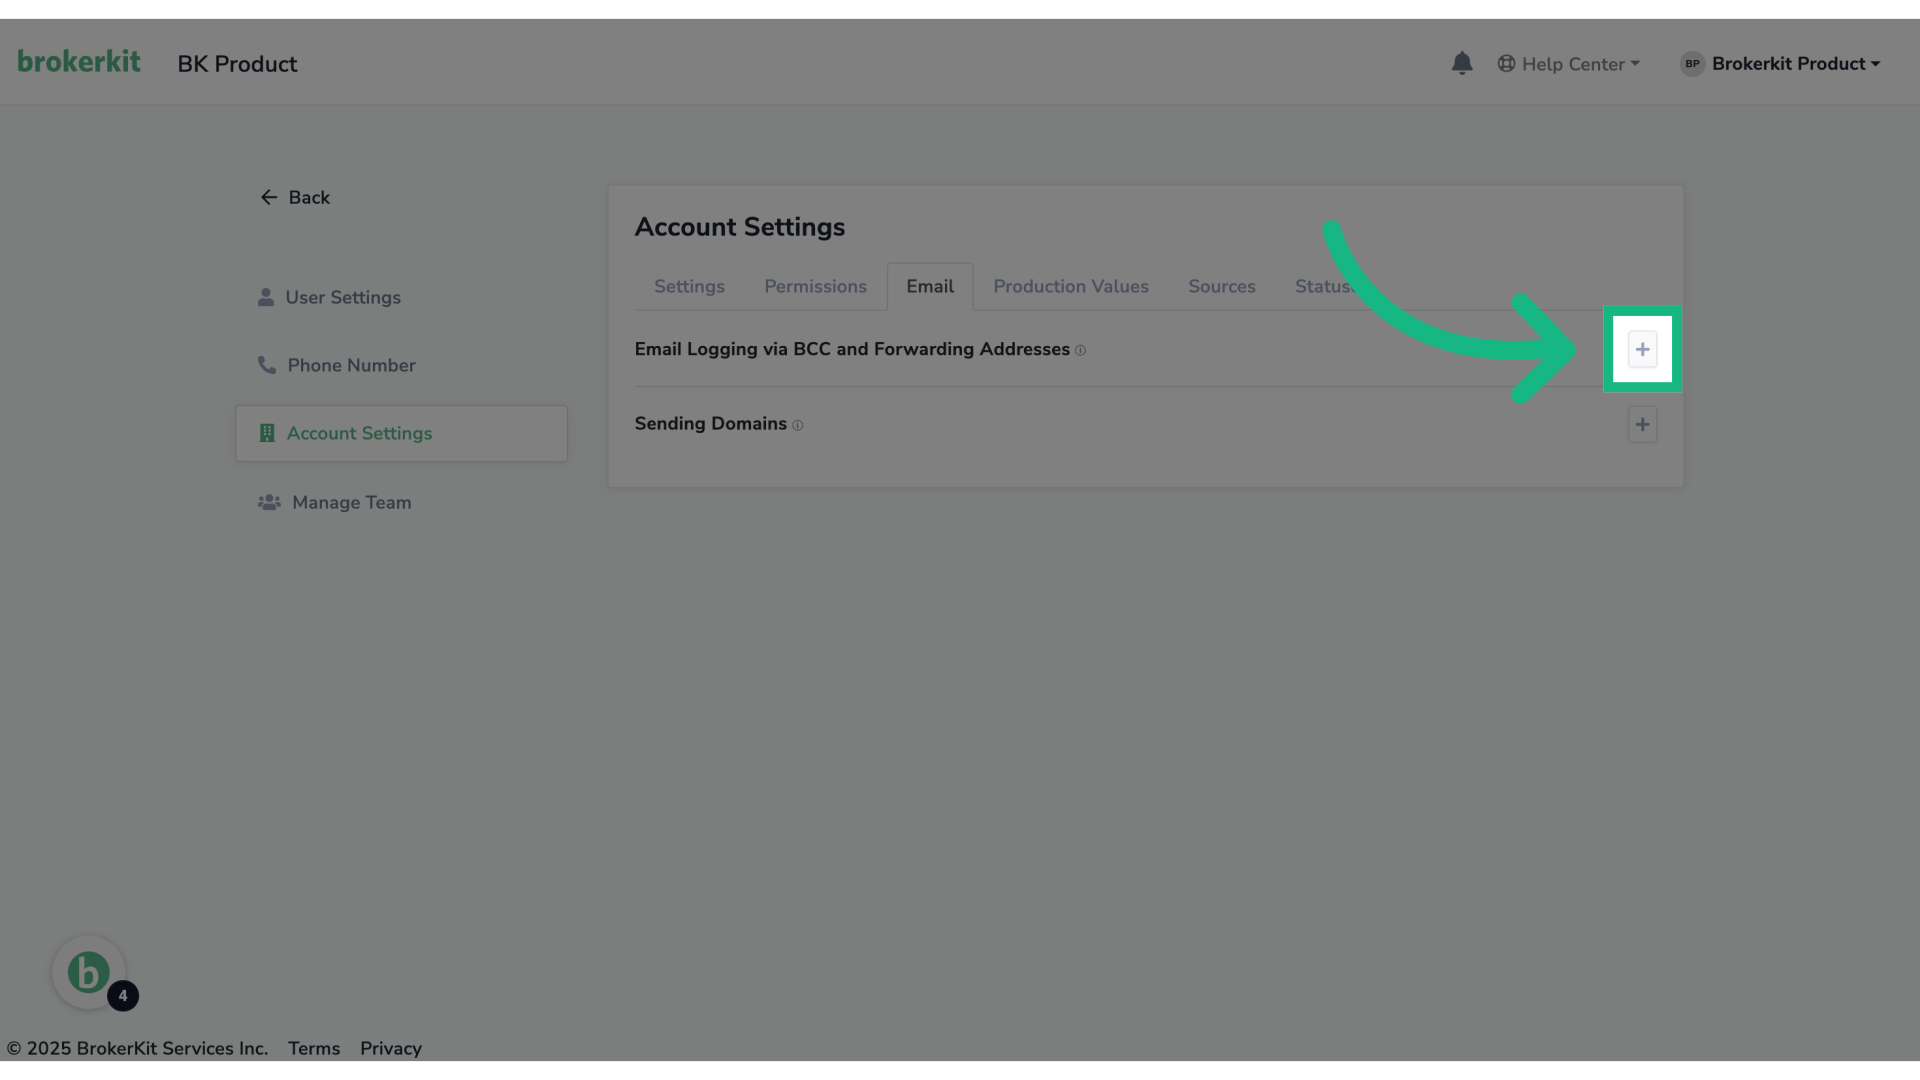
4. Click + to expand
Click the plus sign to expand the email settings section.
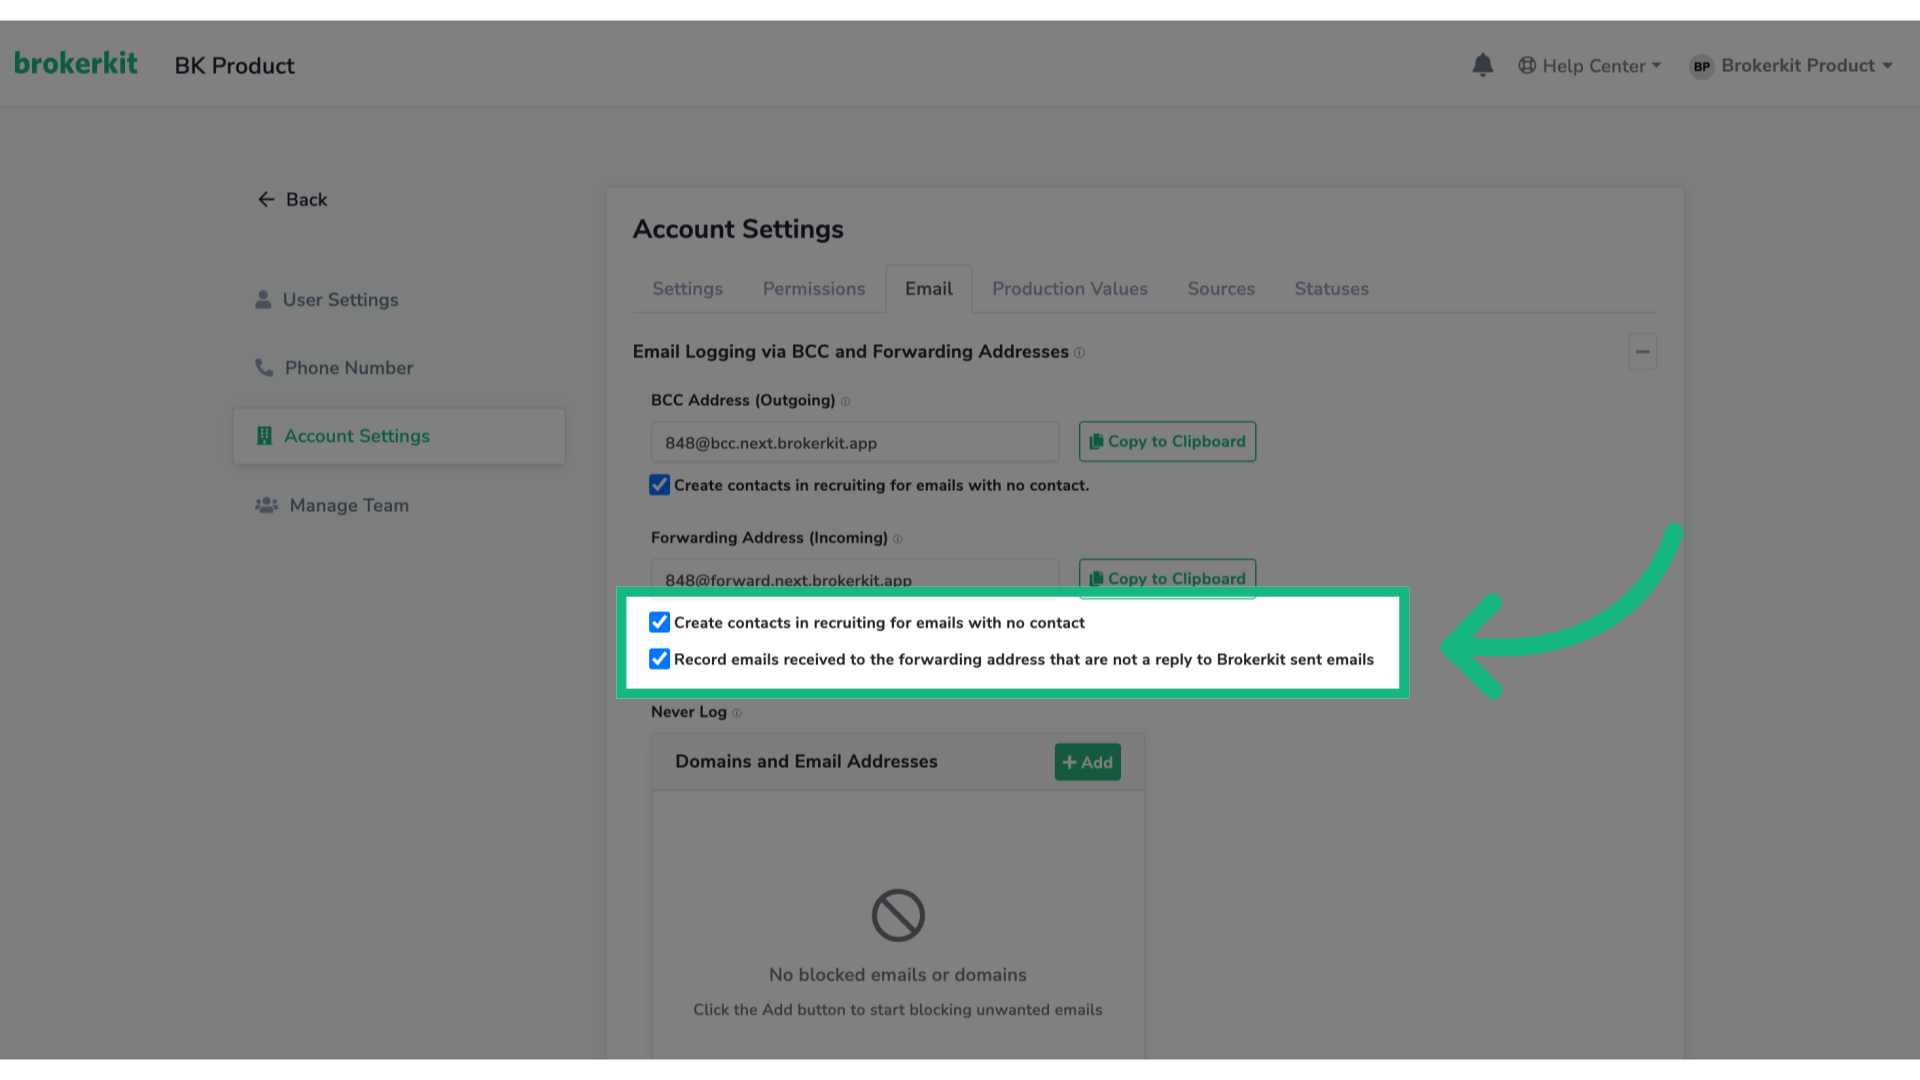
5. Choose what Brokerkit should record
The two forwarding controls are independent:
- Create contacts in recruiting for emails with no contact creates a recruiting contact for an unmatched address.
- Record emails received to the forwarding address that are not a reply to Brokerkit sent emails also records non-reply inbound messages.
Leave the second setting off if you only want replies to Brokerkit-sent emails. Turn it on for broader inbound forwarding; matching non-replies may then appear on contact records. Use Never Log to exclude specific addresses or domains.
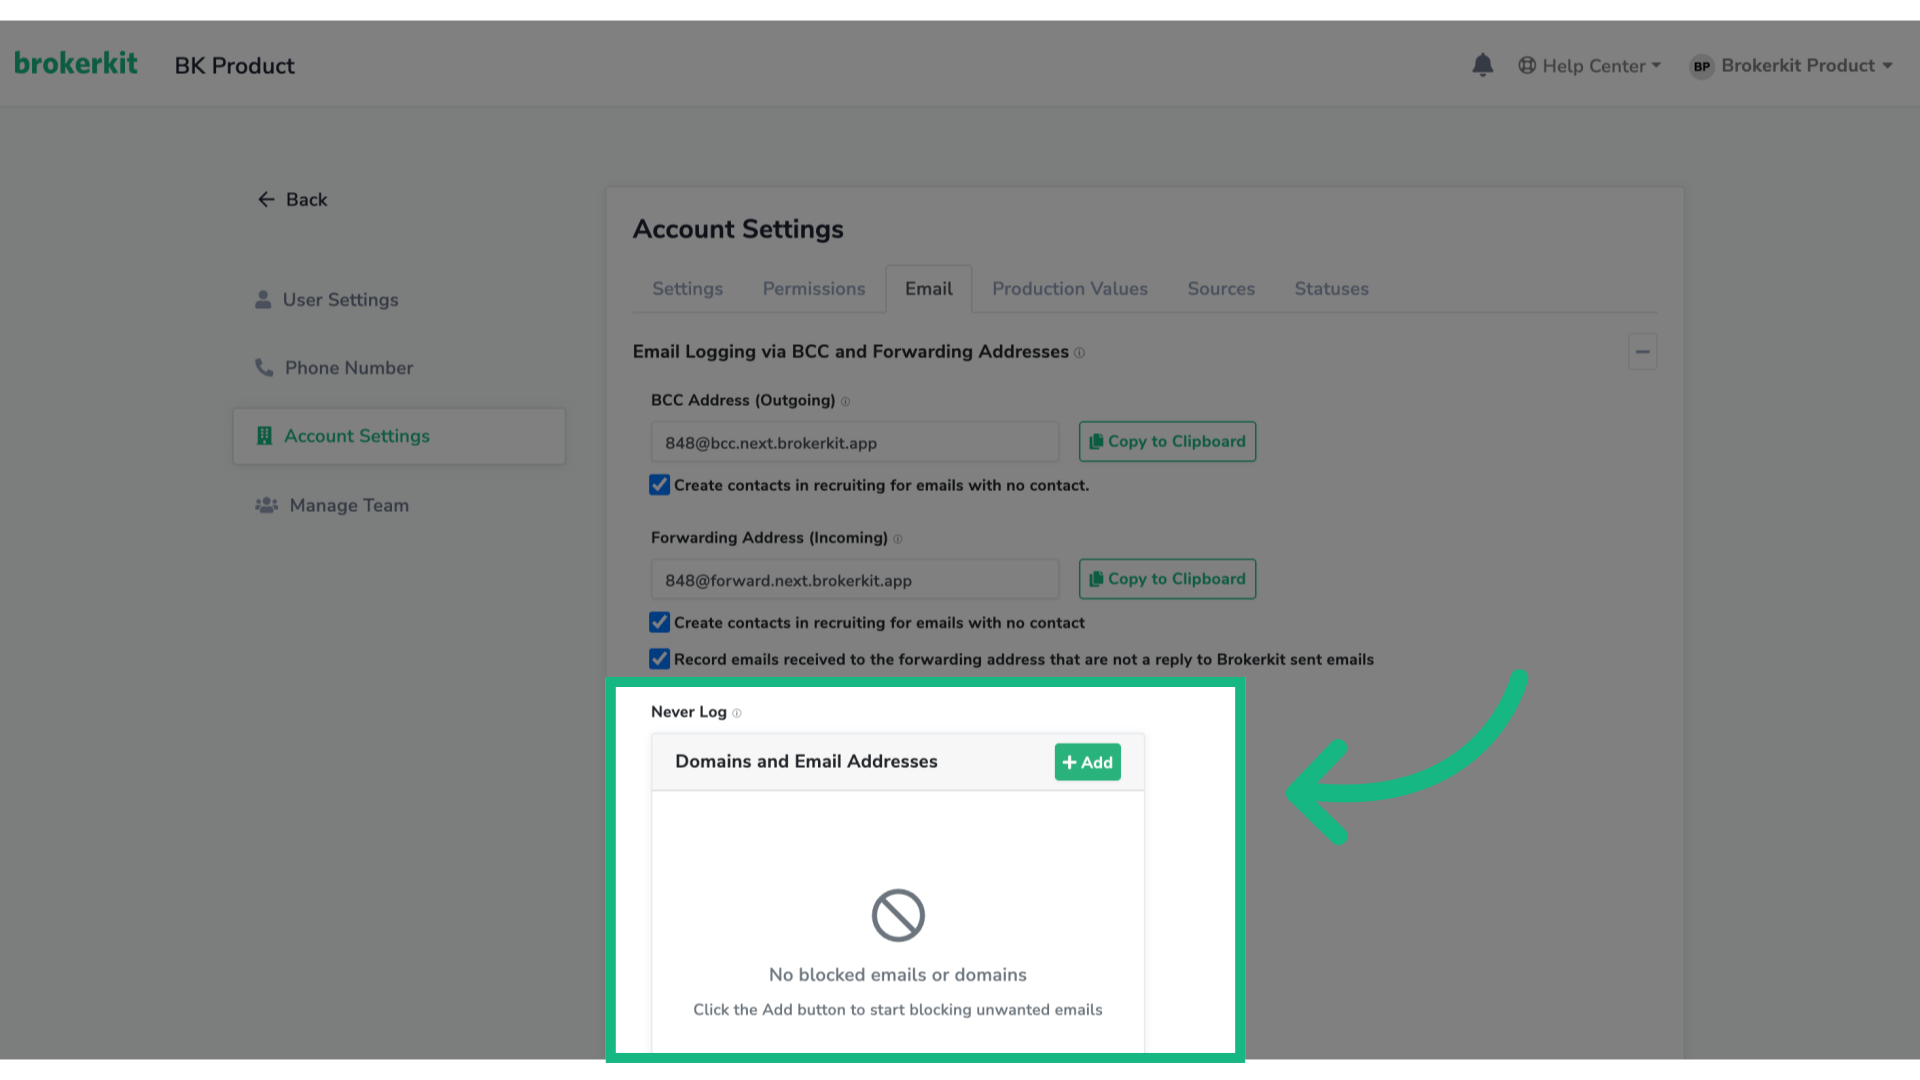
6. Add email addresses or domains to avoid forwarding emails to Brokerkit
If you want to avoid forwarding emails from specific email address or domains, you can add them to the Never Log section.
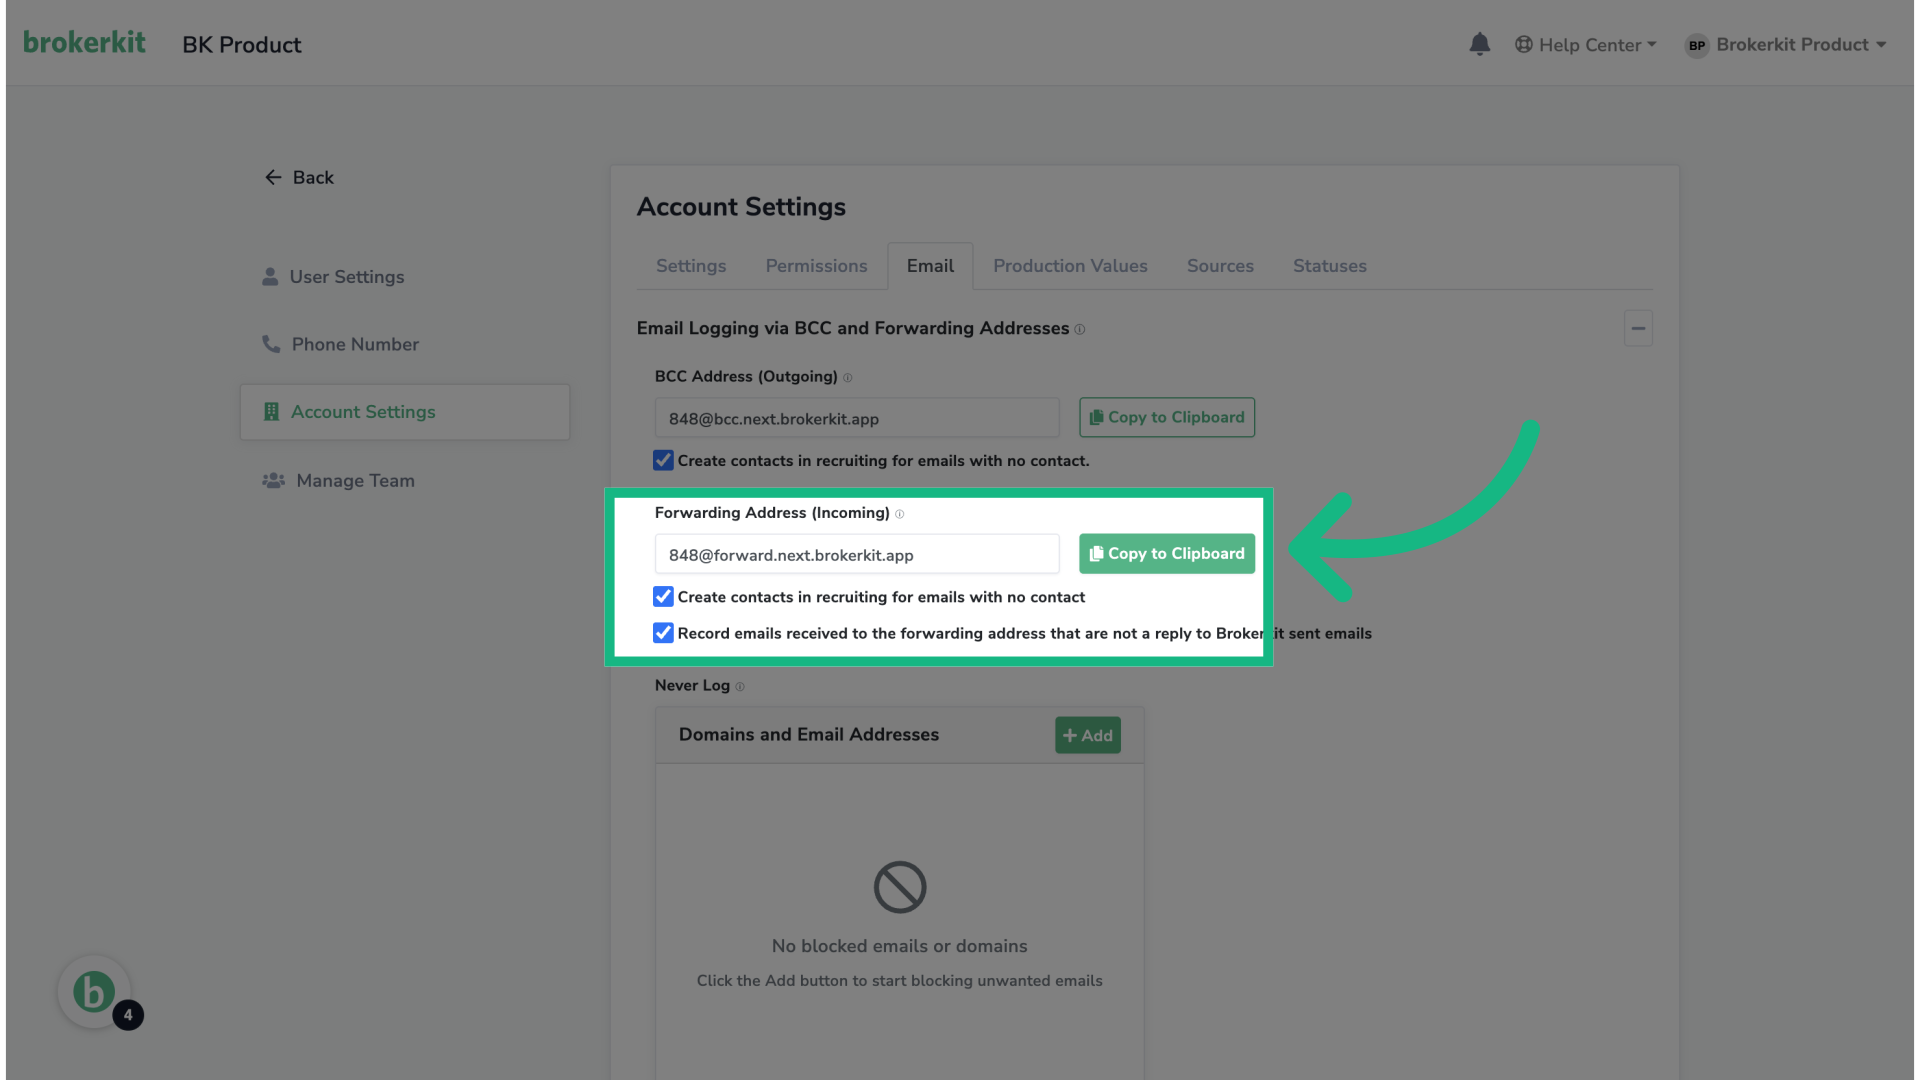
7. Click "Copy to Clipboard"
Navigate to the Forwarding Address section and copy Brokerkit's forwarding address by clicking the button Copy to Clipboard.
8. Example: Manually Adding Brokerkit's Forward Address in Gmail
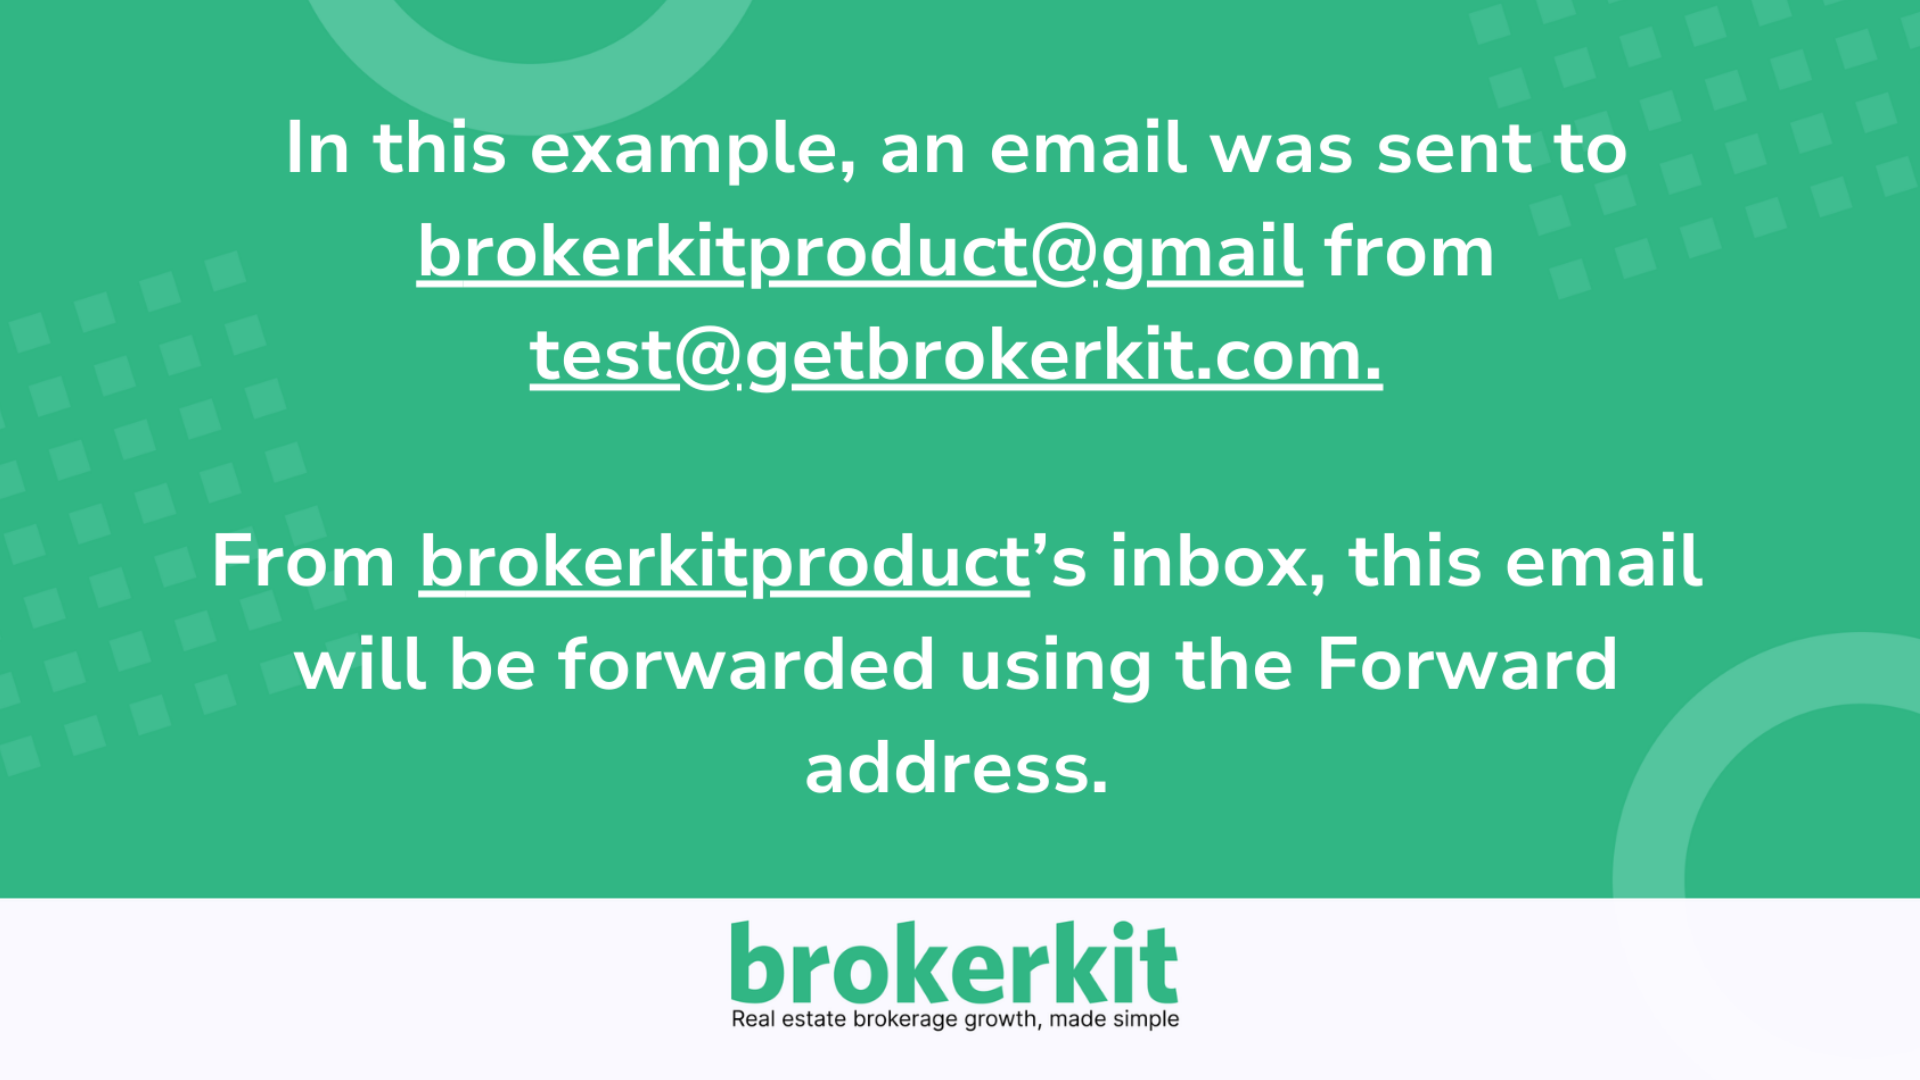
An email was sent from test@getbrokerkit.com to our Gmail account brokerkitproduct@gmail.com. We will forward this email to Brokerkit's inbox using Brokerkit's Forward address.
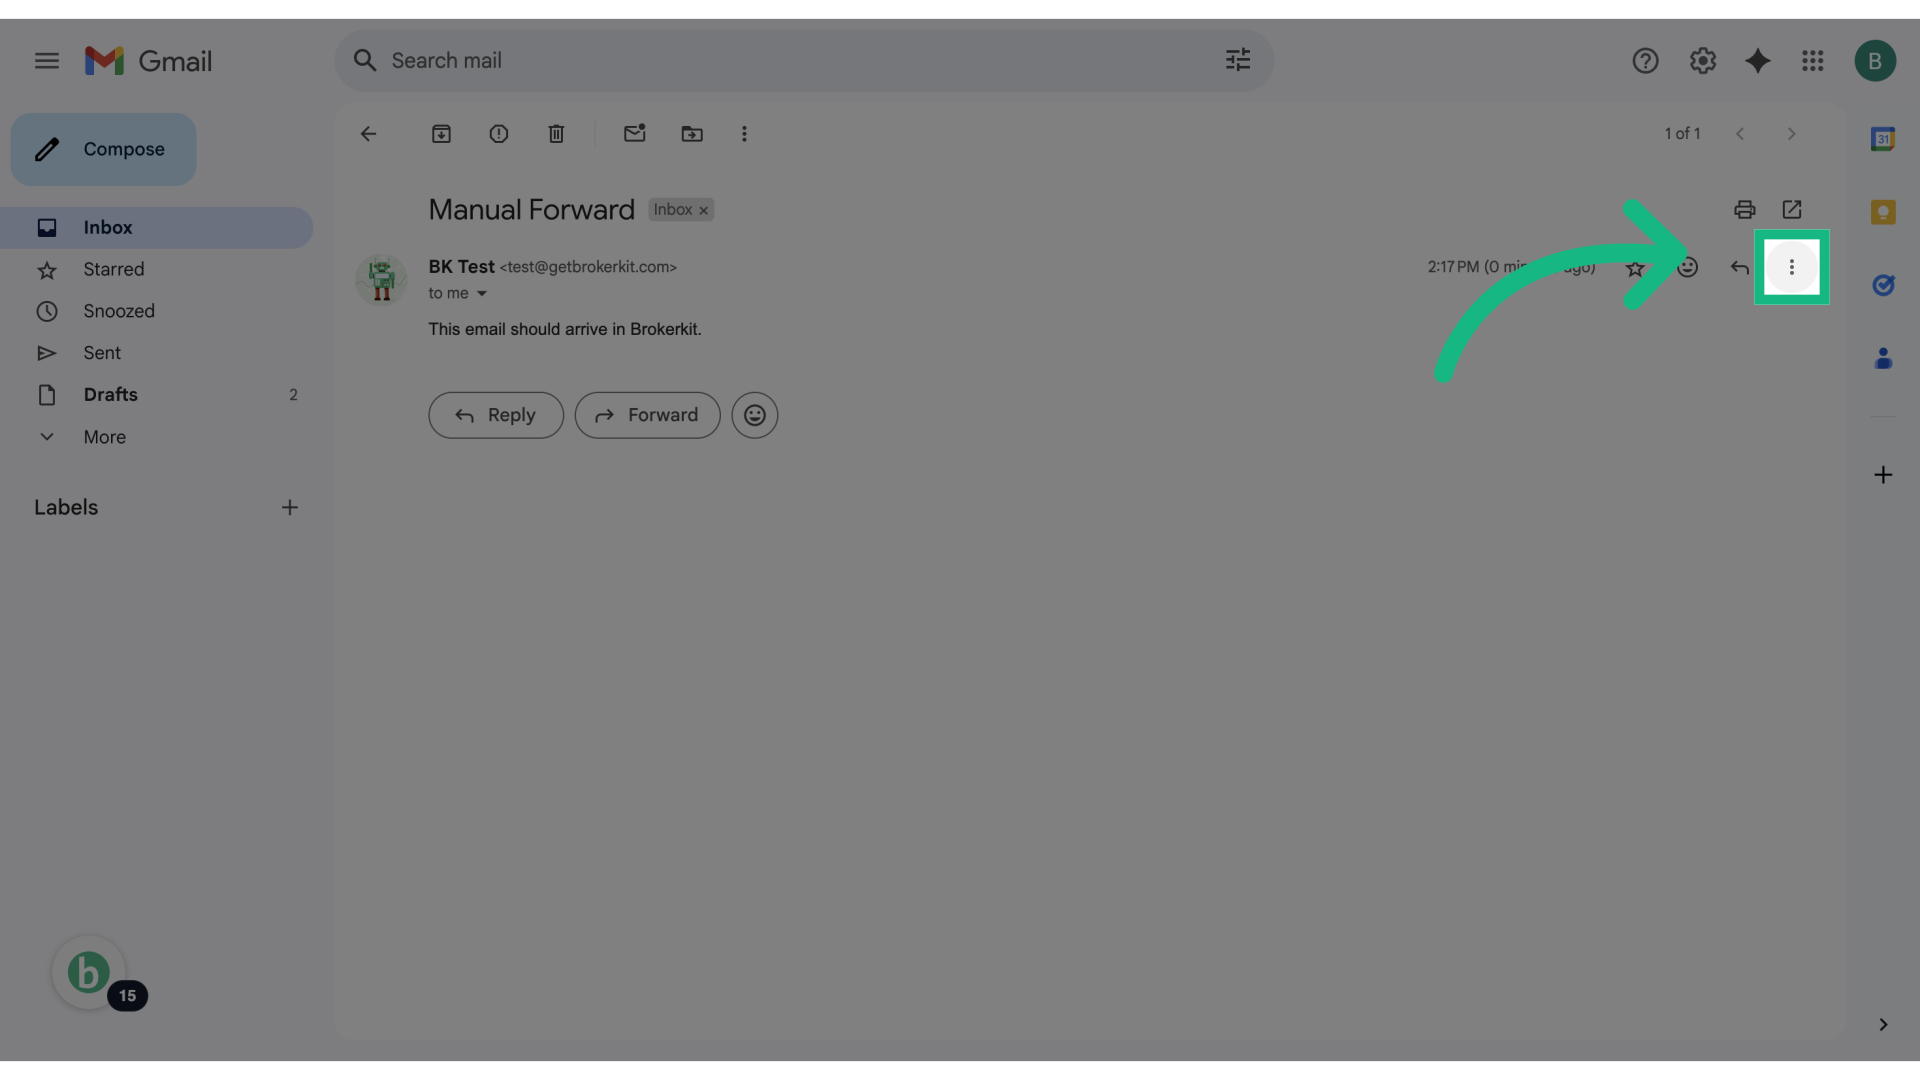
9. Click the 3 dots
Navigate to the right part of the screen and click the 3 dots.
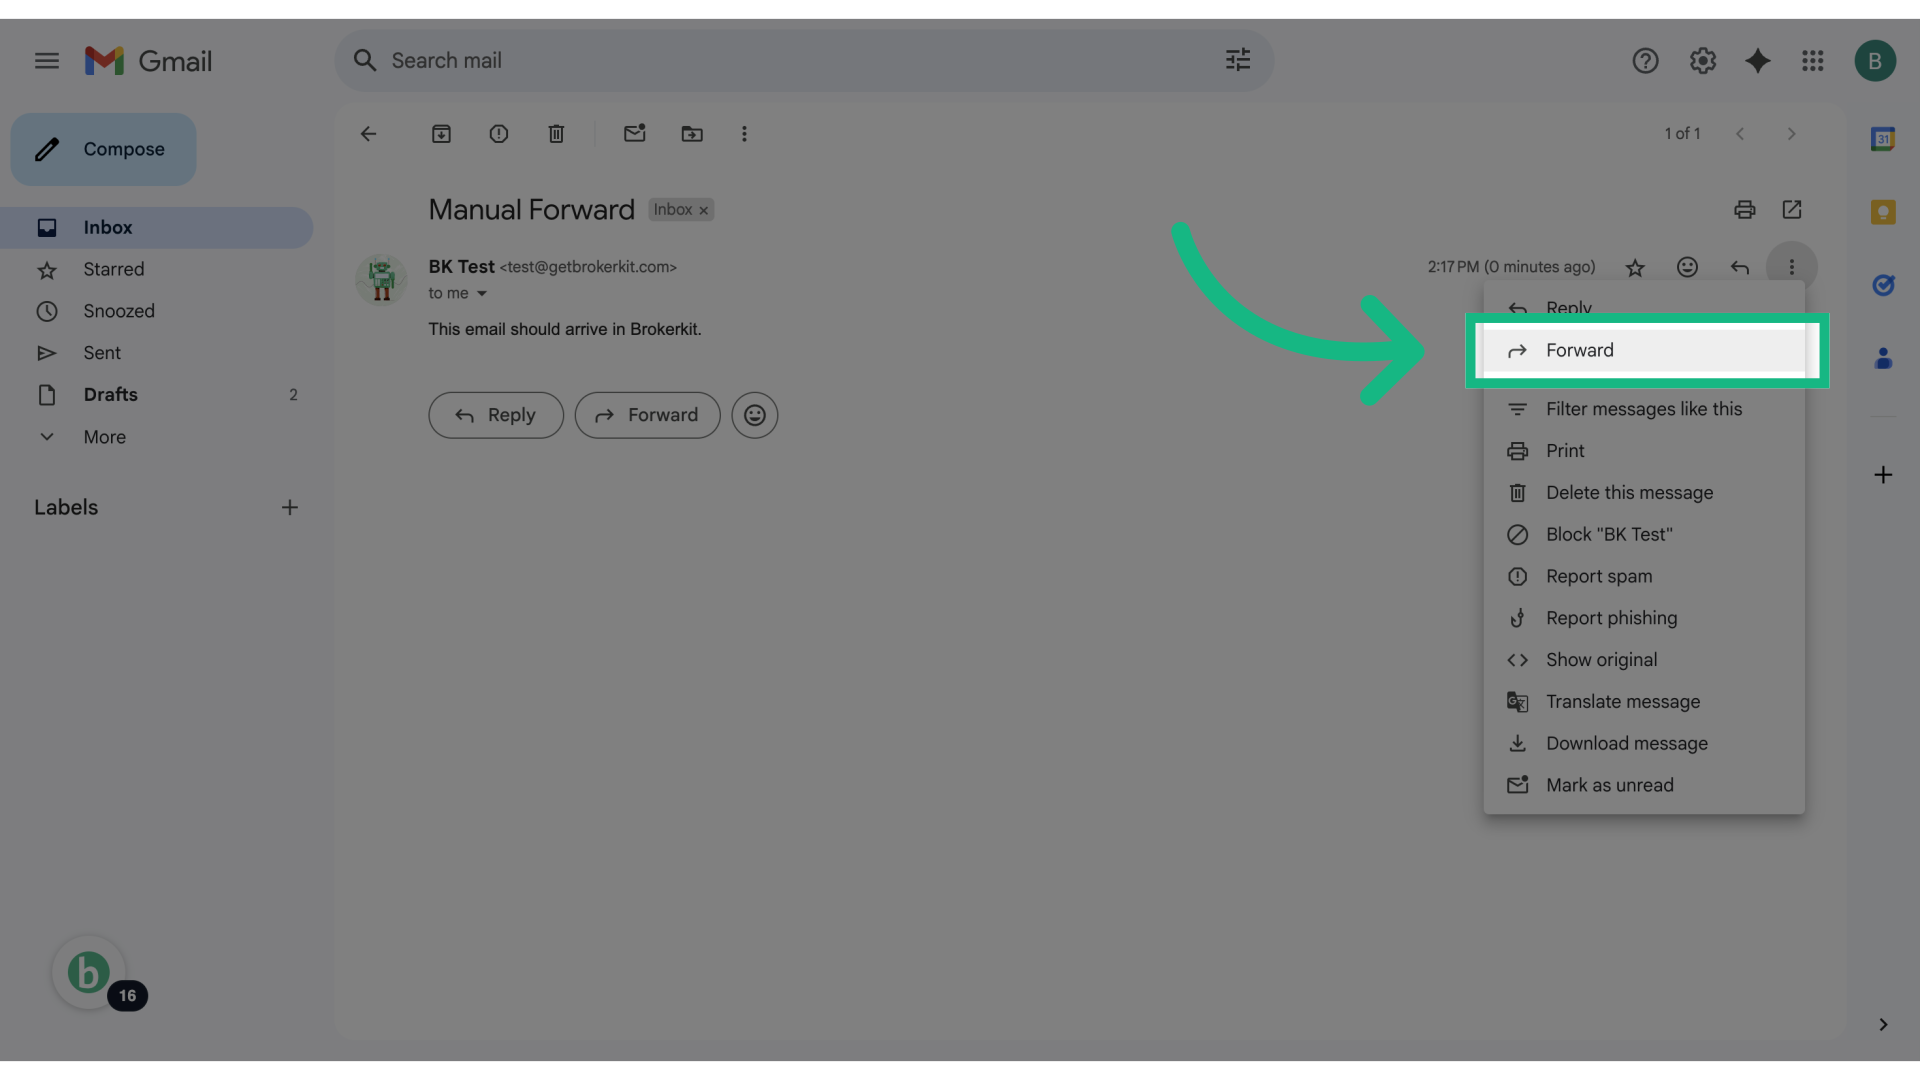
10. Click "Forward"
Select the option Forward.
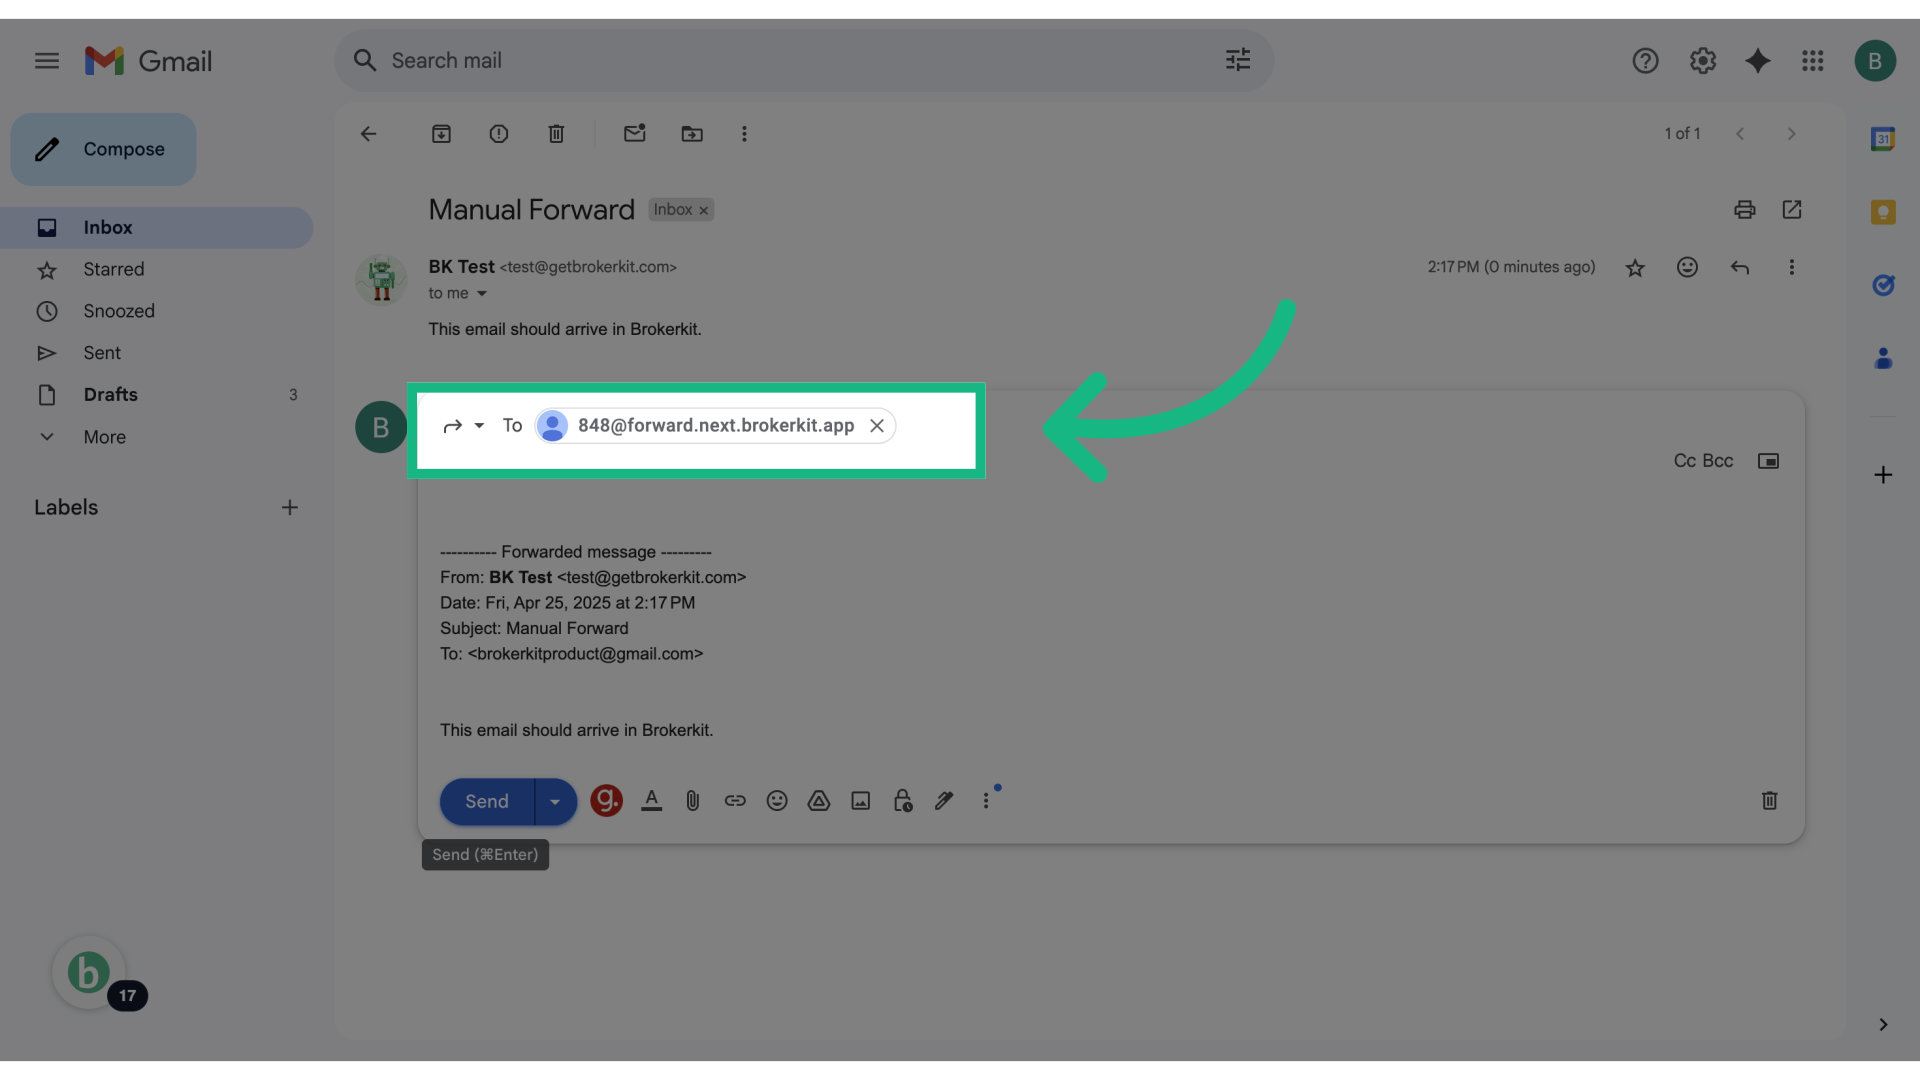
11. Paste Brokerkit's Forward address
Paste Brokerkit's Forward address, ensure there are no typos.
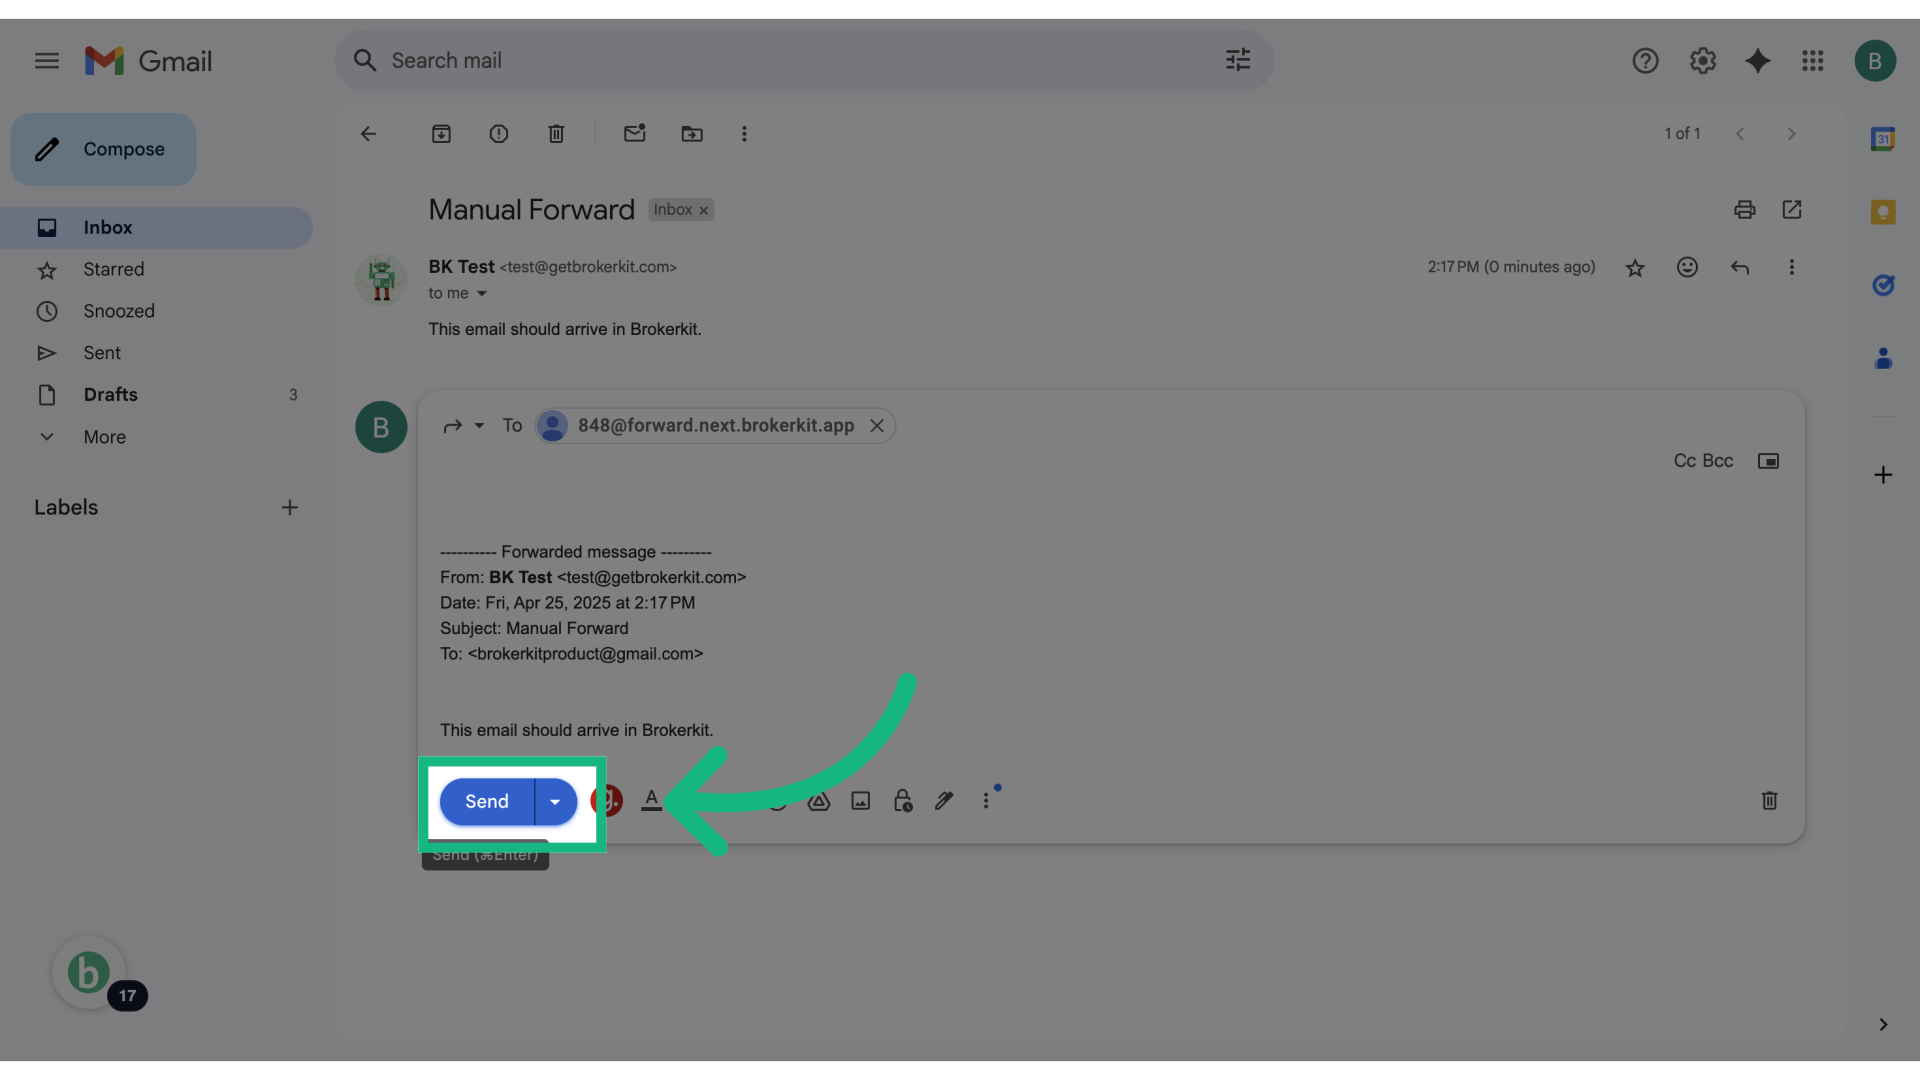
12. Click "Send"
Then click Send.
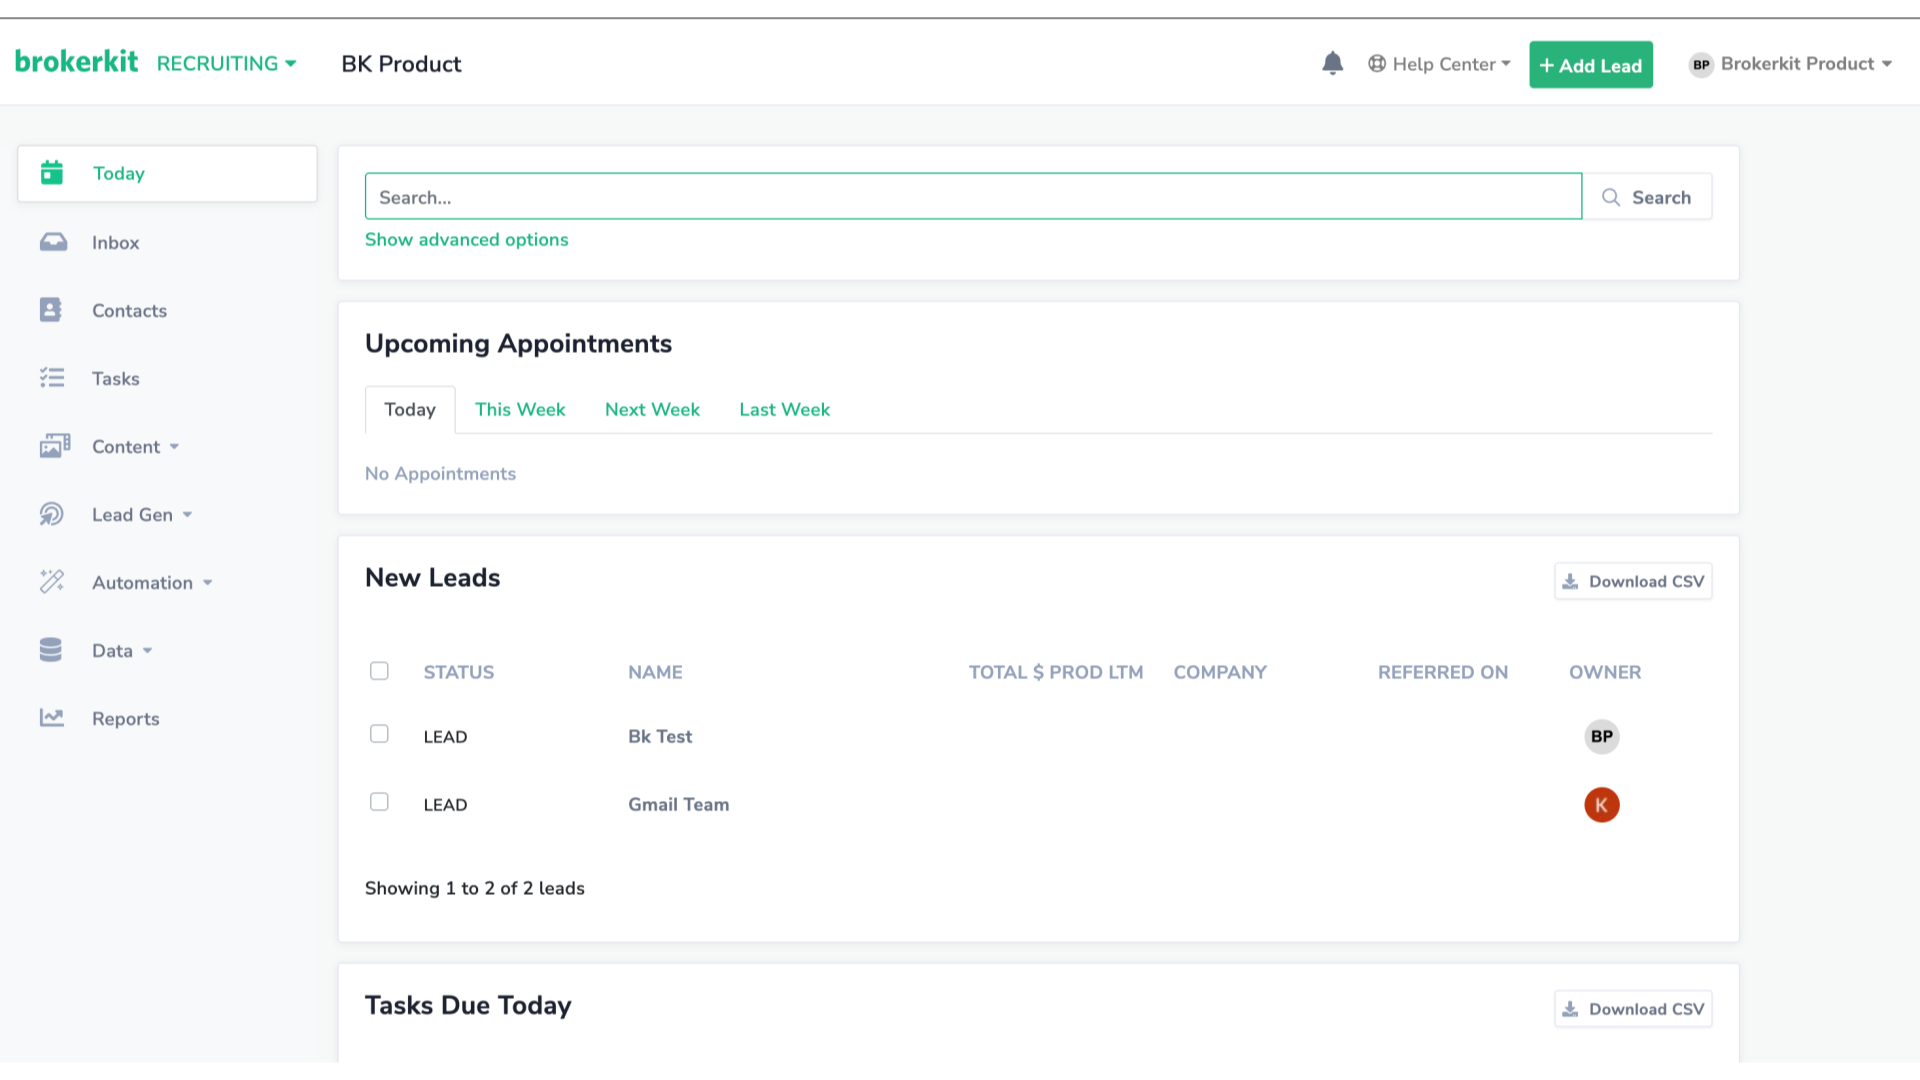
13. Go to your Brokerkit
Open your Brokerkit platform.
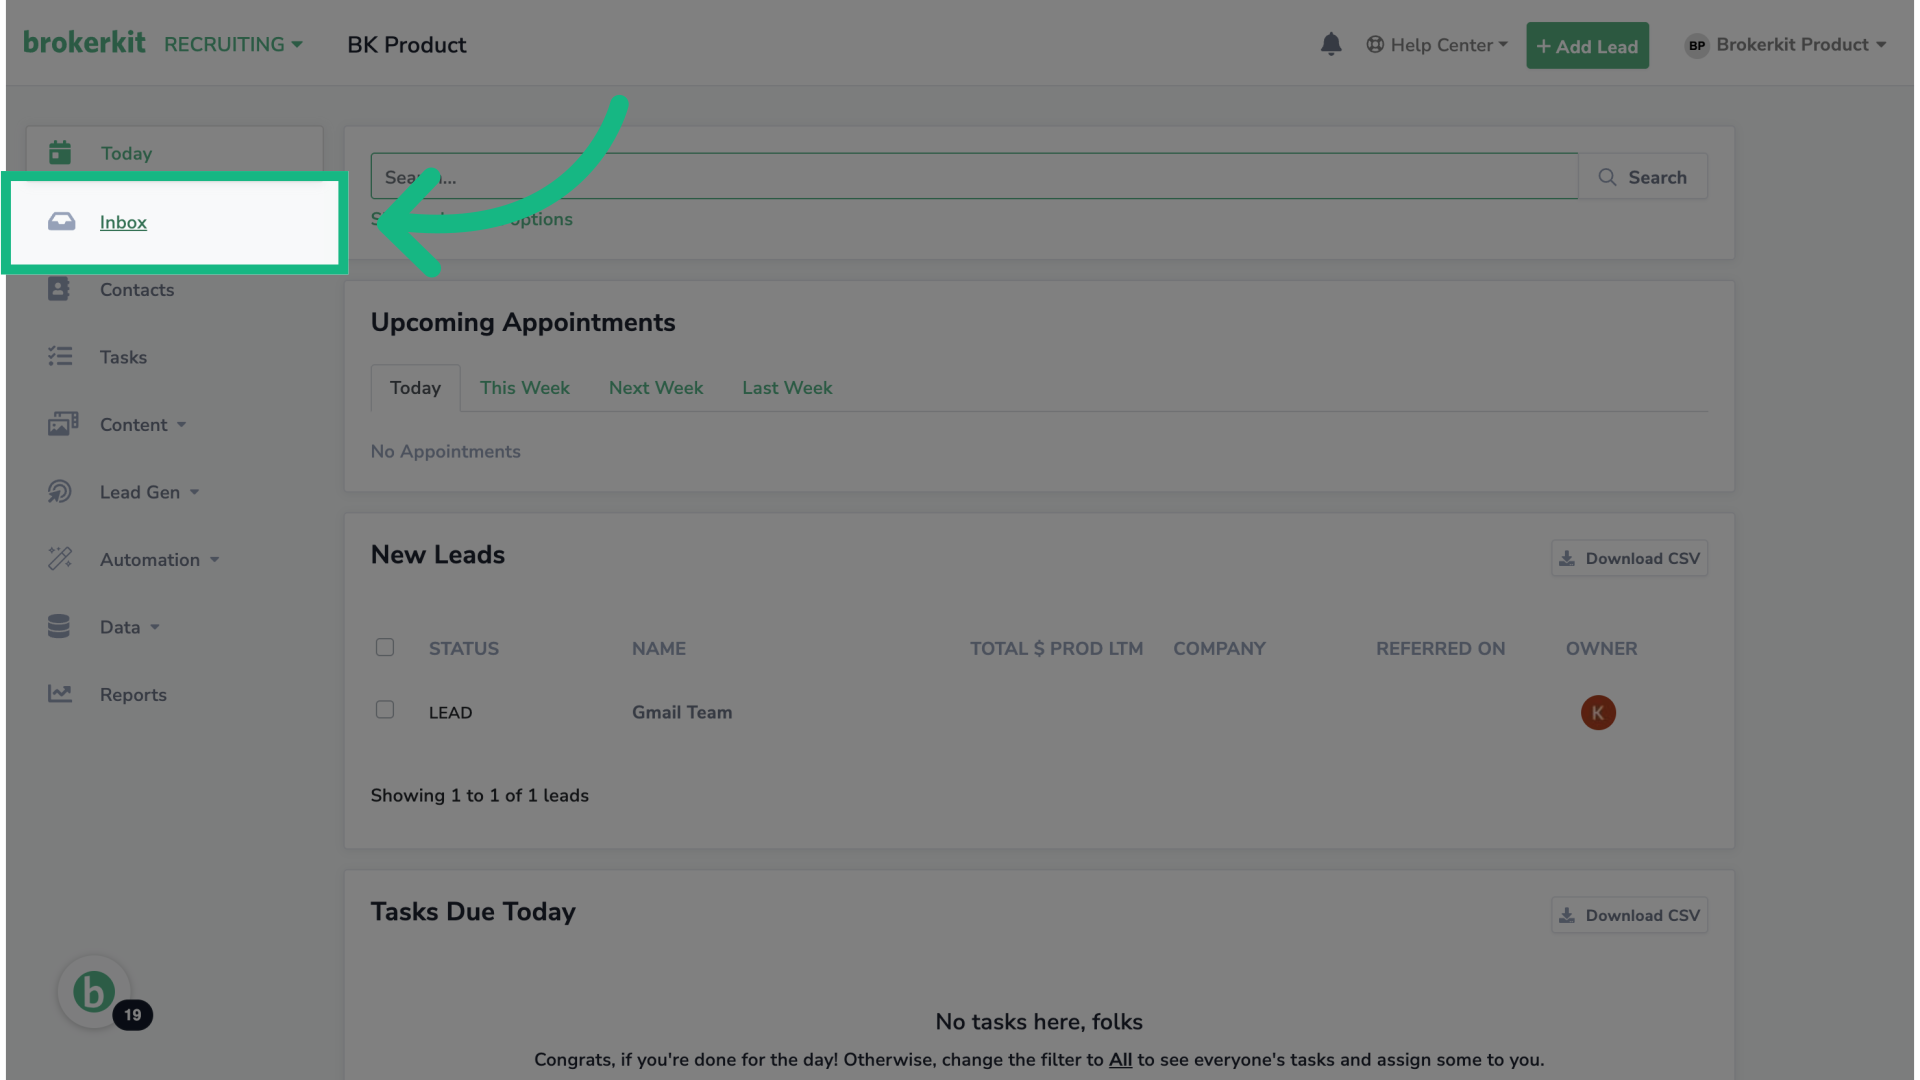
14. Click "Inbox"
Select Inbox from the left menu.
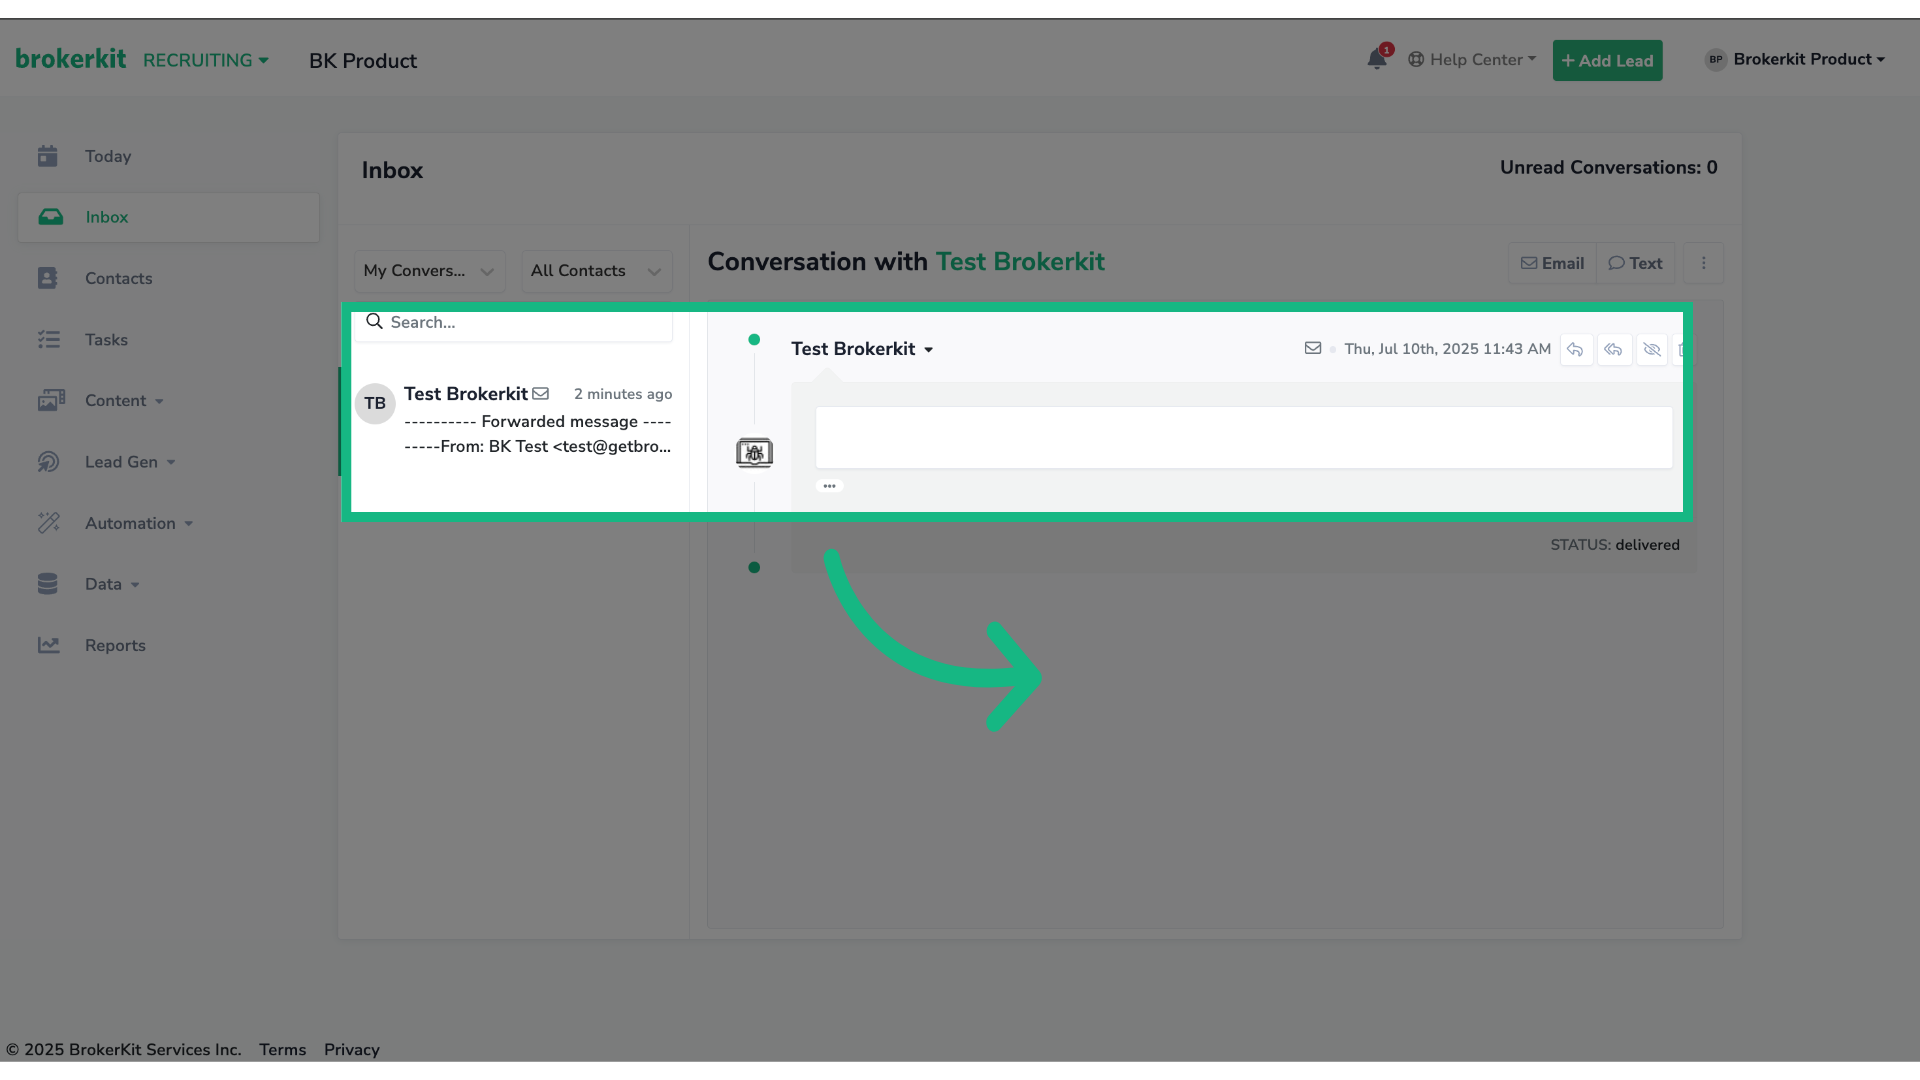
15. Click on the 3 dots to see the detail.
Since you have manually forwarded the email using Brokerkits Forward address, the email has arrived in Brokerkits inbox. Click on the 3 dots to see the detail.
16. Click the small downward arrow to view the email header preview
To view the email header preview, click on that small downward arrow.
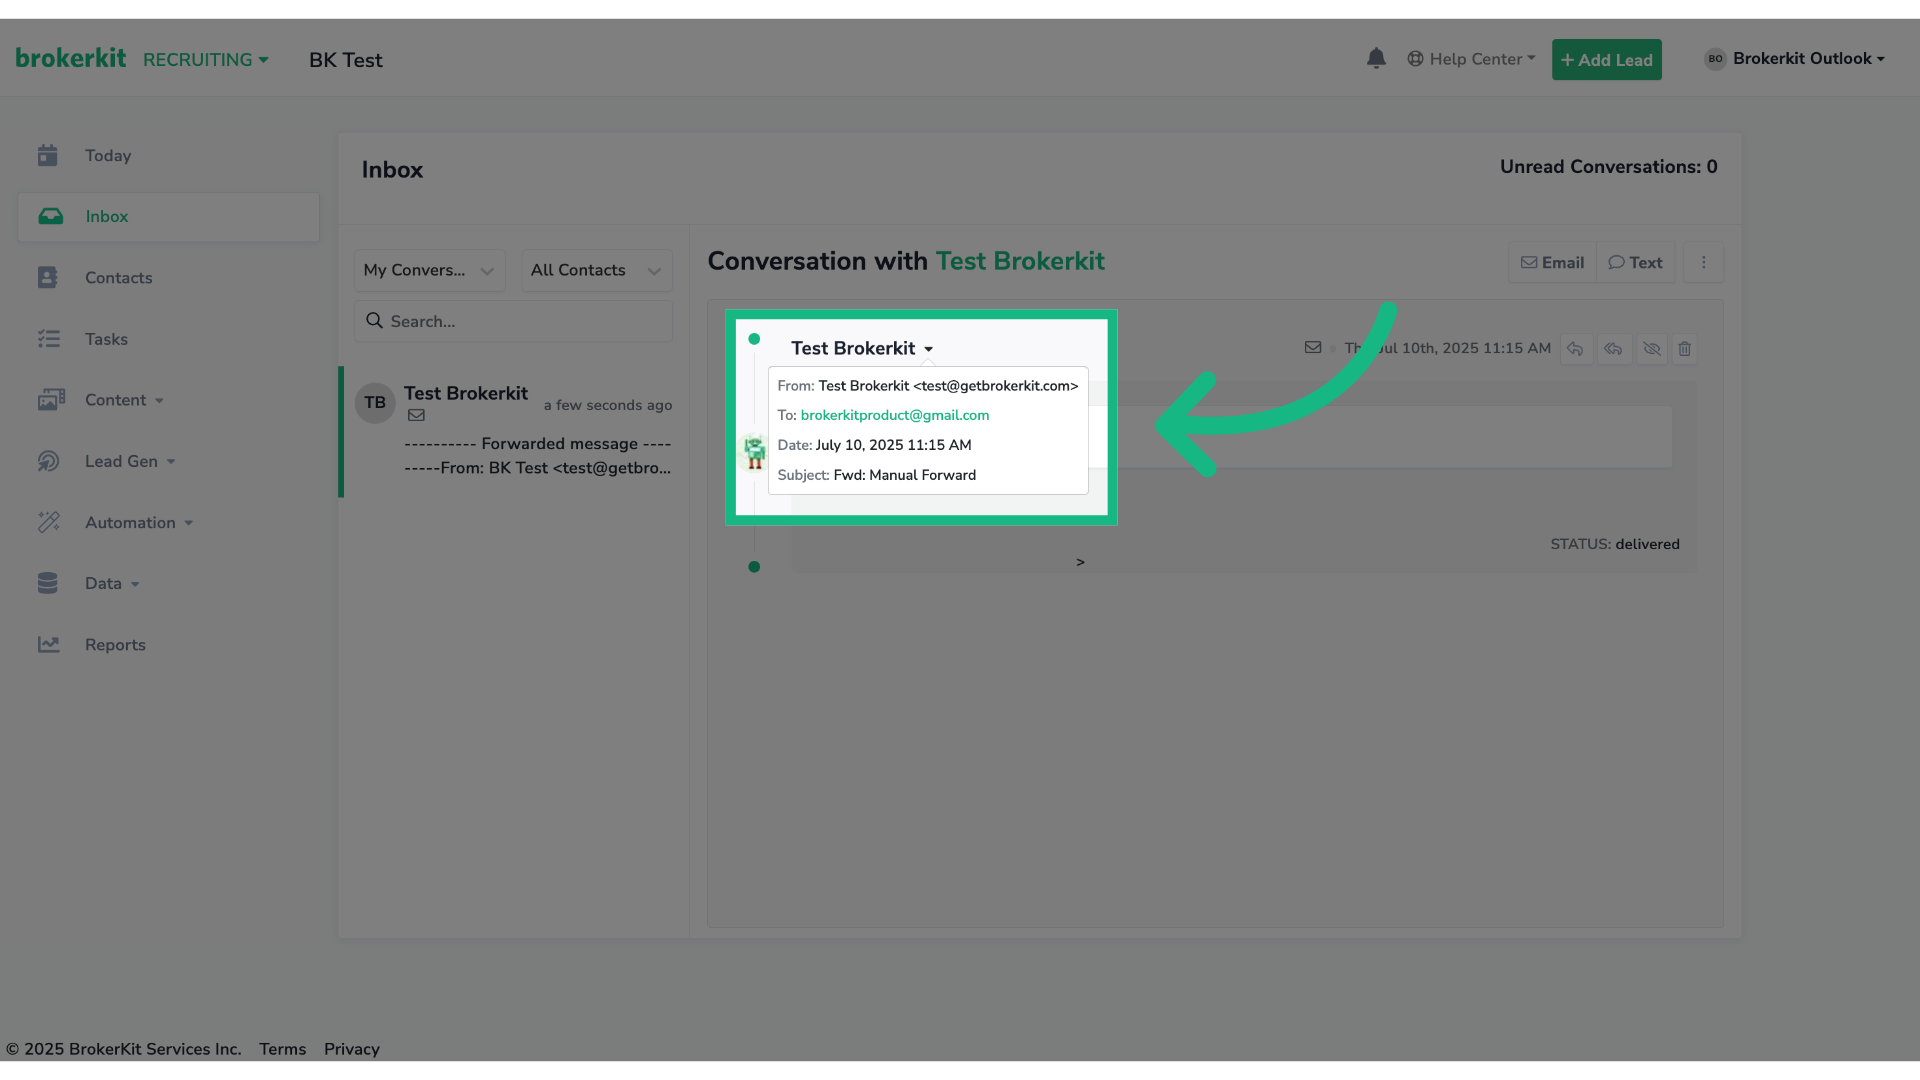
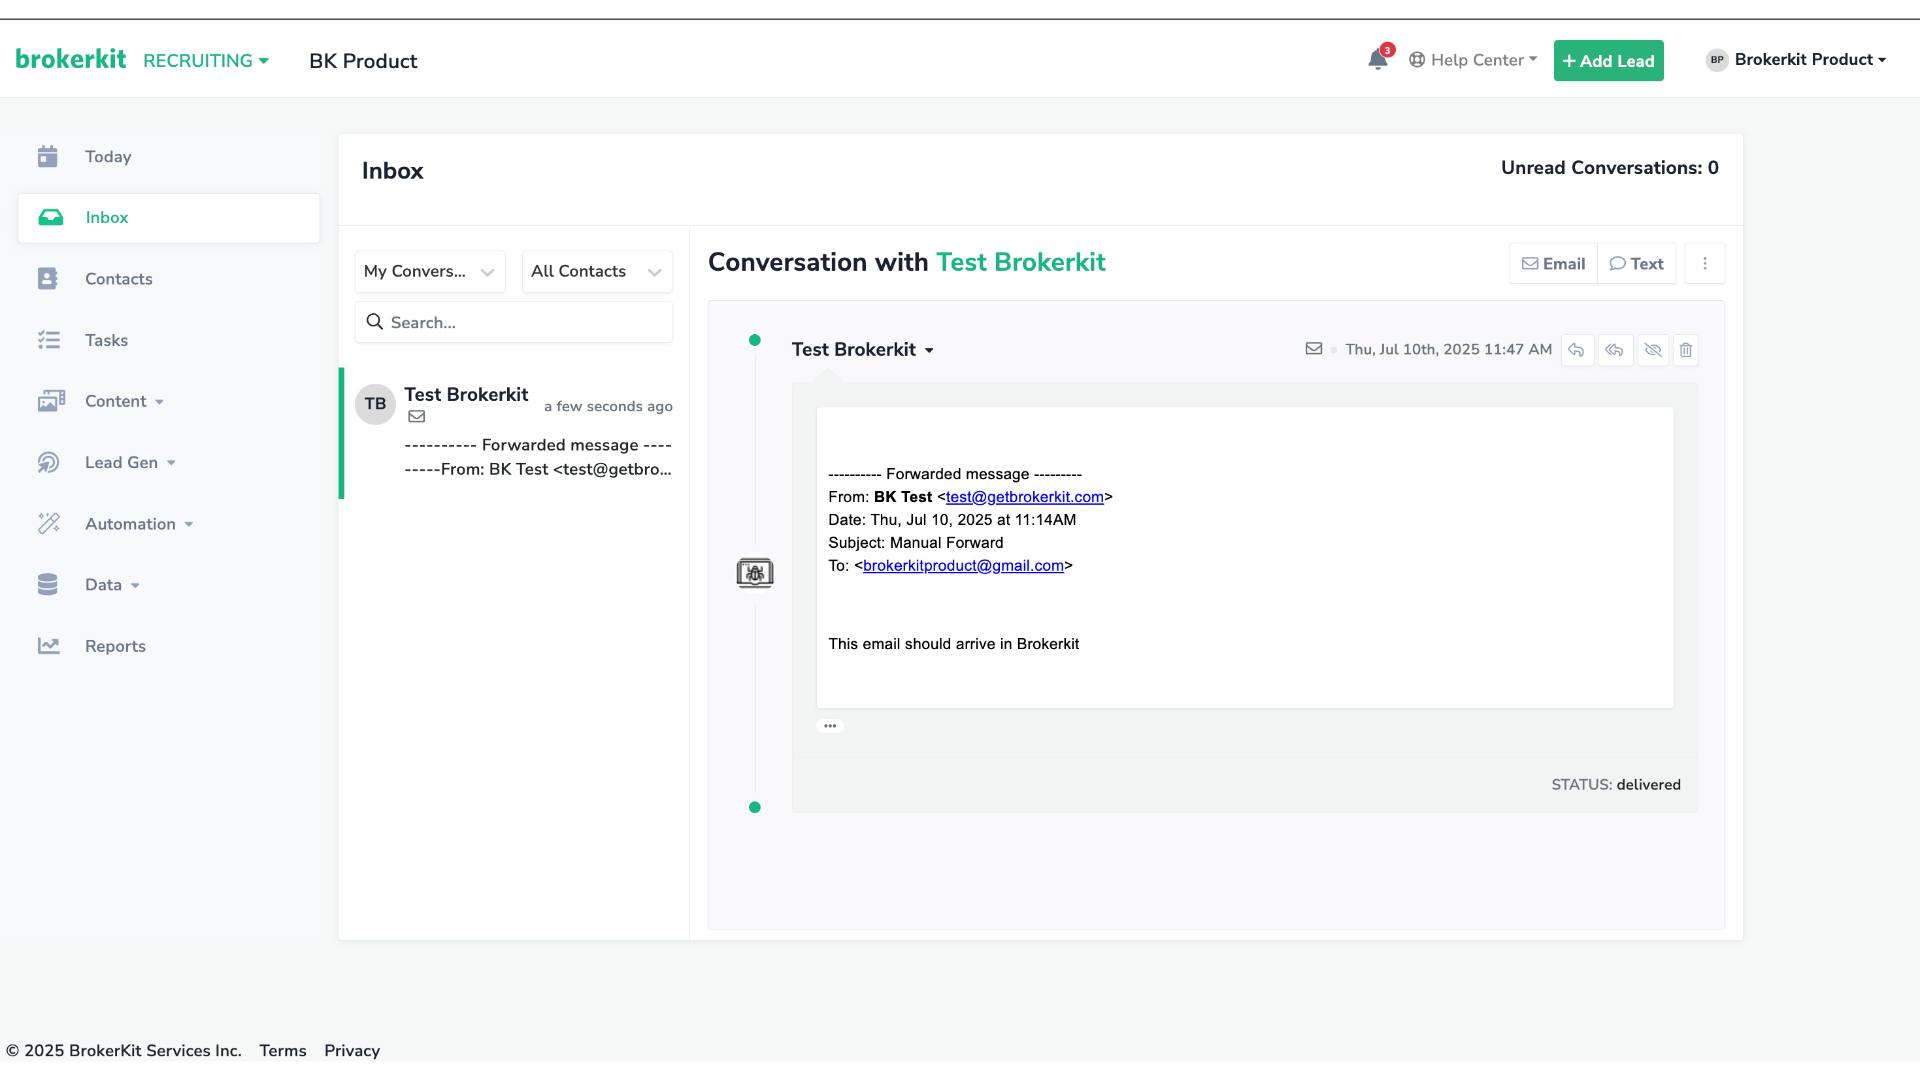
17. The email you have manually forwarded using Brokerkit's Forward address has successfully been delivered — you'll find it in your Inbox.
Open the test email to ensure it reflects the correct information.
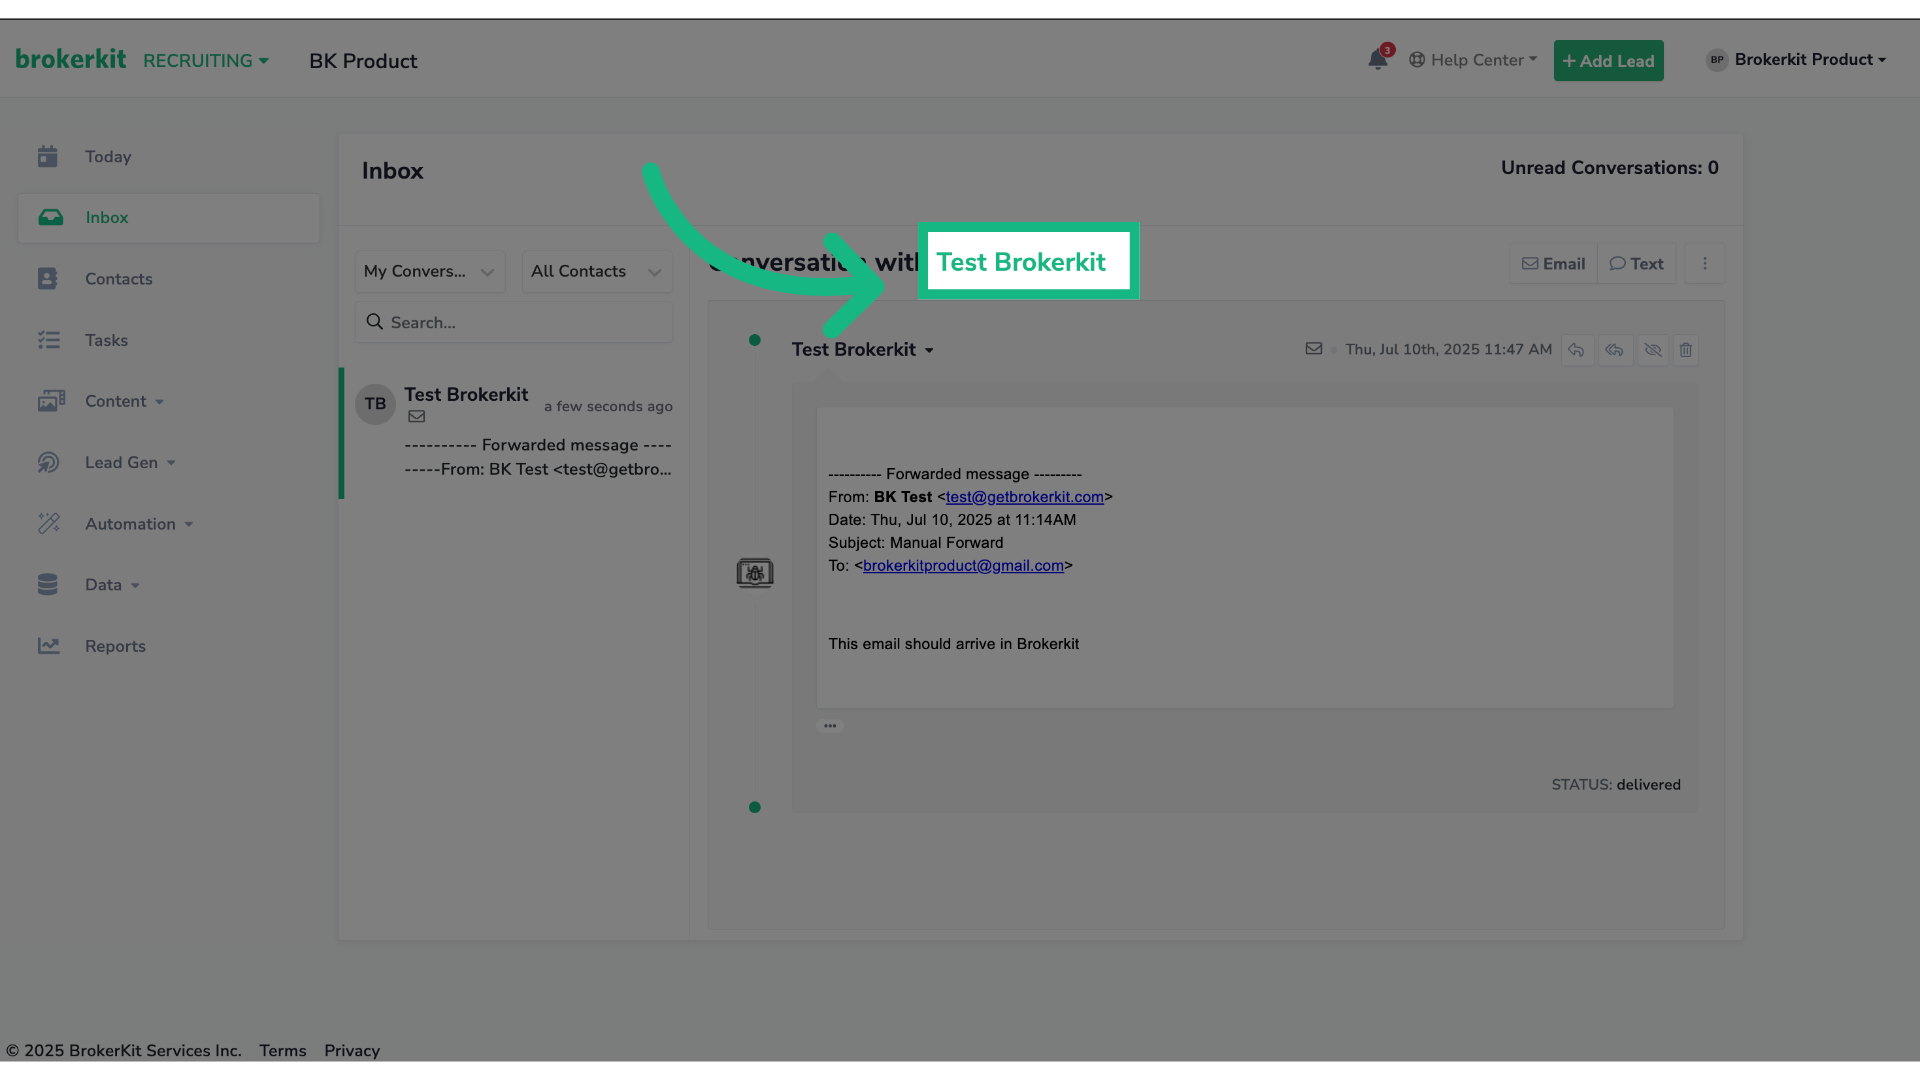
18. Click the contact's name
Click the contact's name to navigate to the contact's profile.
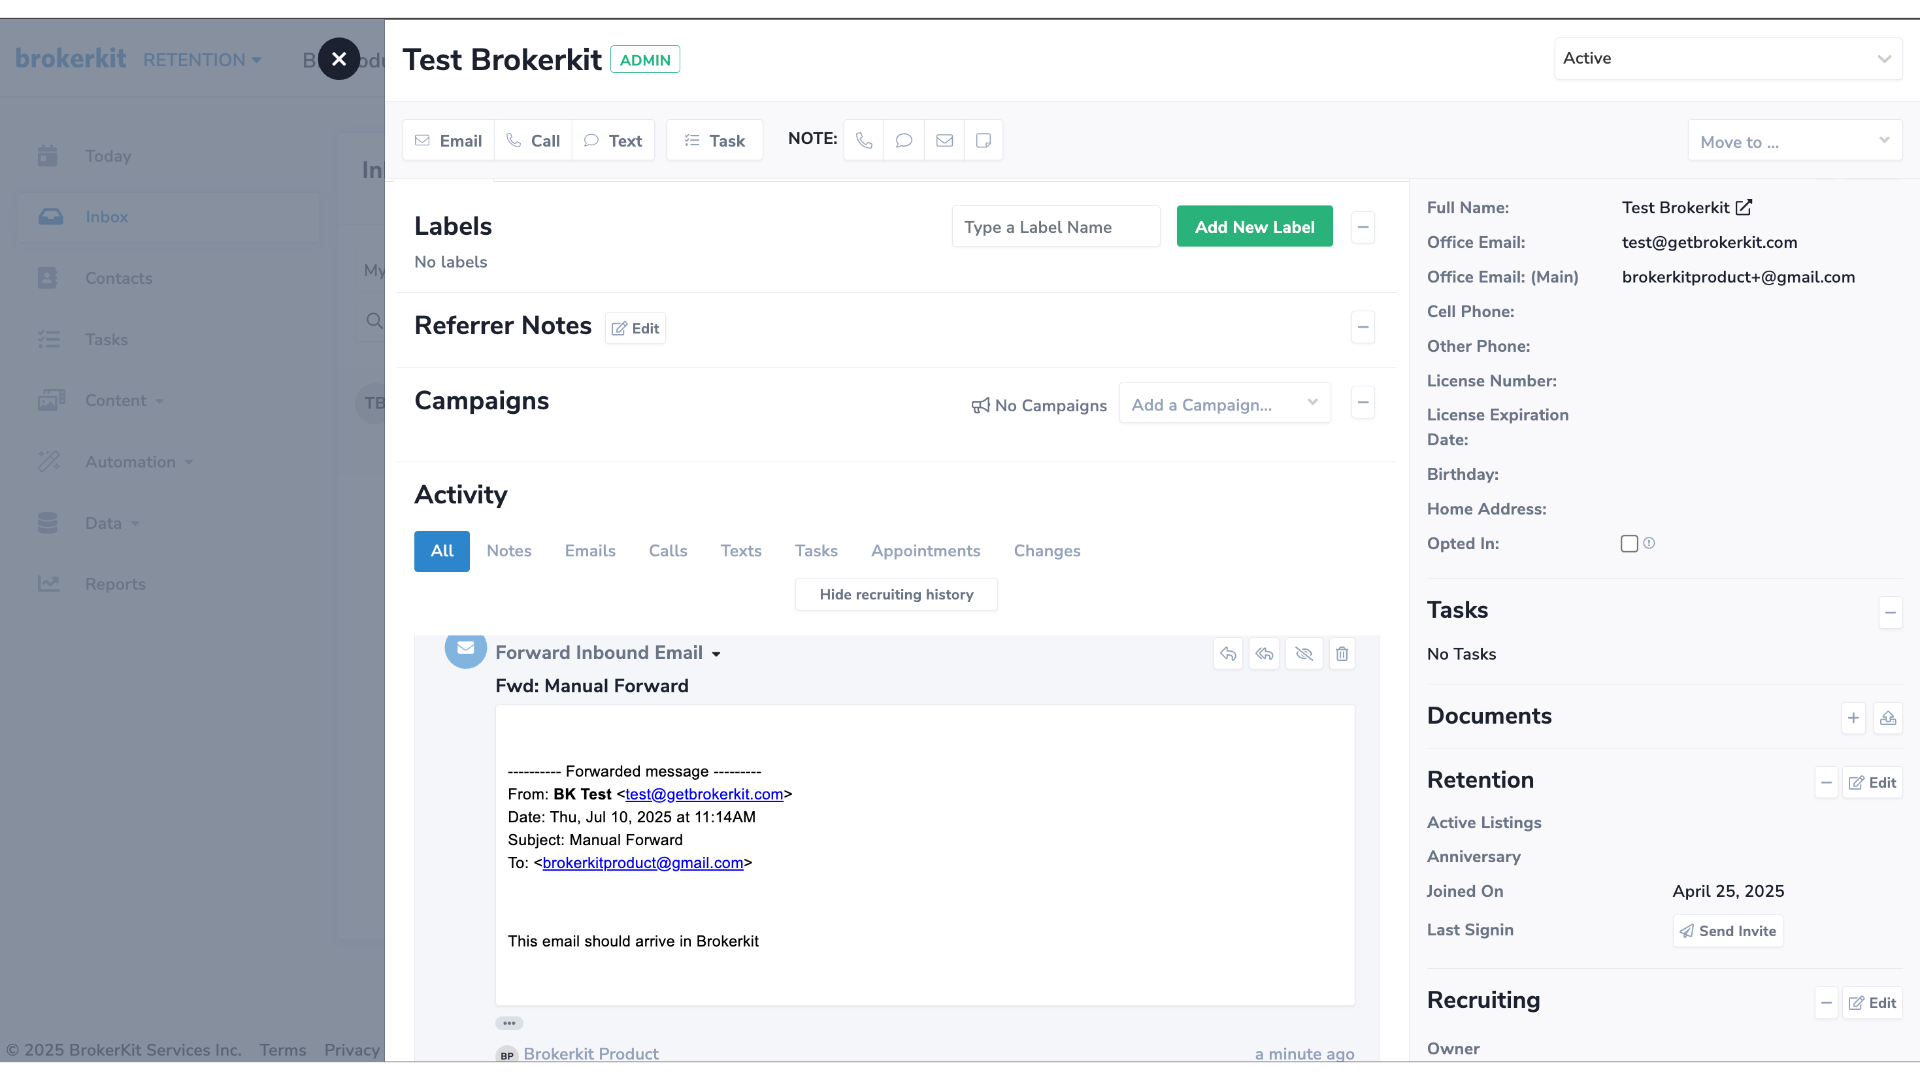
19. The email you have manually forwarded using Brokerkit's Forward address has successfully been delivered — you can also find it in the contact's profile.
Since the email was sent from test@getbrokerkit.com, you will be able to also see the forwarded email logged in the contact's profile.
 That concludes this tutorial.
If you have any questions, please reach out to our support team at support@brokerkit.com.
That concludes this tutorial.
If you have any questions, please reach out to our support team at support@brokerkit.com.