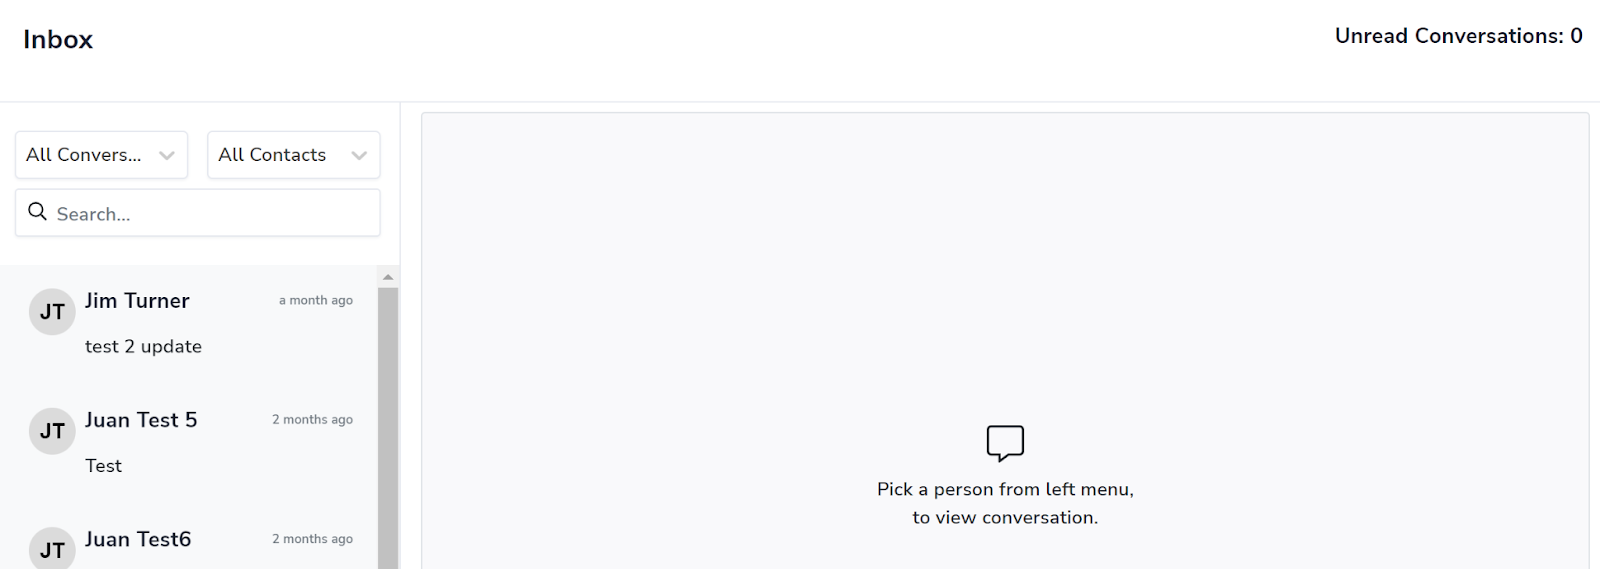
The Inbox in Brokerkit provides a centralized hub for managing conversations with your contacts. You can access your Inbox from Recruiting or Retention screen:
- From Recruiting or Retention screen look for Inbox in left-side menu
- You will see all your conversations from texts and/or emails
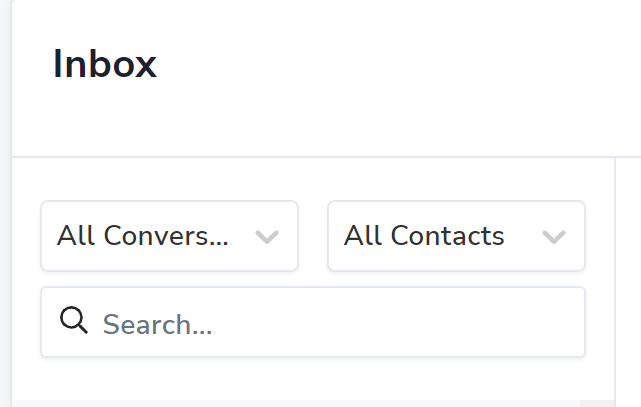
When using Inbox, you can filter your conversations by:
- Contact
- All my contacts
- Recruiting contacts
- Retention contacts
- Conversation
- All conversations
- My conversations
By default, the inbox view is set to "My Conversations" for staff role users and "All Conversations" for admin users.
Bulk Actions in Your Inbox
Covers: bulk mark read, bulk mark unread, bulk archive, multi-select conversations, select all matching, unread filter, inbox triage.
The Inbox supports bulk actions so you can clear, archive, and triage many conversations at once instead of one-by-one.
Multi-Select with Checkboxes
- A checkbox appears on the leading edge of every conversation row.
- Click a checkbox to select that conversation without opening it.
- Click the master checkbox at the top of the list to select every conversation currently visible.
- The bulk action toolbar appears at the top of the list as soon as one conversation is selected.
- Selections clear automatically when you change filters, search, or navigate away.
Mark Read / Mark Unread (Bulk)
- A single smart button in the toolbar flips between Mark Read and Mark Unread based on what you have selected.
- If any selected conversation is unread → the button reads "Mark Read."
- If every selected conversation is already read → the button reads "Mark Unread."
- Click once to update every selected conversation in a single action.
- Read state is per user — marking conversations as read only affects your view and your unread count, not your teammates'.
Bulk Archive
- The Archive icon in the toolbar archives every selected conversation in one click.
- Archive is per user — when you archive, only your view of the conversation is hidden. Teammates who also participate still see the conversation in their inbox.
- Archived rows fade out of your list immediately.
Unread Filter
- A new Unread only toggle sits with the existing filter controls in the search row.
- Flip it on to show only conversations with unread messages for you.
- The unread filter combines with every other filter — Mine / All Conversations, Recruiting / Retention, and the search box — so you can narrow your view as broad or as specific as you need.
Select All Matching Filter
- When you click the master checkbox, you will see "Selected N of M records."
- If more conversations match your filter than fit on the screen, a "Select all M records" link appears next to it.
- Click it to apply your bulk action to every conversation matching your current filter, even ones not yet loaded.
- A confirmation modal appears before bulk-archiving 25 or more conversations — your safety net for large triage operations.
Who Can Use Bulk Actions
| Role | Multi-Select | Mark Read / Unread | Archive | Unread Filter |
|---|---|---|---|---|
| Admin | ✅ | ✅ | ✅ | ✅ |
| Staff | ✅ | ✅ | ✅ | ✅ |
| Agent | — | — | — | ✅ (read-only) |
| Affiliate | — | — | — | — |
Where Do I See All My Unread Messages and Replies?
Covers: unread messages, unread replies, new replies, reply notifications, unread count, where are my new messages, incoming replies, check replies.
Short answer: Open the Inbox from the left-side menu — unread messages and replies appear bolded at the top. The Inbox is the single place to see every unread text, email, and reply from your recruits and agents across Recruiting and Retention.
How Unread Messages and Reply Notifications Work
- Unread indicator in the sidebar — the Inbox icon shows a count badge when you have unread messages.
- Bolded conversations — any conversation with an unread message is bolded in the inbox list.
- Reply notifications — when a recruit replies to one of your emails or texts, the reply lands in the Inbox and triggers an unread notification.
- Mark as read — clicking a conversation in the right panel marks it as read automatically.
- Mark as unread manually — click the three-dot menu at the top-right of a conversation to re-mark it as unread (useful for triage).
- Email notifications — you can also receive email alerts for new replies. Check your notification preferences in Account Settings → Notifications.
Filtering to Just Unread
Flip the Unread only toggle in the filter row to show only conversations with unread messages for you. The toggle combines with the Mine / All Conversations filter, the Recruiting / Retention filter, and the search box, so you can narrow your view as broad or as specific as you need. See "Unread Filter" under Bulk Actions in Your Inbox above.
Conversation Settings
For a single conversation: open the conversation from the Inbox, then click the three dots at the top-right to mark it as Unread or to archive it. Clicking the message in the right panel marks it as read automatically.
For multiple conversations at once: tick the checkboxes on the rows you want and use the bulk action toolbar at the top of the list. See Bulk Actions in Your Inbox above.
If you need to view the history of the Contact, click on their name and it will take you to the contact profile.

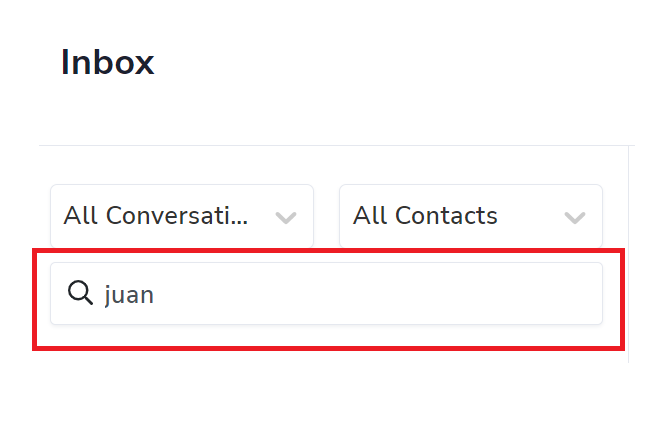
Searching and Timeline
Under the filters there is a search bar where you can search by the contact names. The timeline of all message types (text, email) are in chronological order.
How to Use the Compose Email Button
The Compose Email button allows you to quickly send an email to a contact from within your inbox, regardless of how the conversation was initiated (text, email).
Composing an Email
- Locate the Compose Email Button: The Compose Email button is located in the top right corner of a conversation
- Clicking Compose Email: Click on the Compose Email button in the conversation. Note: Gmail replies are coming soon!
- Email Creation Text Editor: Once you click Compose Email, a text editor will appear where you can draft your email. This editor will have the same styling and features as the one in the contact profile
- Options in Composing an Email:
- Formatting your email with all the many text editor options
- Insert an Image
- Add an Attachment
- Insert a Document from your Brokerkit Library - Coming Soon!
- Add a Video from your Brokerkit Library
- Use Ai Assist to write content
- Select from an email template or create a new one
- Change the Contact's Status from the dropdown
- Share the email with only Admin/Staff or Share with with referring agent
- Add a follow up task
- Schedule the email or send it directly
Composing a Text
- Locate the Compose Text Button: The Compose Text button is located in the top right corner of a conversation.
- Clicking Compose Text: Click on the Compose Text button in the conversation
- Text Creation: Once you click Compose Text, a text editor will appear where you can draft your text. This editor will have the same styling and features as the one in the contact profile
- Options in Composing a Text:
- Insert an image
- Insert a Document from your Brokerkit Library - Coming Soon!
- Add a Video from your Brokerkit Library
- Use Ai Assist to write content
- Select from an text template or create a new one
- Change the Contact's Status from the dropdown
- Share the text with only Admin/Staff or Share with with referring agent
- Add a follow up task
- Schedule the text or send it directly
Scheduling Emails and Texts
- Scheduling Option: You can schedule emails and texts directly from Inbox. This feature allows you to set a specific date and time for when your email should be sent. For more information about scheduling emails and texts, follow these links:
Viewing All Messages With a Contact in One Thread
The Inbox shows conversations across all your contacts. When you want to see every message exchanged with a single recruit or agent — texts, emails, calls, and notes — open their contact profile instead. Every contact has a unified communication timeline.
How to open a contact's message thread
- Click the contact's name anywhere in BrokerKit (inbox, leads list, search results).
- On their profile page, scroll to the Communications / Messages section (or click the Messages tab).
- You'll see every interaction with this contact in chronological order:
- Inbound and outbound texts
- Inbound and outbound emails (with open and reply tracking)
- Call logs and voicemails
- Notes you or teammates added
- Campaign touches (auto-sent emails and texts)
Filtering the thread
Use the filter buttons at the top of the timeline to narrow to a single channel — for example, "Texts only" or "Emails only" — when you want to see just the SMS history or email chain with that contact.
Replying from the thread
You can reply to any message directly from the contact profile without opening the Inbox. Use the Compose Text or Compose Email button at the top of the conversation view — it has the same options documented above (templates, scheduling, attachments, AI Assist).
Inbox vs. Contact Profile: when to use each
- Inbox — triaging across all contacts (see who replied, clear unread, manage workload).
- Contact profile → Messages tab — reviewing one contact's full communication history before a call, or before sending the next message.