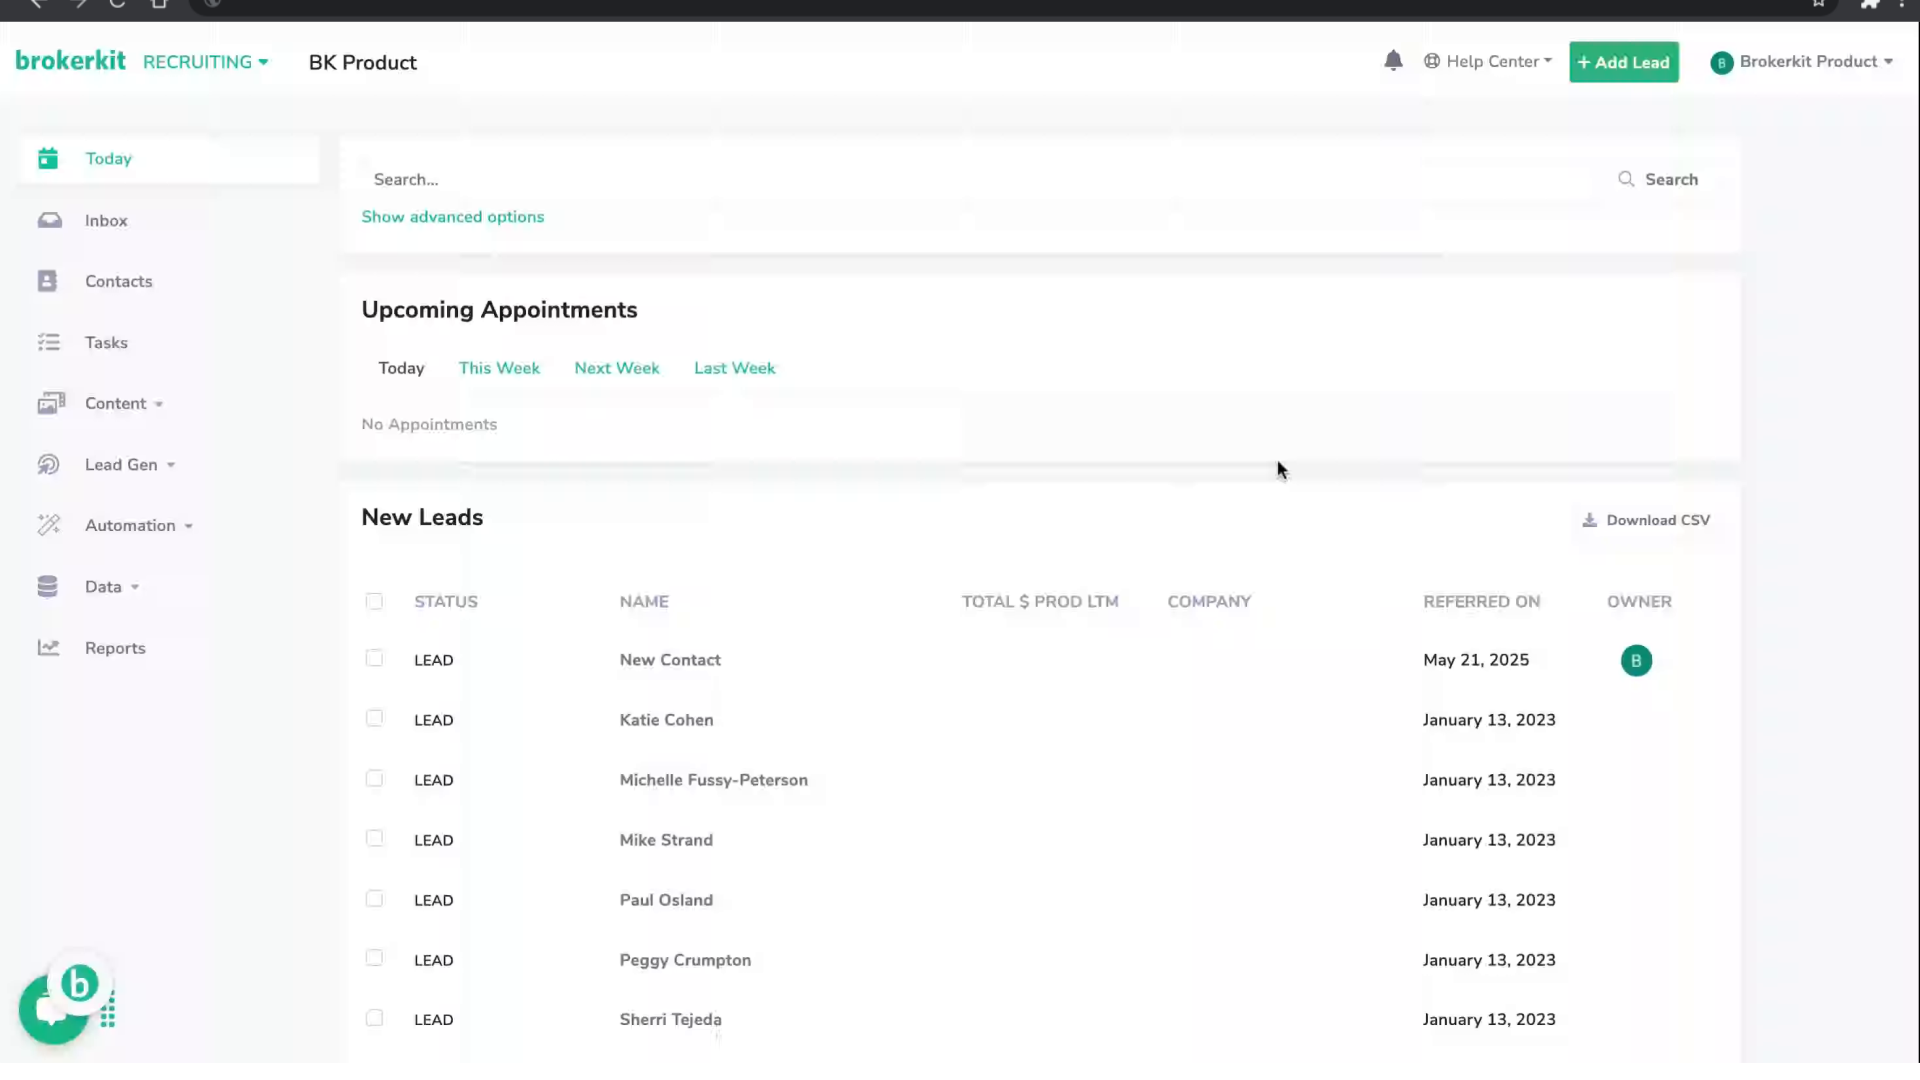
Welcome to this tutorial where we will show you how to use the dialer feature for outbound calling in Brokerkit.
1. Introduction
To start, please access the Brokerkit platform.
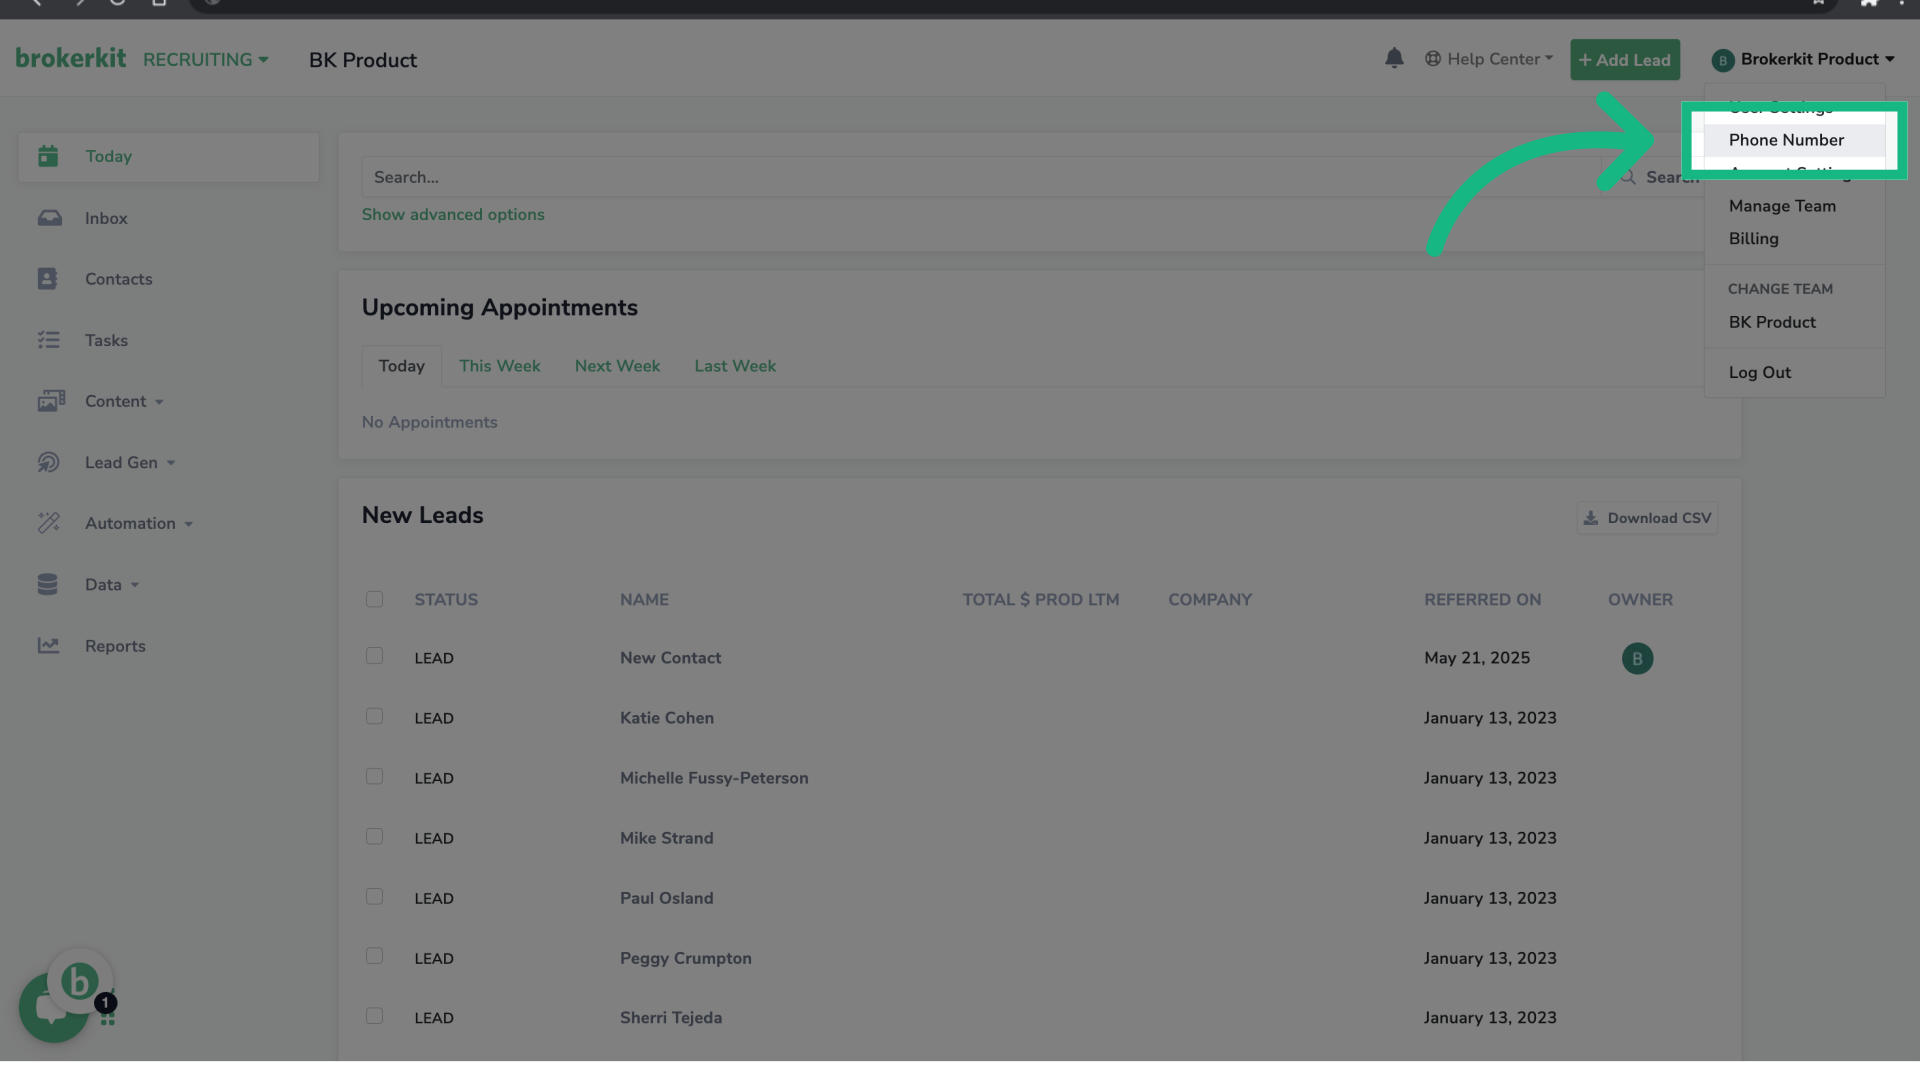
2. Click "Phone Number"
Go to the option Phone Number.
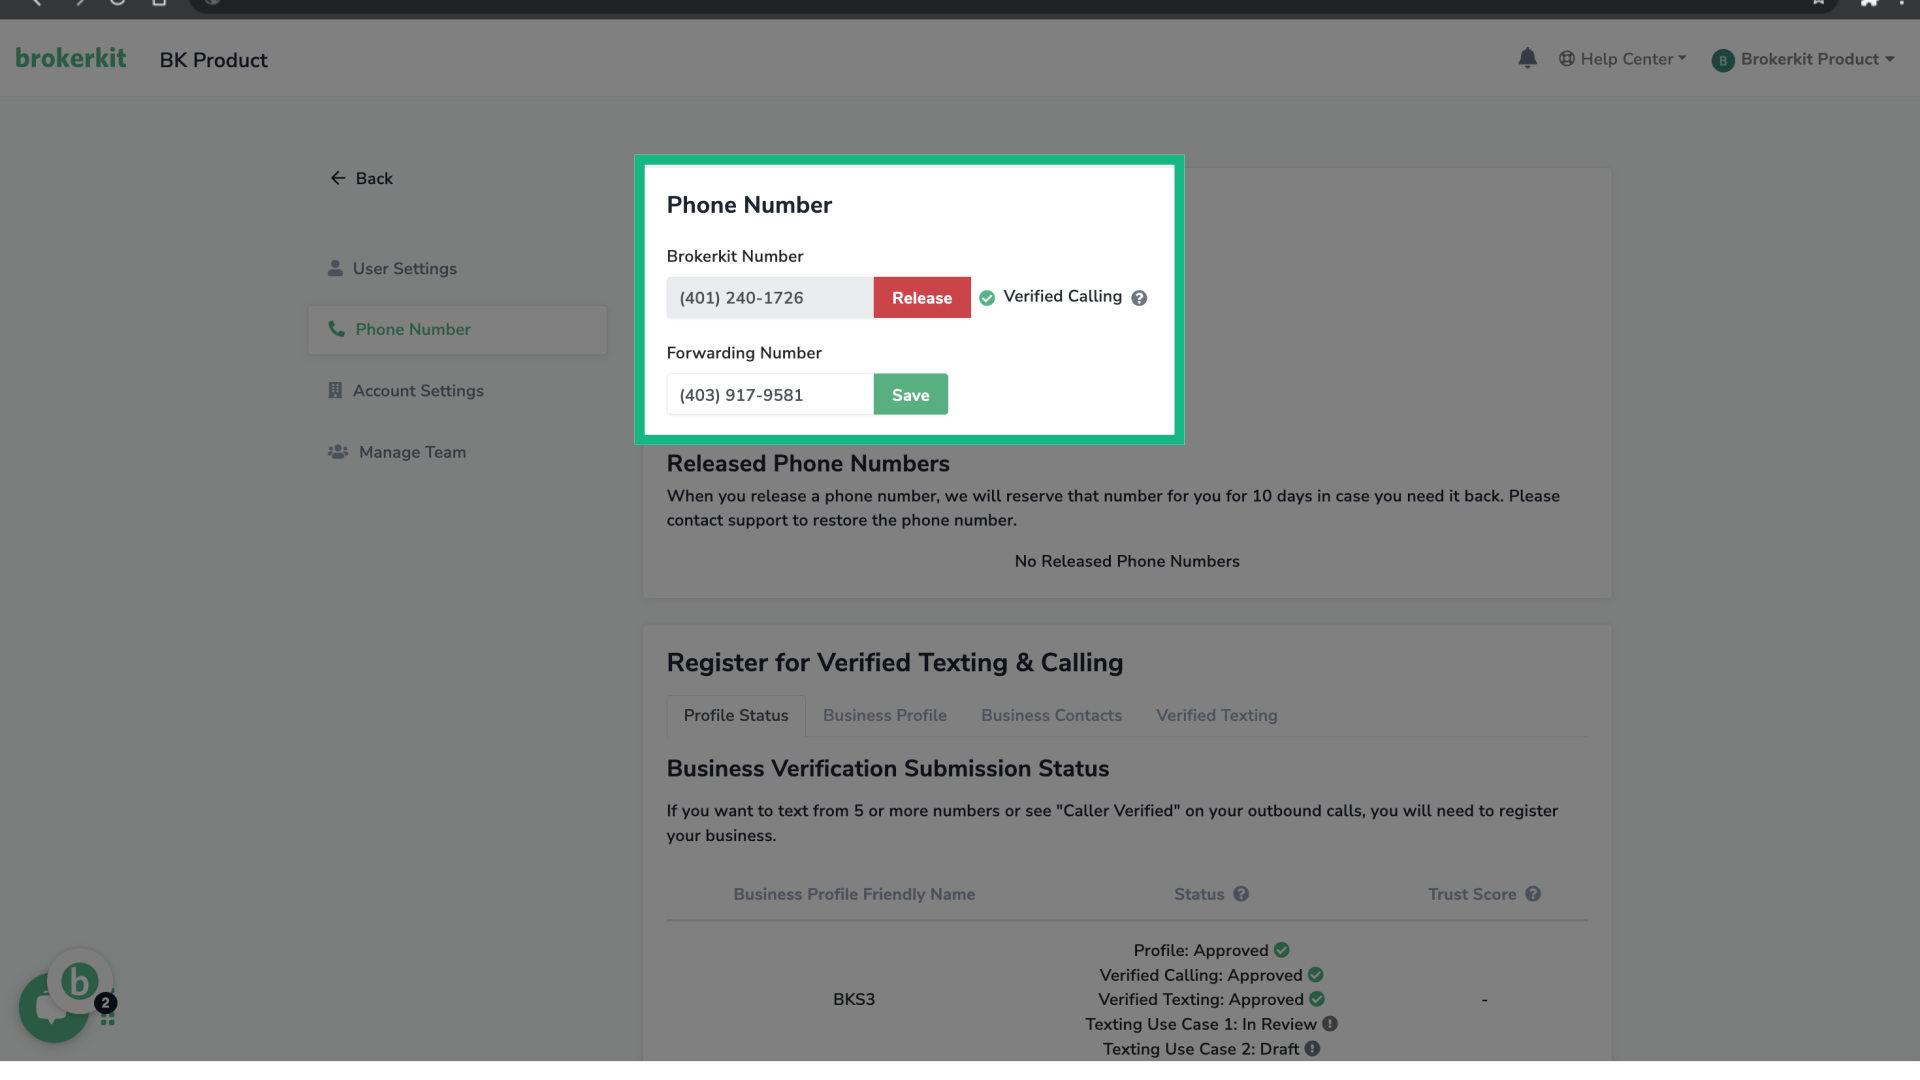
3. Set up your Brokerkit Phone Number
Your outbound calls will come from your Brokerkit phone number. The forwarding number is the one to which calls and text messages will be redirected — this is often your cell phone number. If you need help setting your Brokerkit phone number, please refer to the article linked in the bottom-right corner. How to set up my Brokerkit phone number?
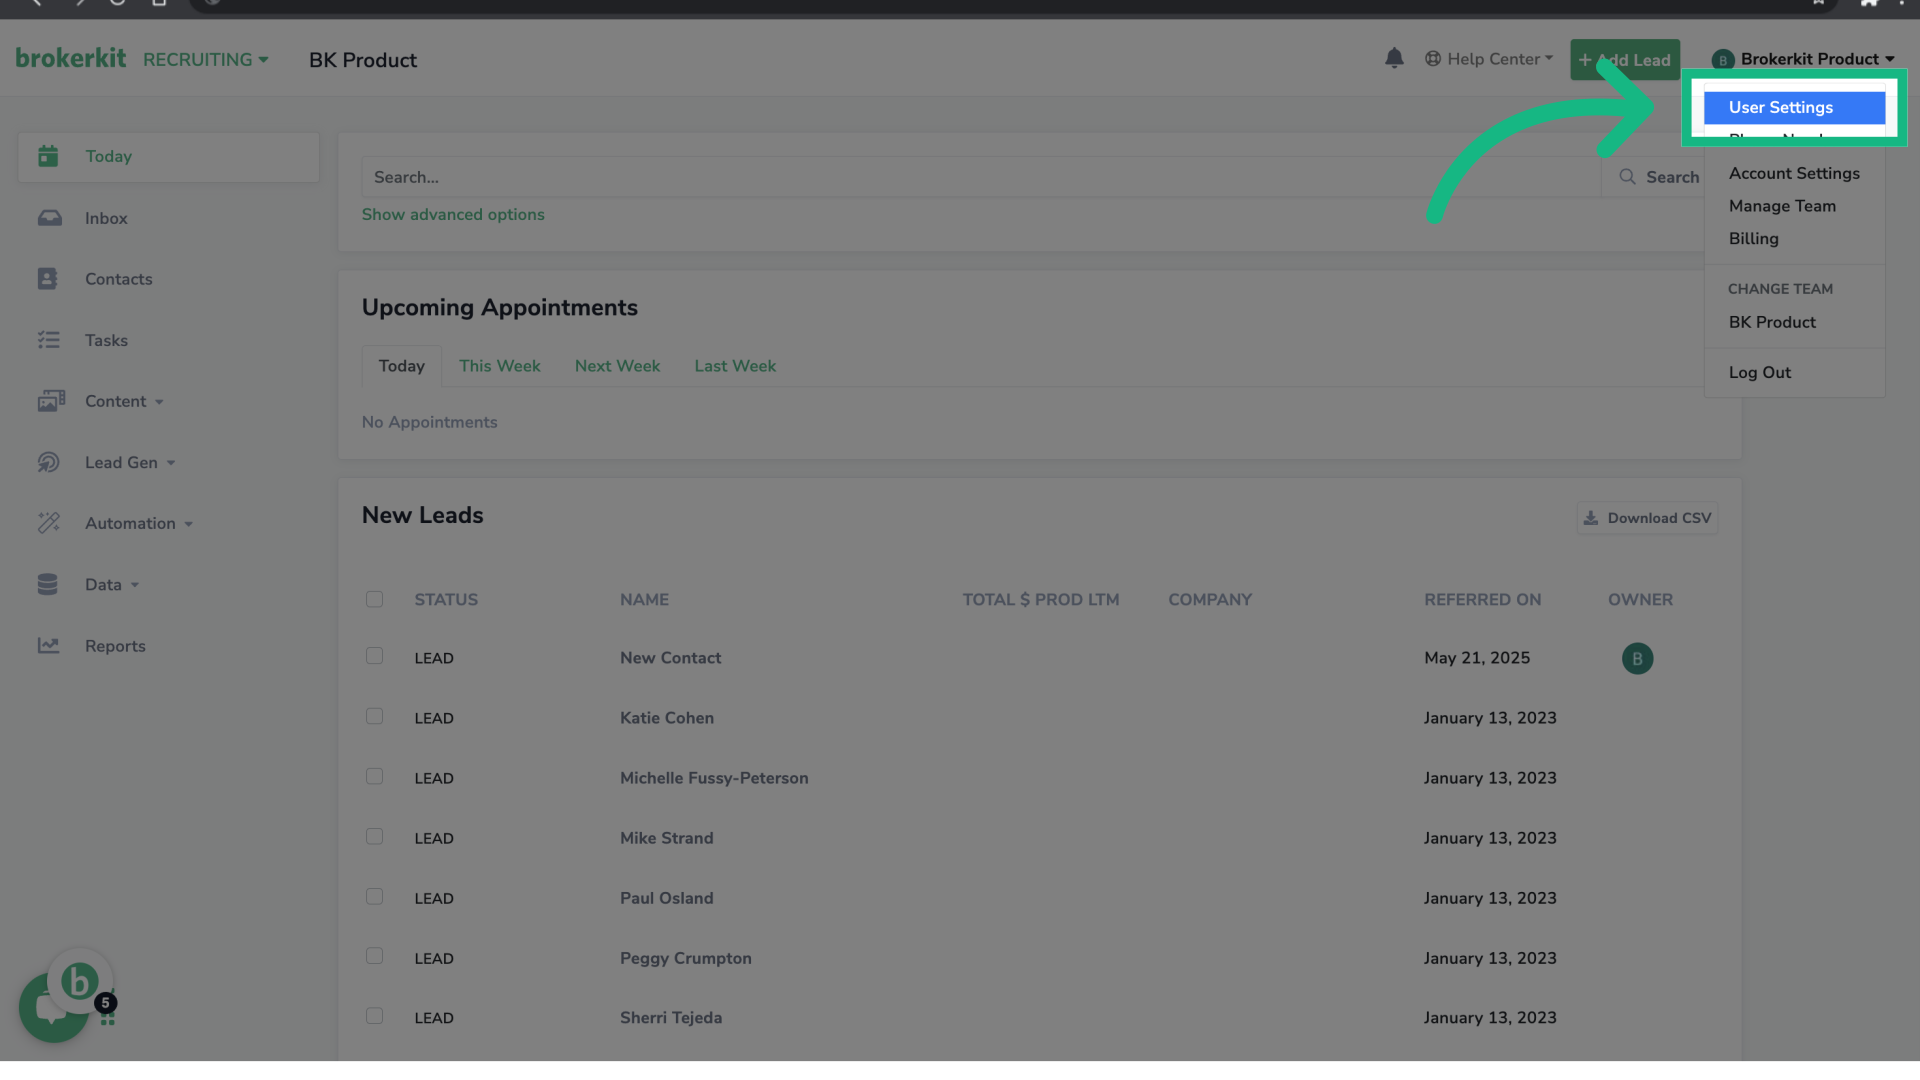
4. Click "User Settings"
Now, go to the option User Settings.
5. Check to Record Calls
At the bottom of the page, you can choose whether or not to record your calls. Don't forget to click "Update user settings" to save your changes.

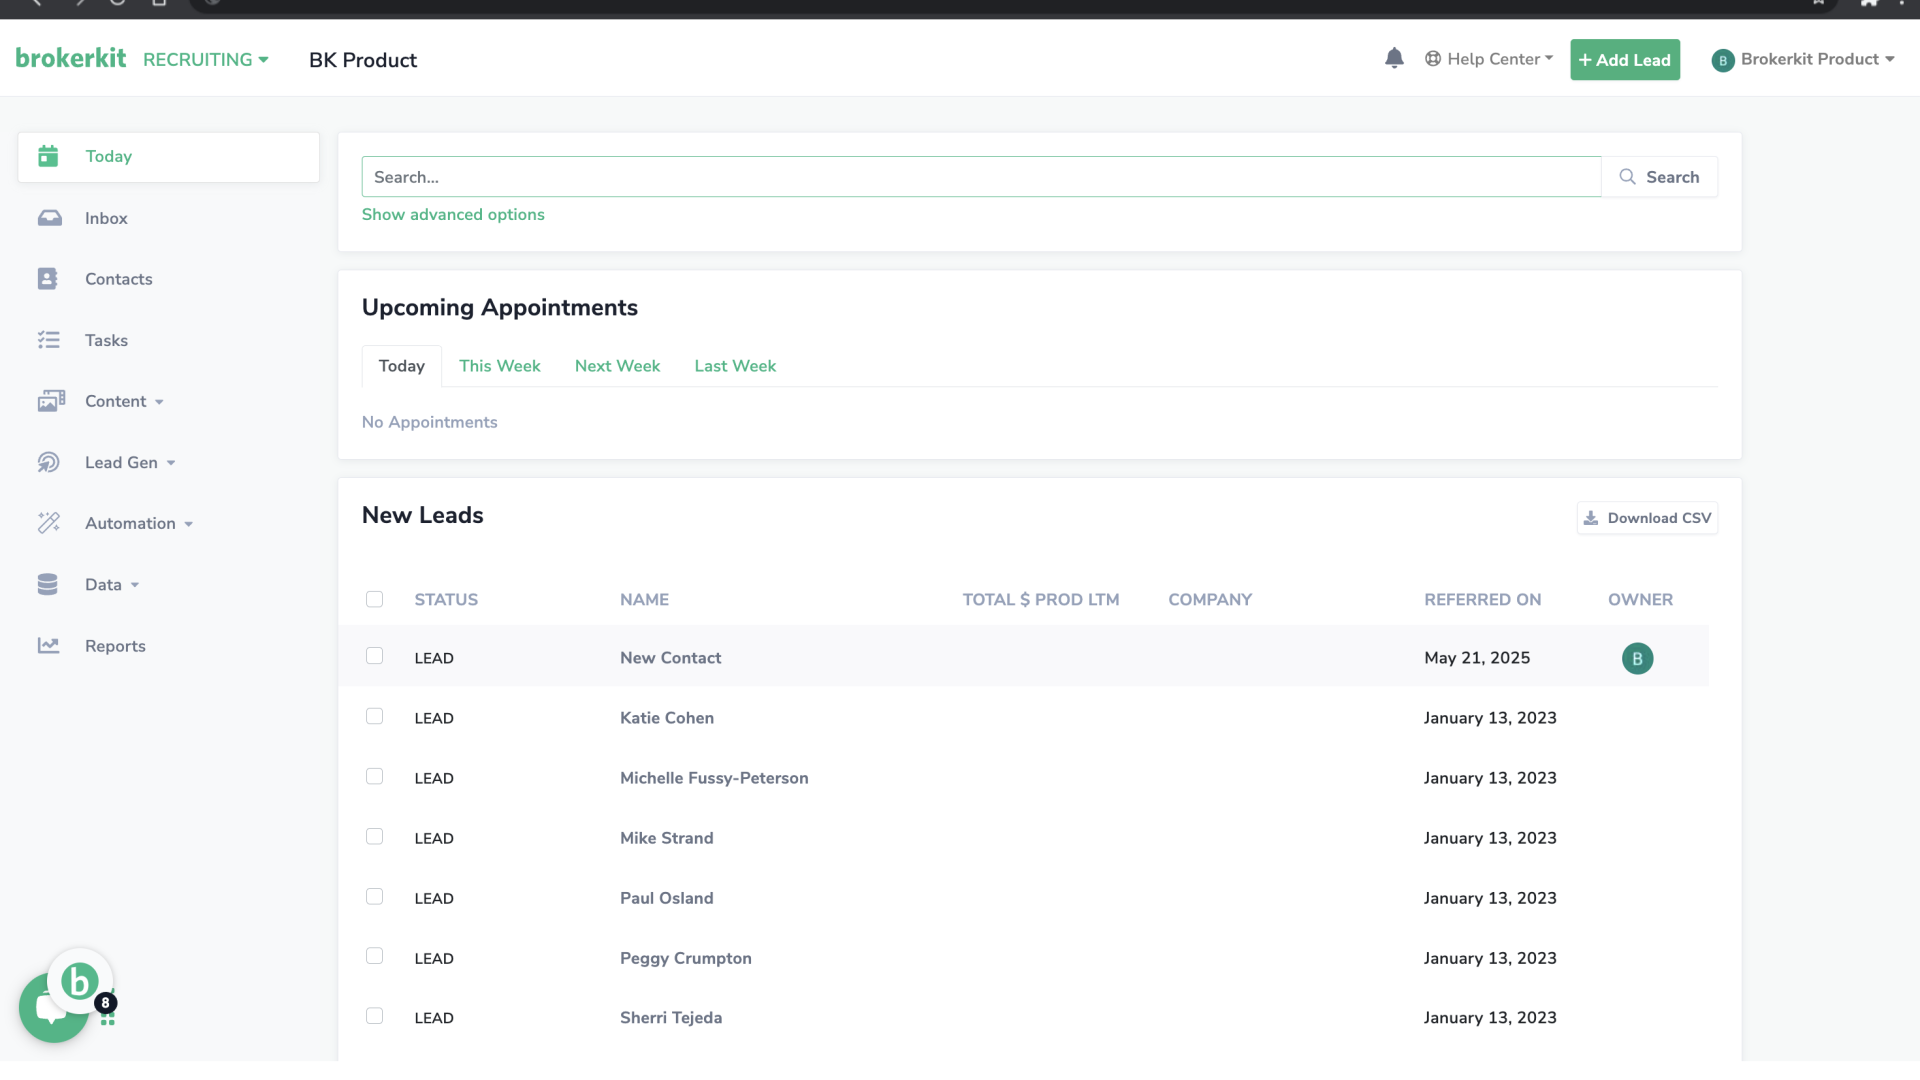
6. Open a new contact profile
Now that we have set up our brokerkit phone number and our recording preferences, let's use the dialer. Open a new contact profile.
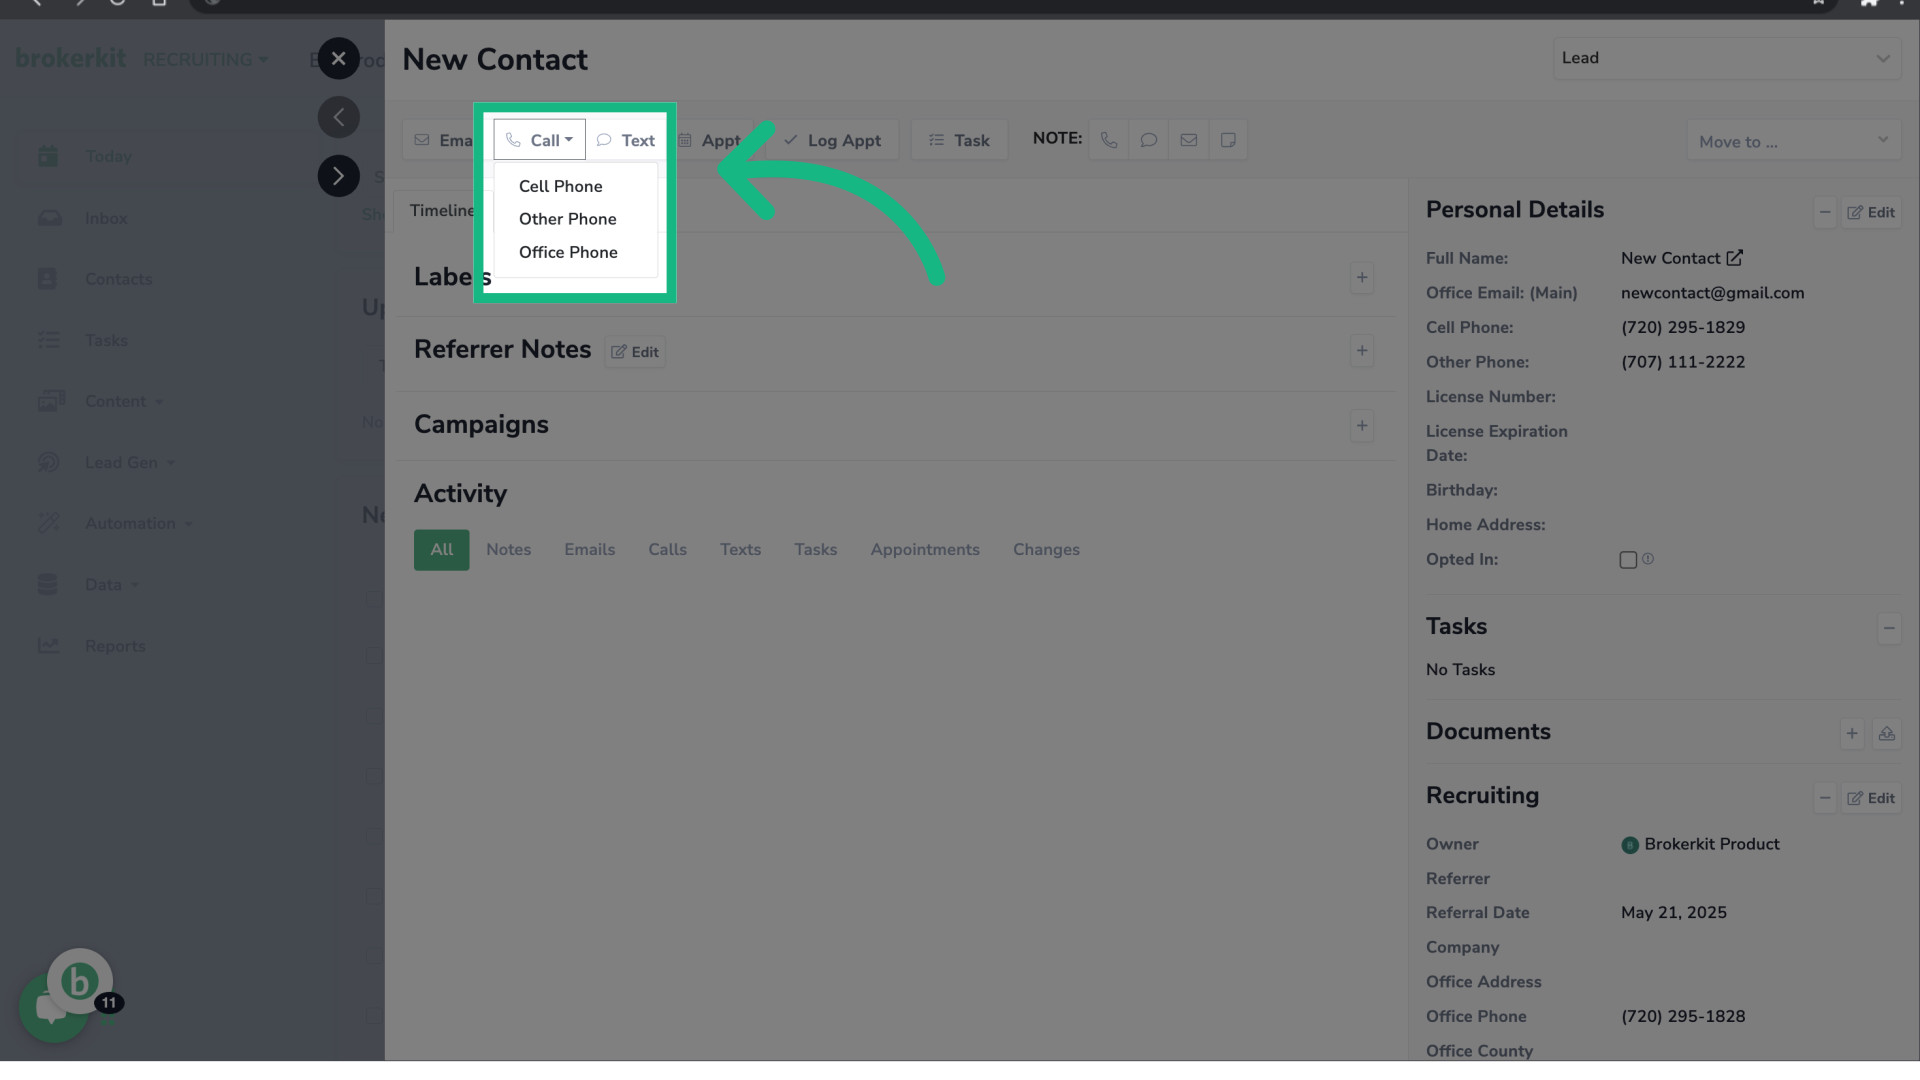
7. Click "Call"
Select the option Call. If the contact has more then one phone number, you will have the option to dial their cell phone, office phone or other phone.
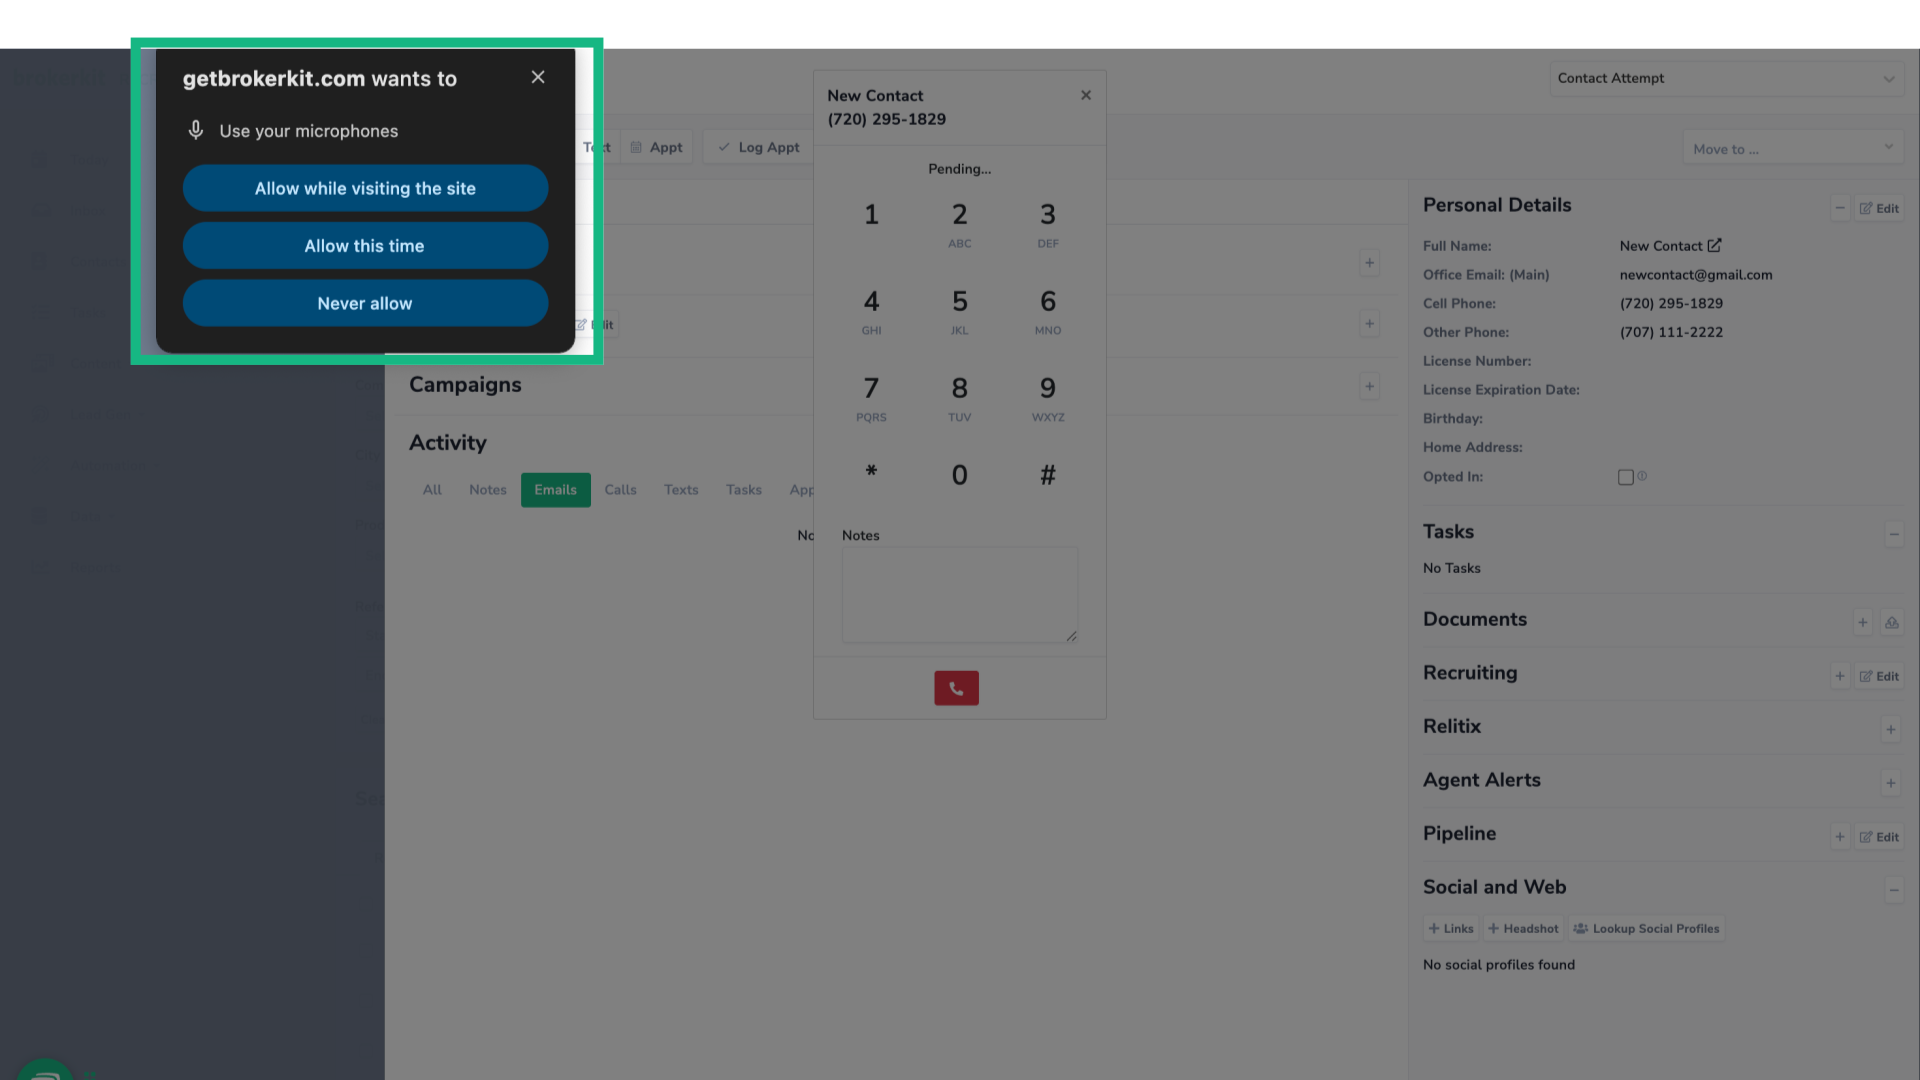
8. Allow microphone access
In most cases, you'll be prompted to allow microphone access the first time you use the dialer. To ensure proper functionality, select Allow when prompted, or enable microphone permissions in your browser settings while visiting the site.
9. Dialer in progress
Once the call starts, you will see the dialer, make sure you have a stable internet connection to maintain excellent call quality. In the dialer, you can do different actions.
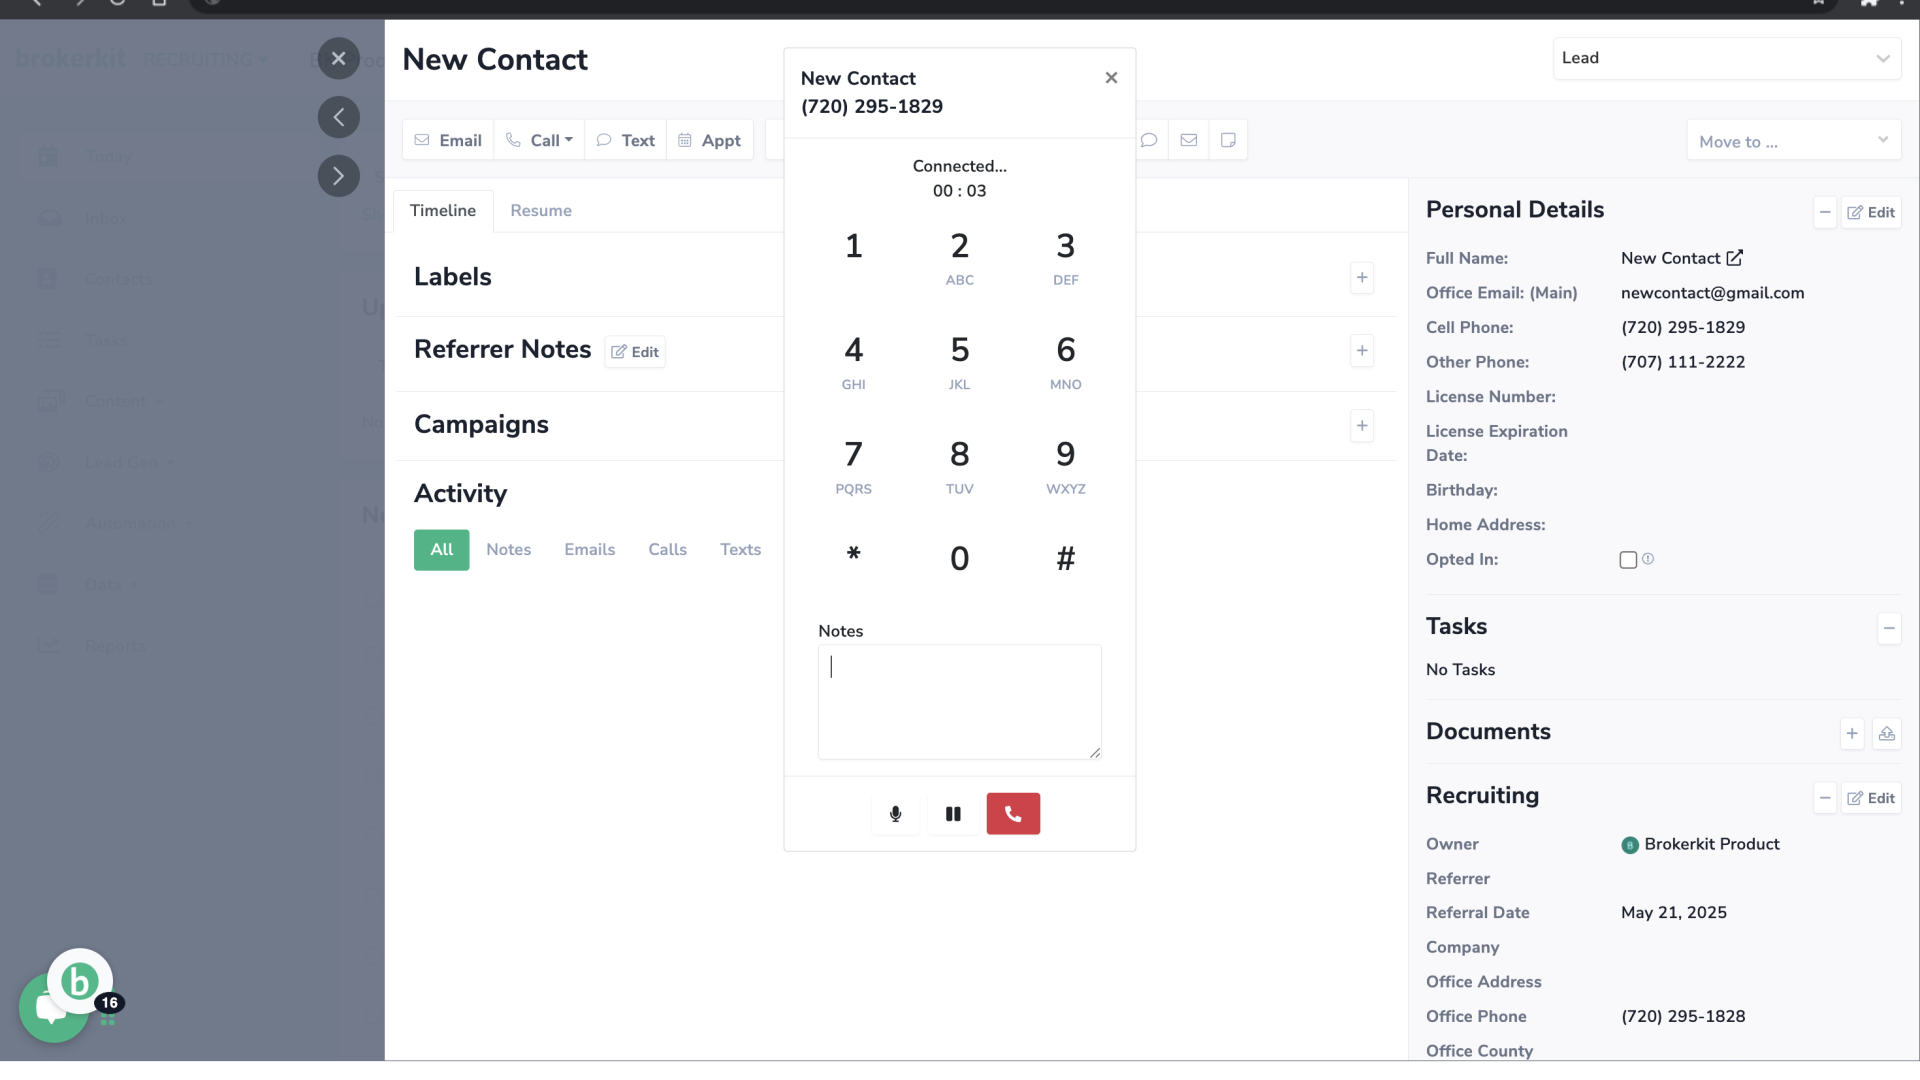
10. Number pad
First, there's a number pad to dial through the menus as needed.
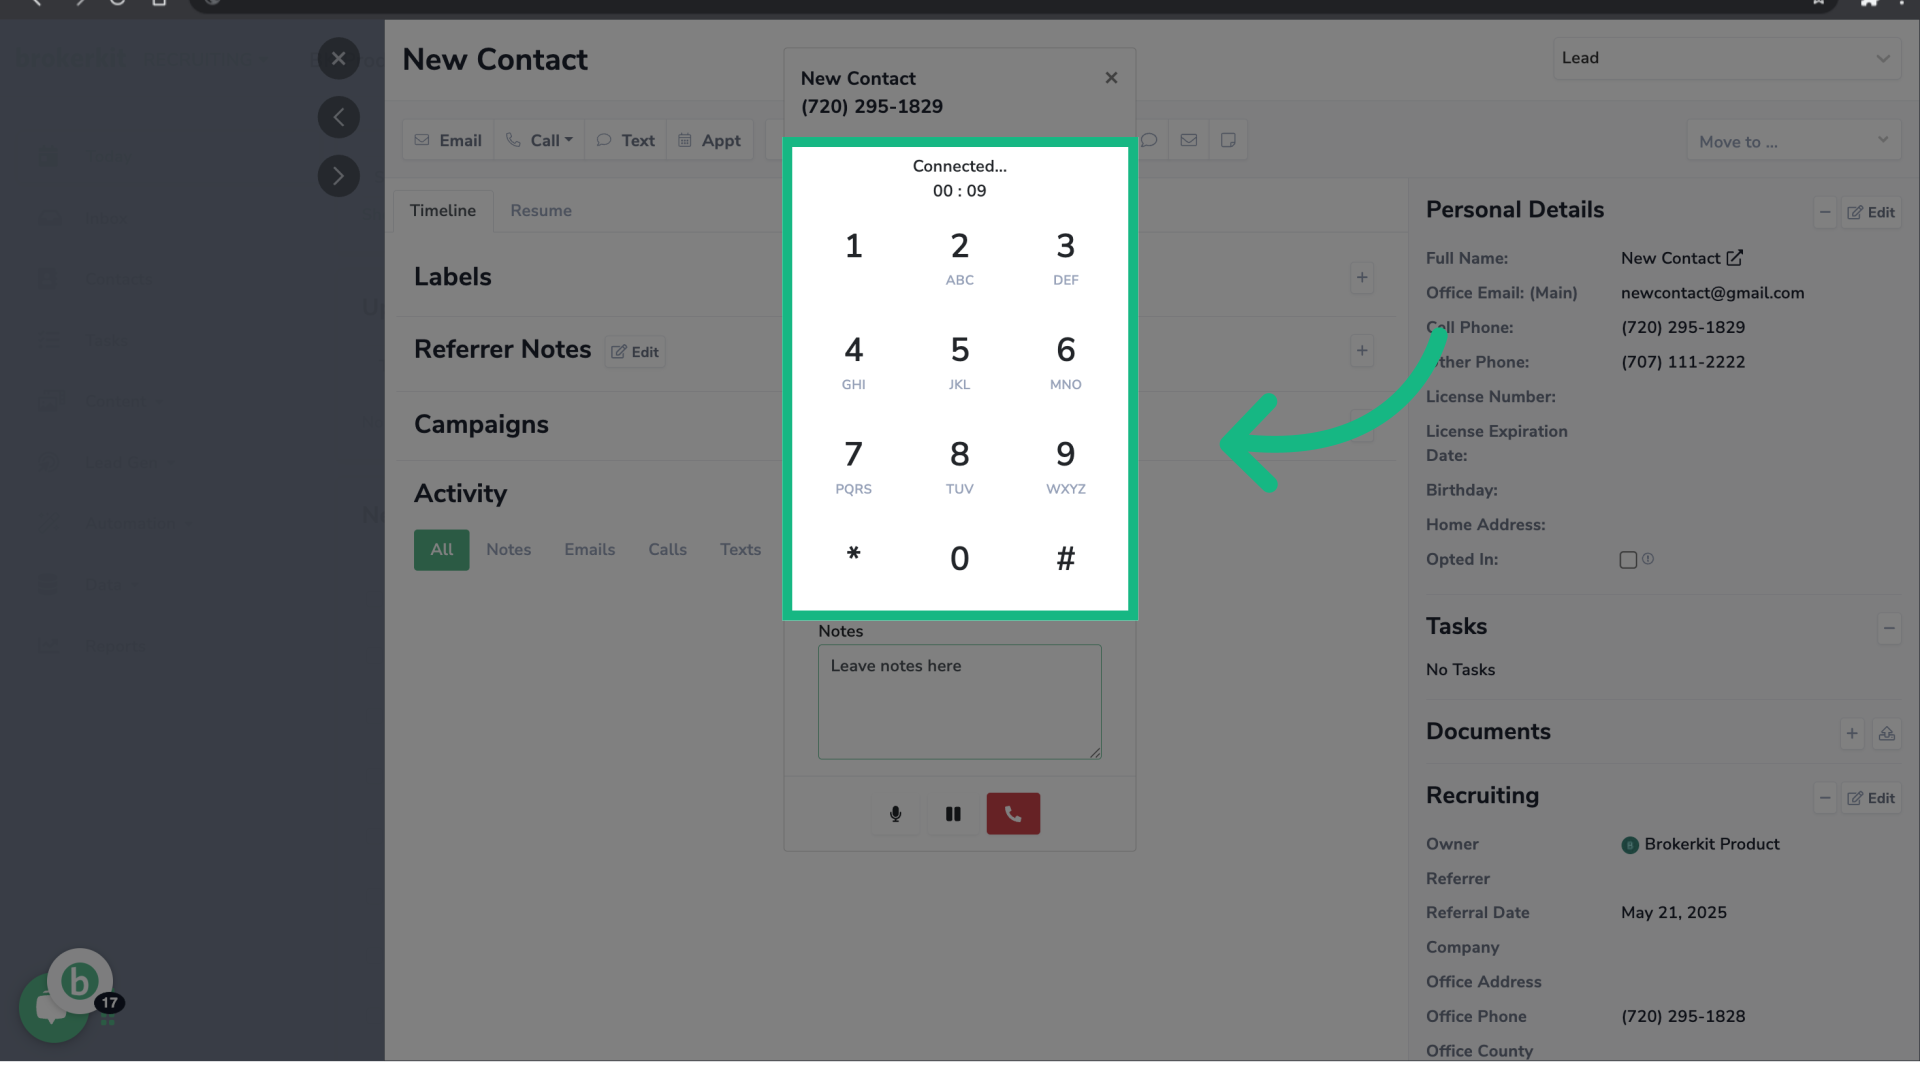
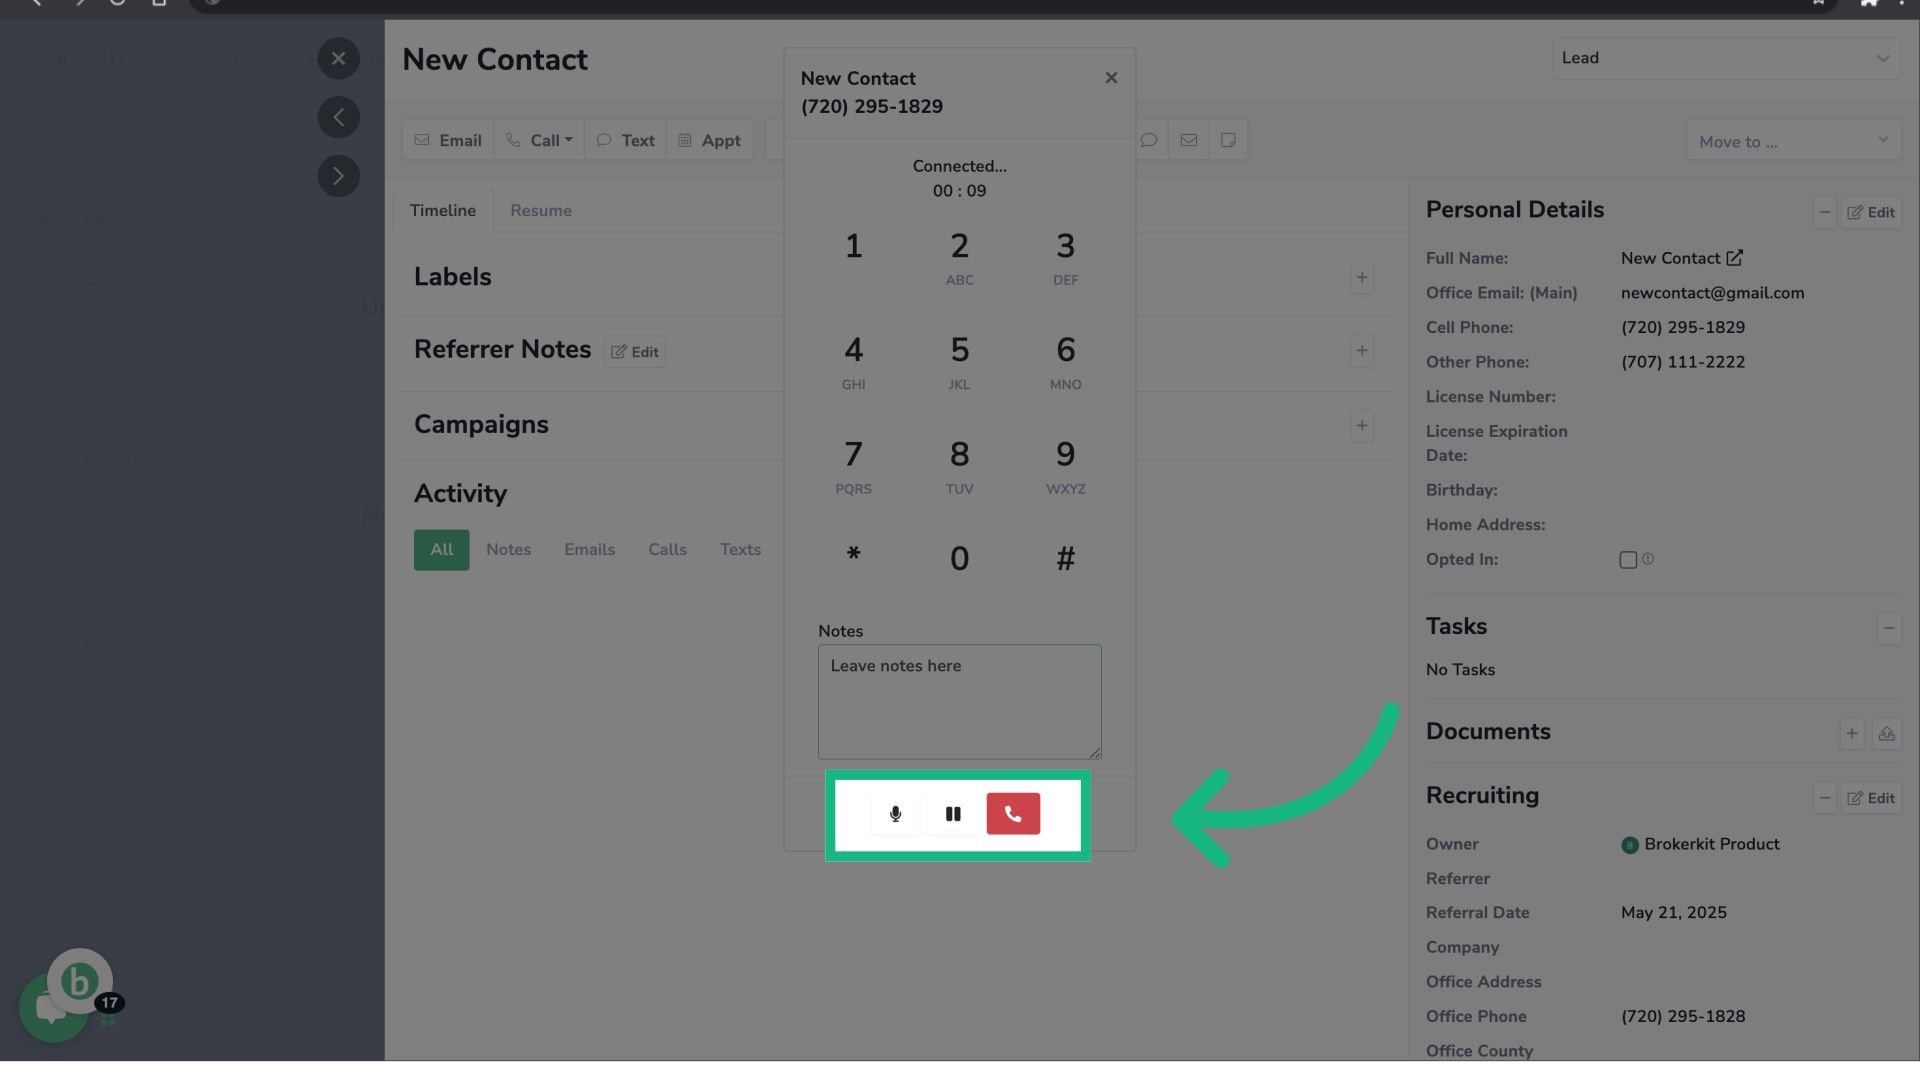
11. Mute, hold or hang up
There's also mute, hold and hang up options.
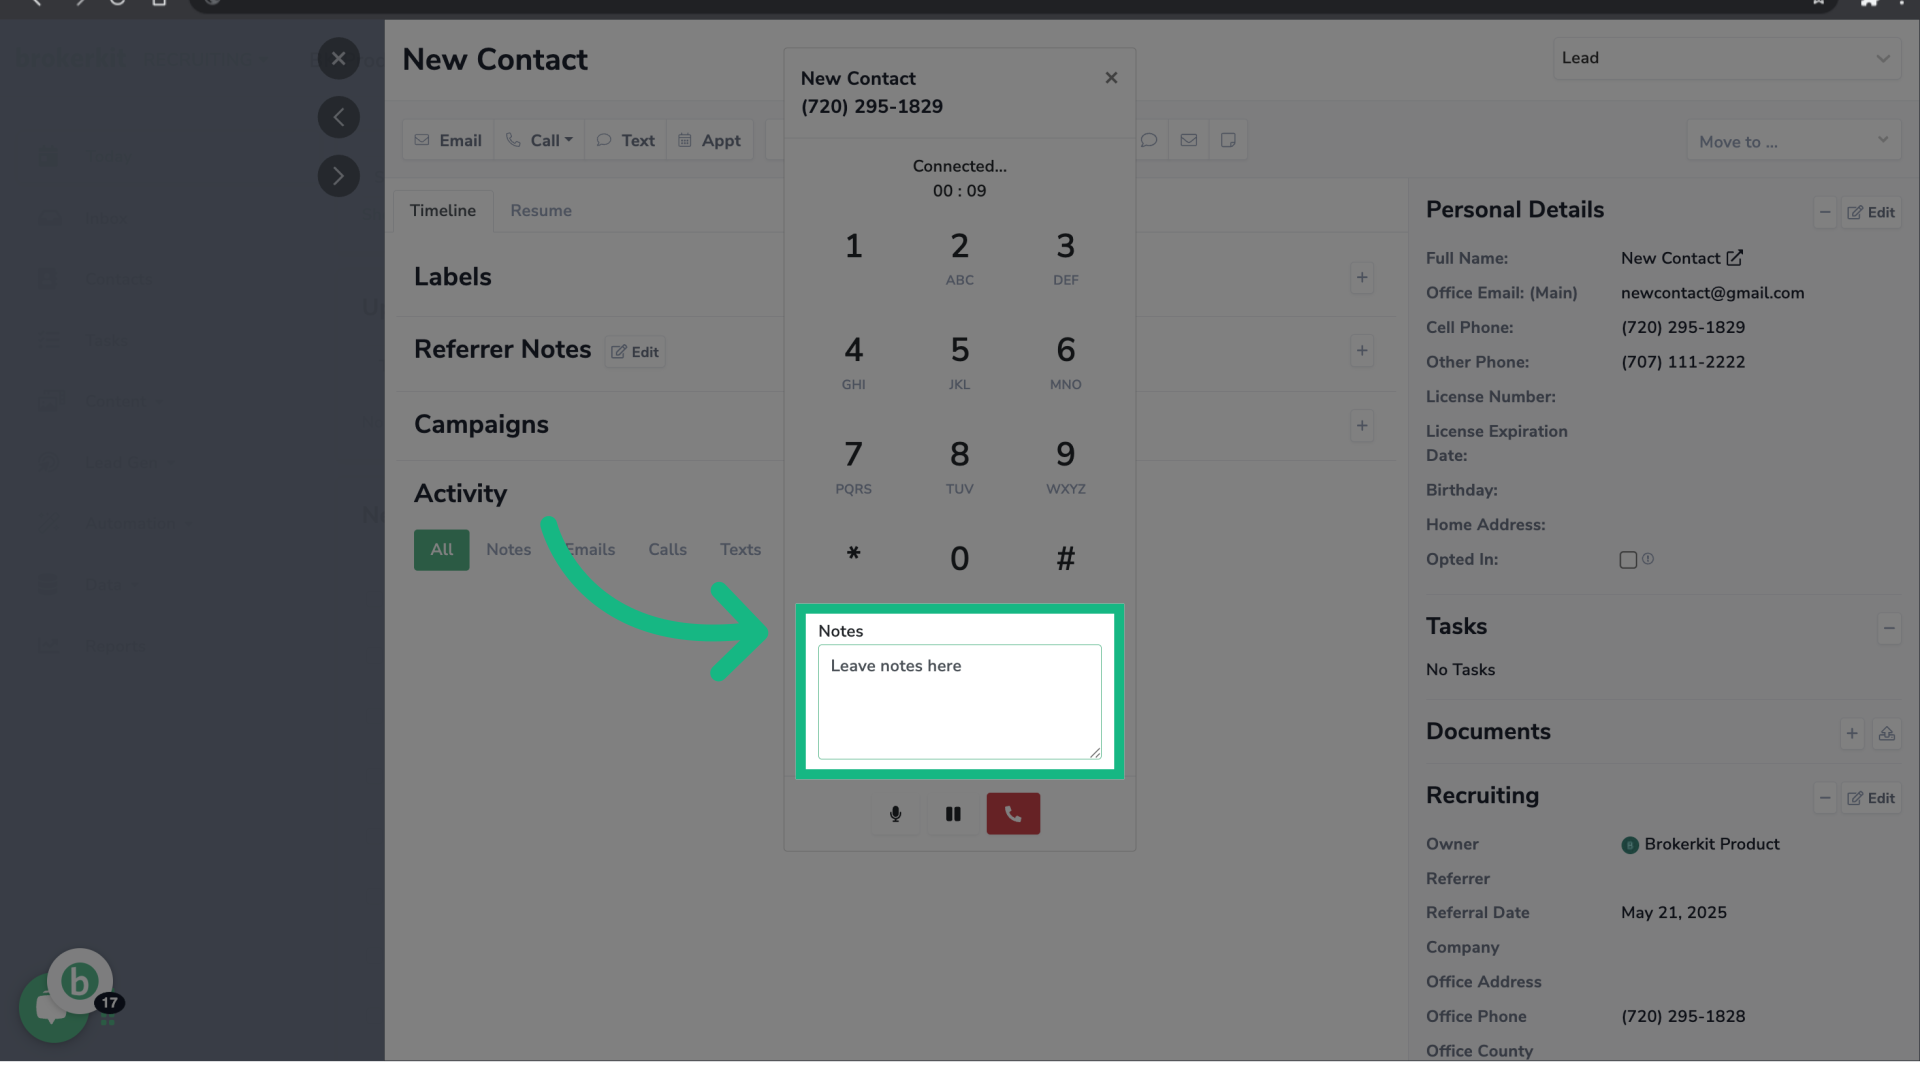
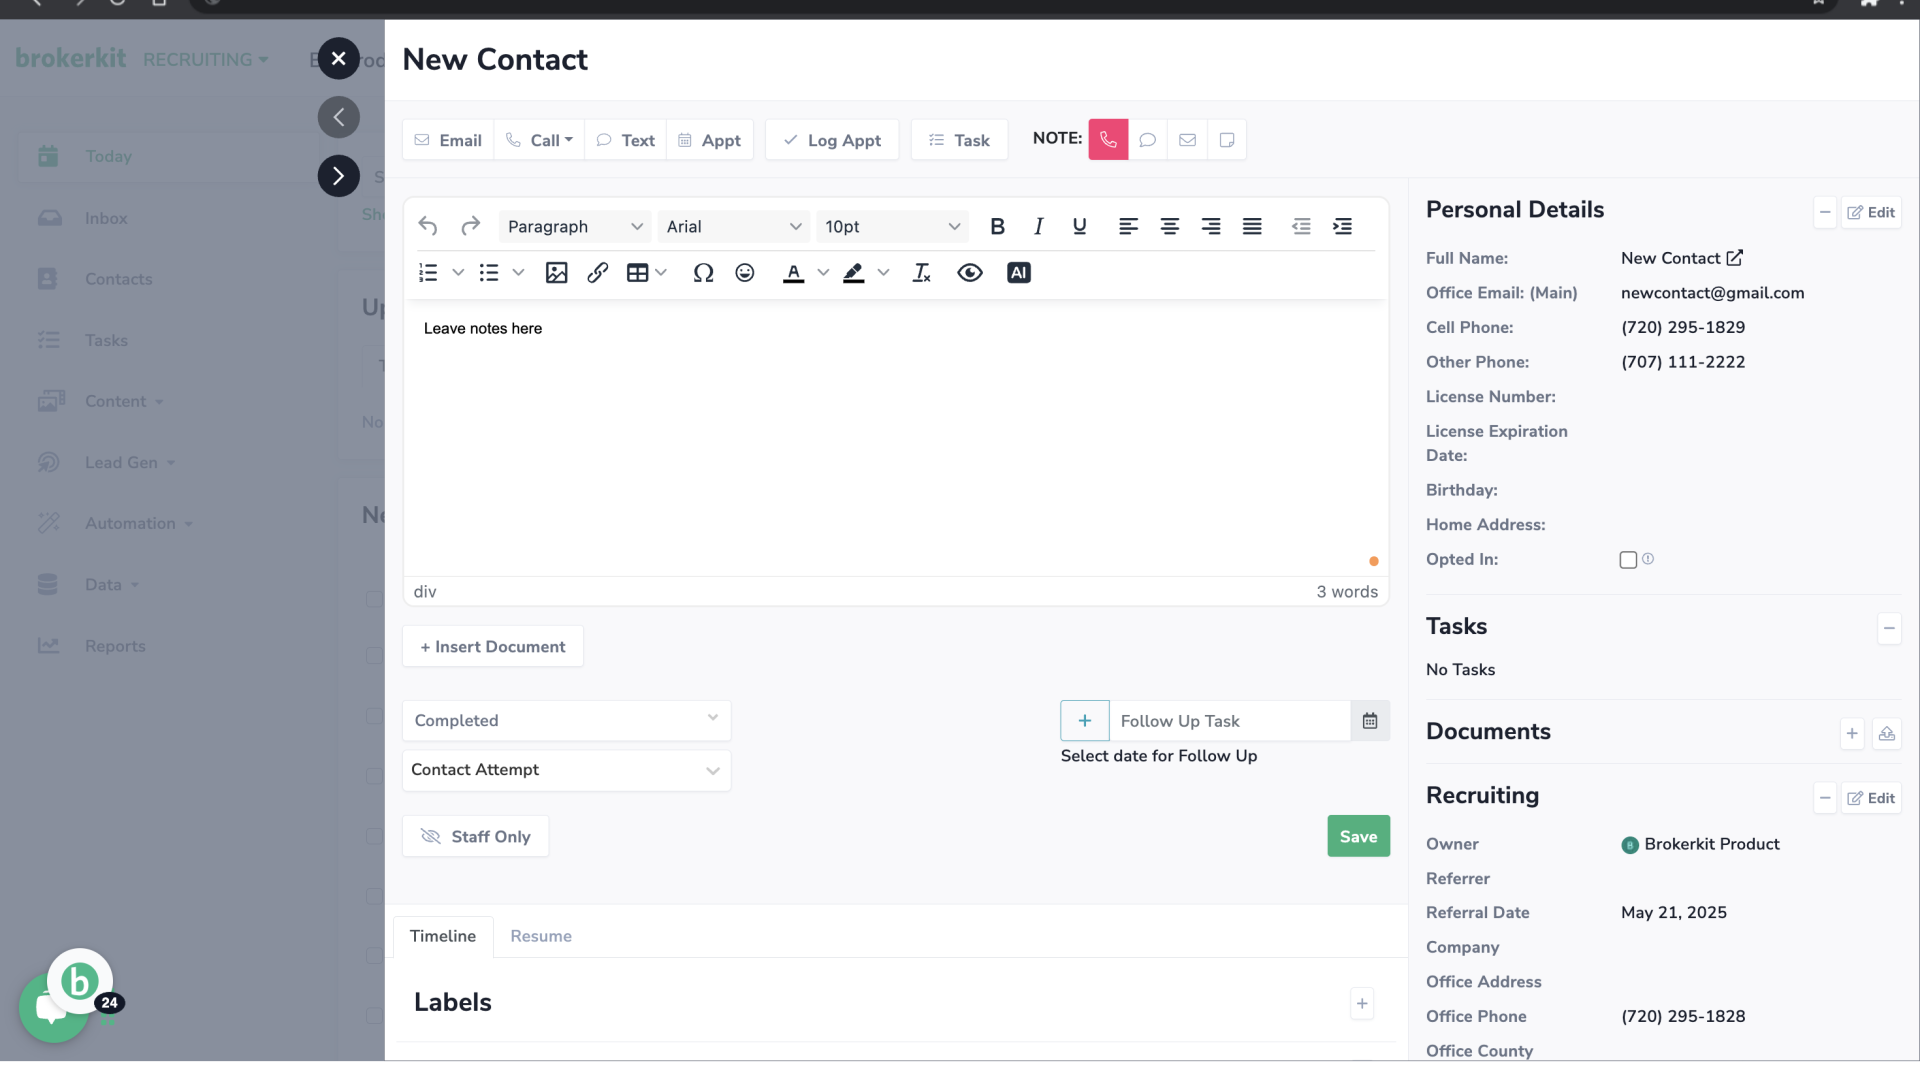
12. Add notes
There's a notes section where you can type any relevant information as you are talking to the contact.
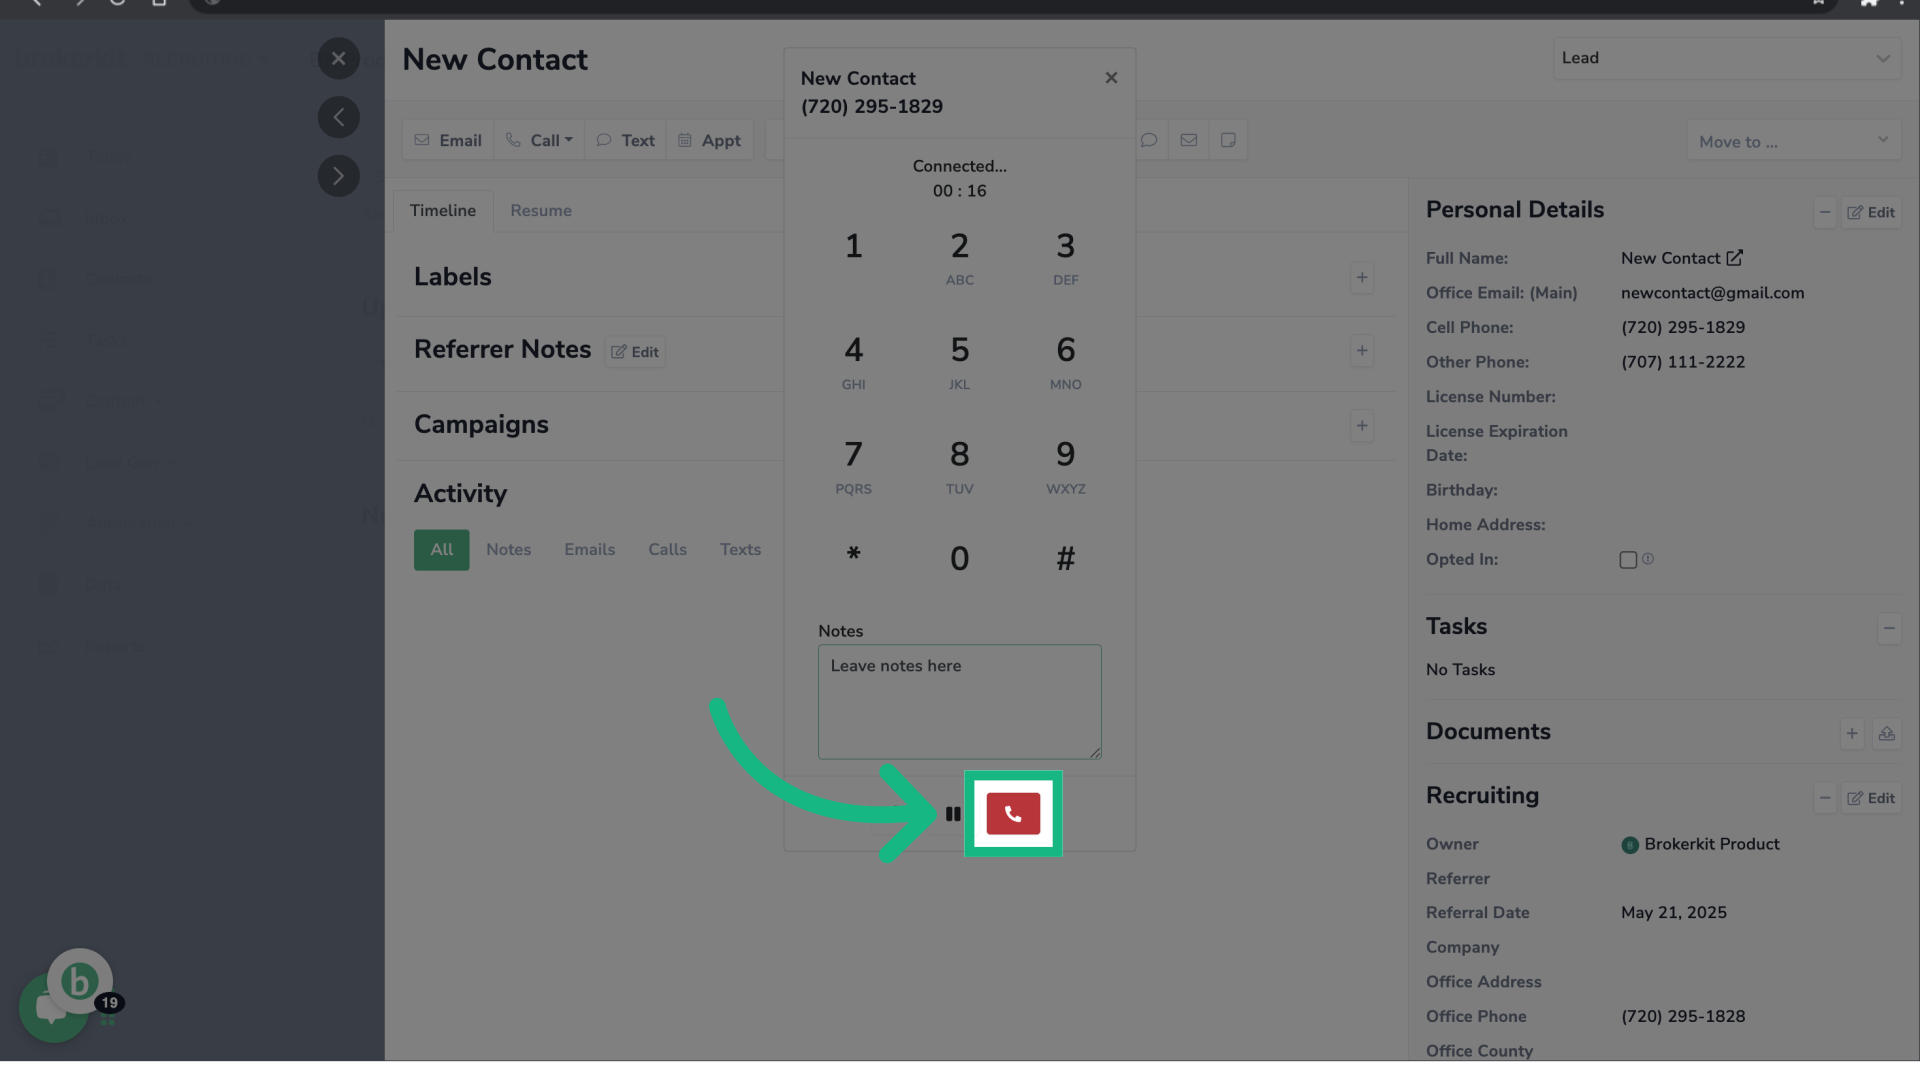
13. End call
To end the call or hang up, click on the red button.
14. Call notes section
Once the call ends, you will be redirected to the call notes sections where you call note will be transferred and you can finish typing your notes.
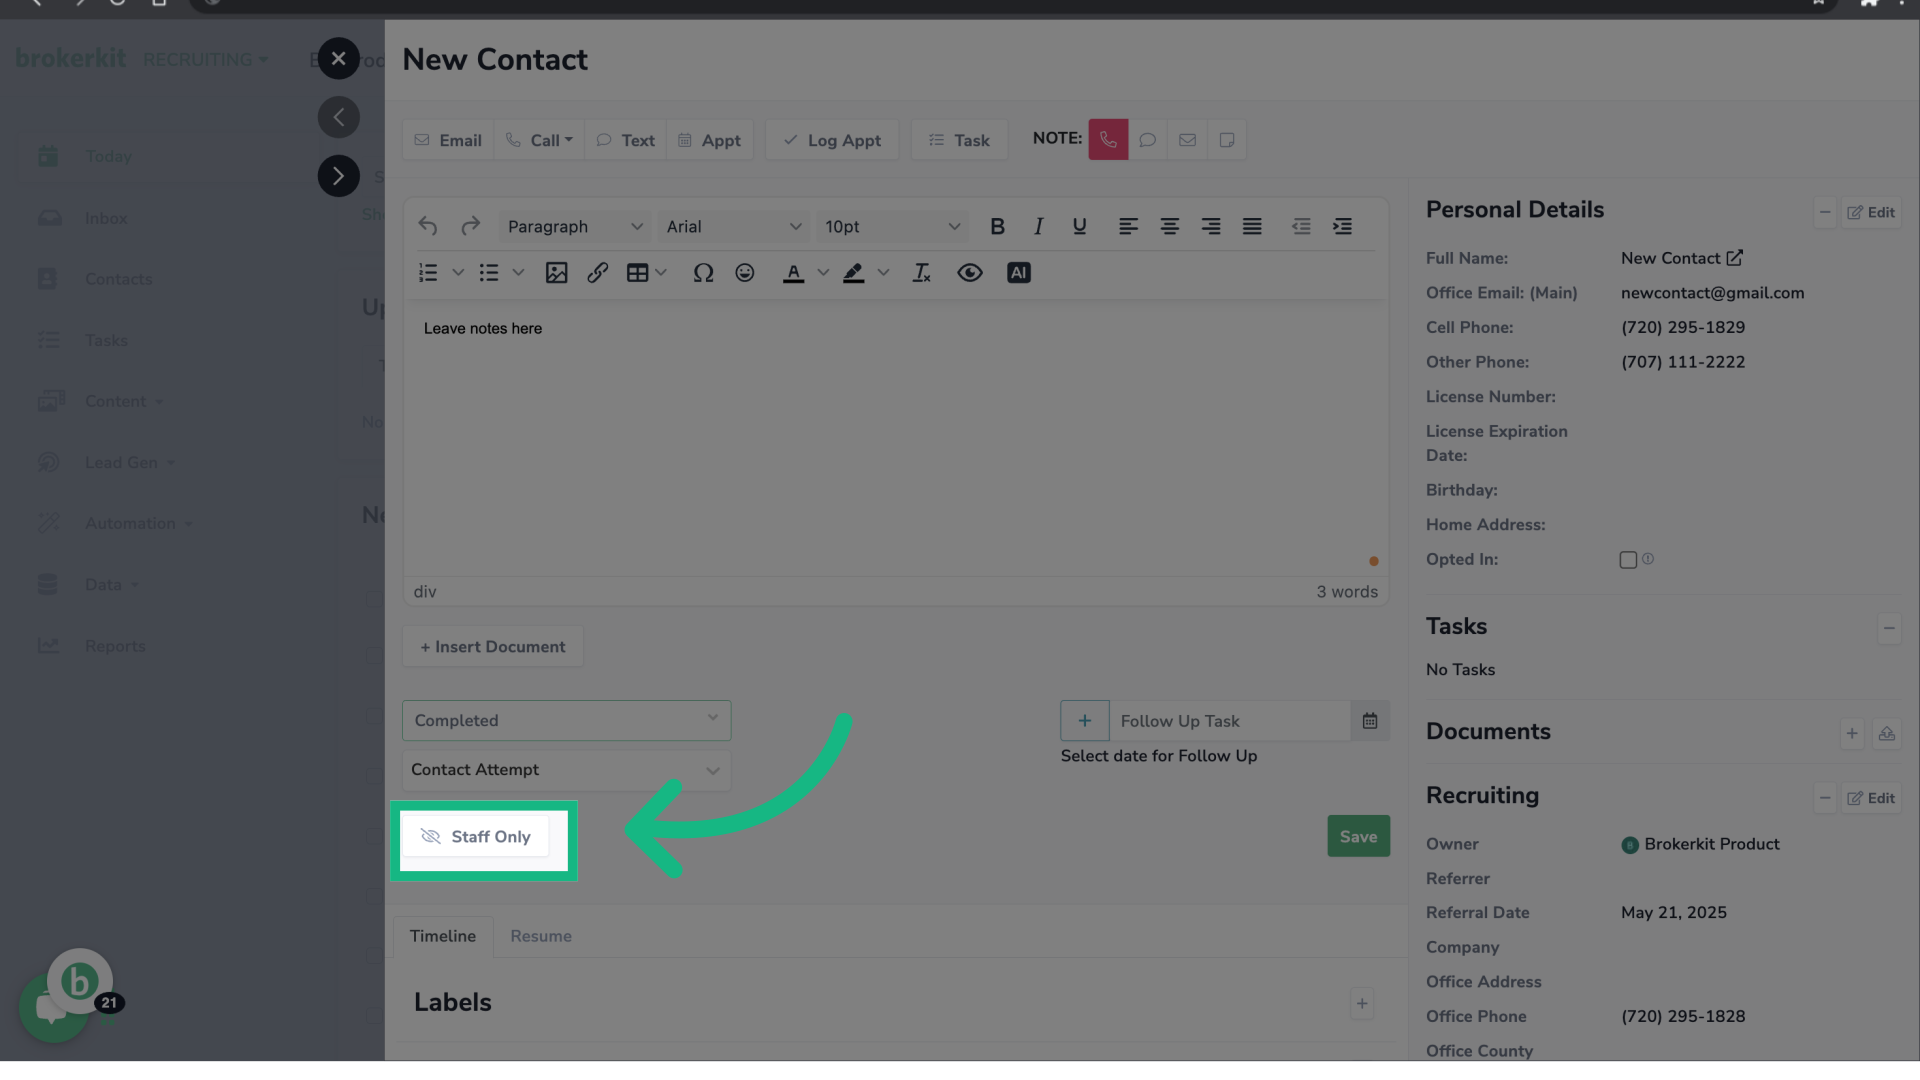
15. Change visibility
If you like, you can change the visibility settings. If the button says Staff only, it will only be shared with your admin and staff users.
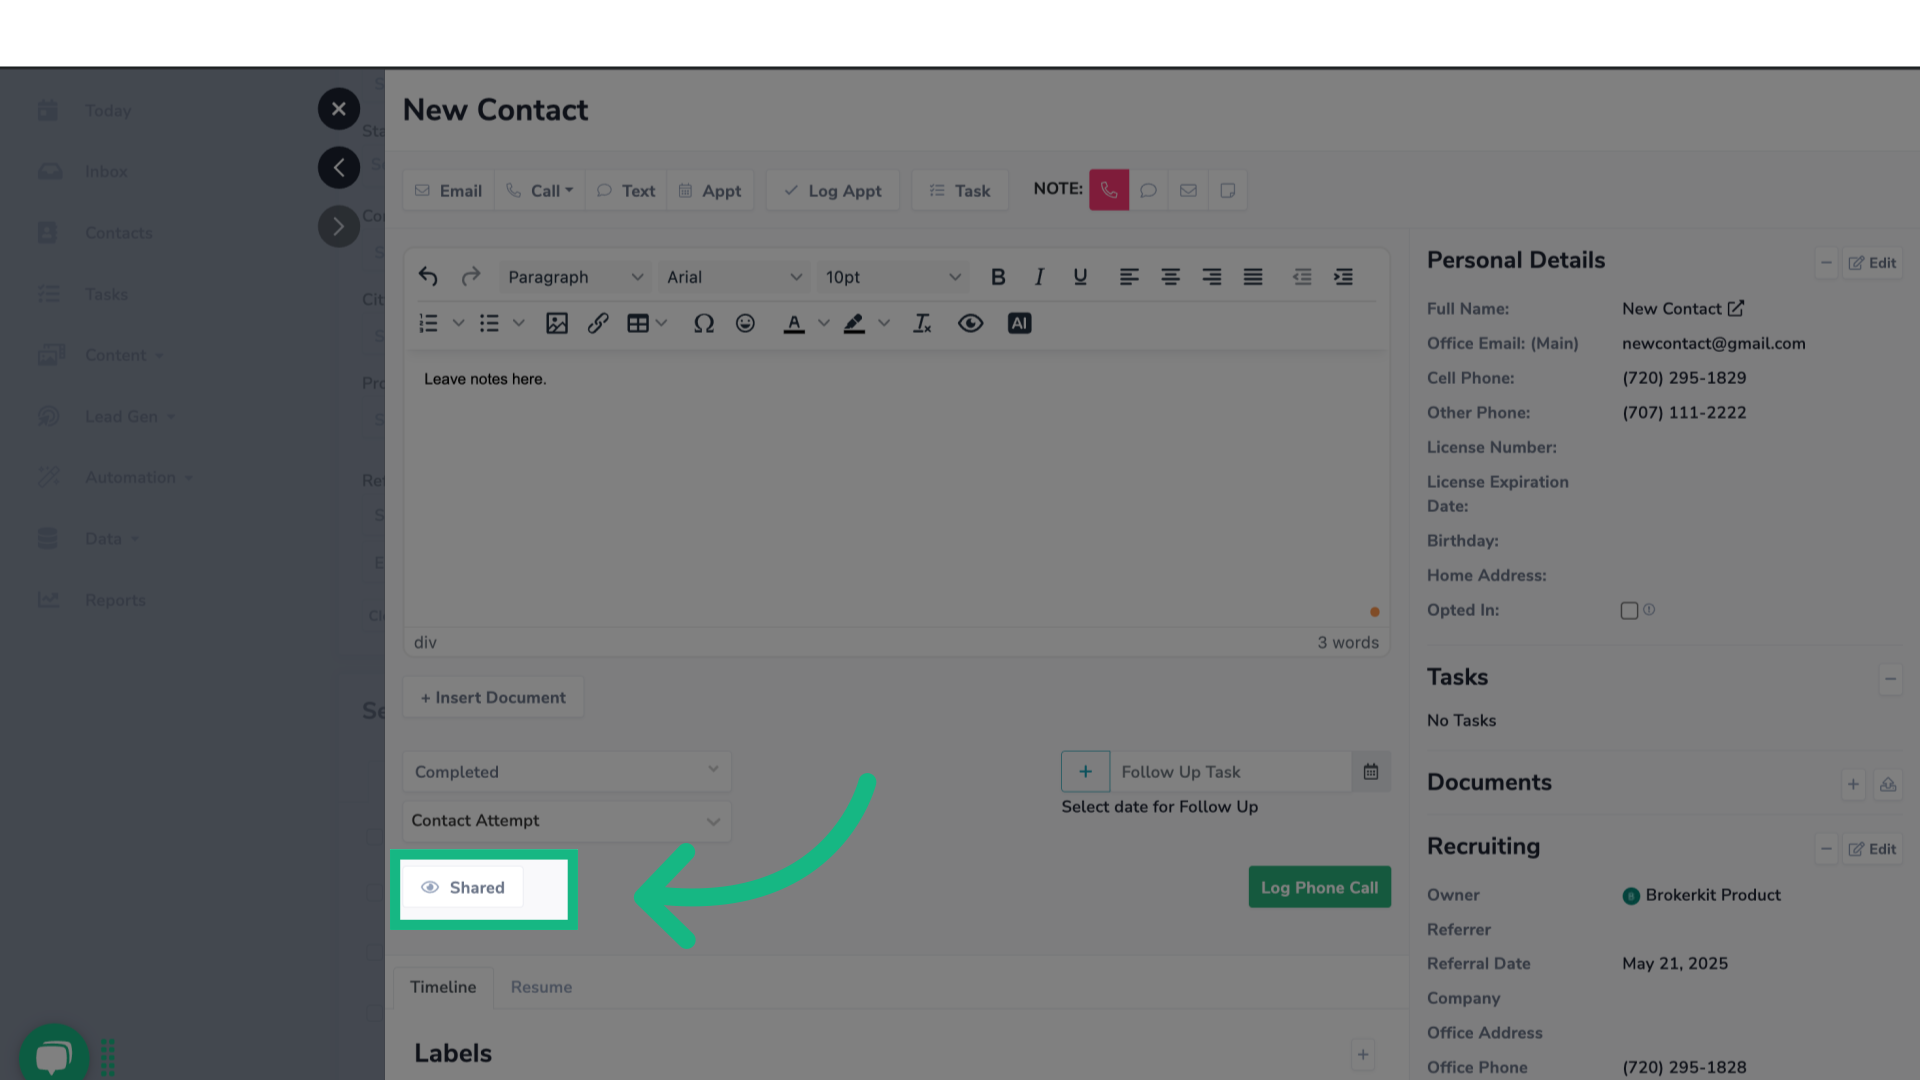
16. Change visibility
But if the button says Shared, it will be shared with any agent or affiliate user who is set as the referrer.
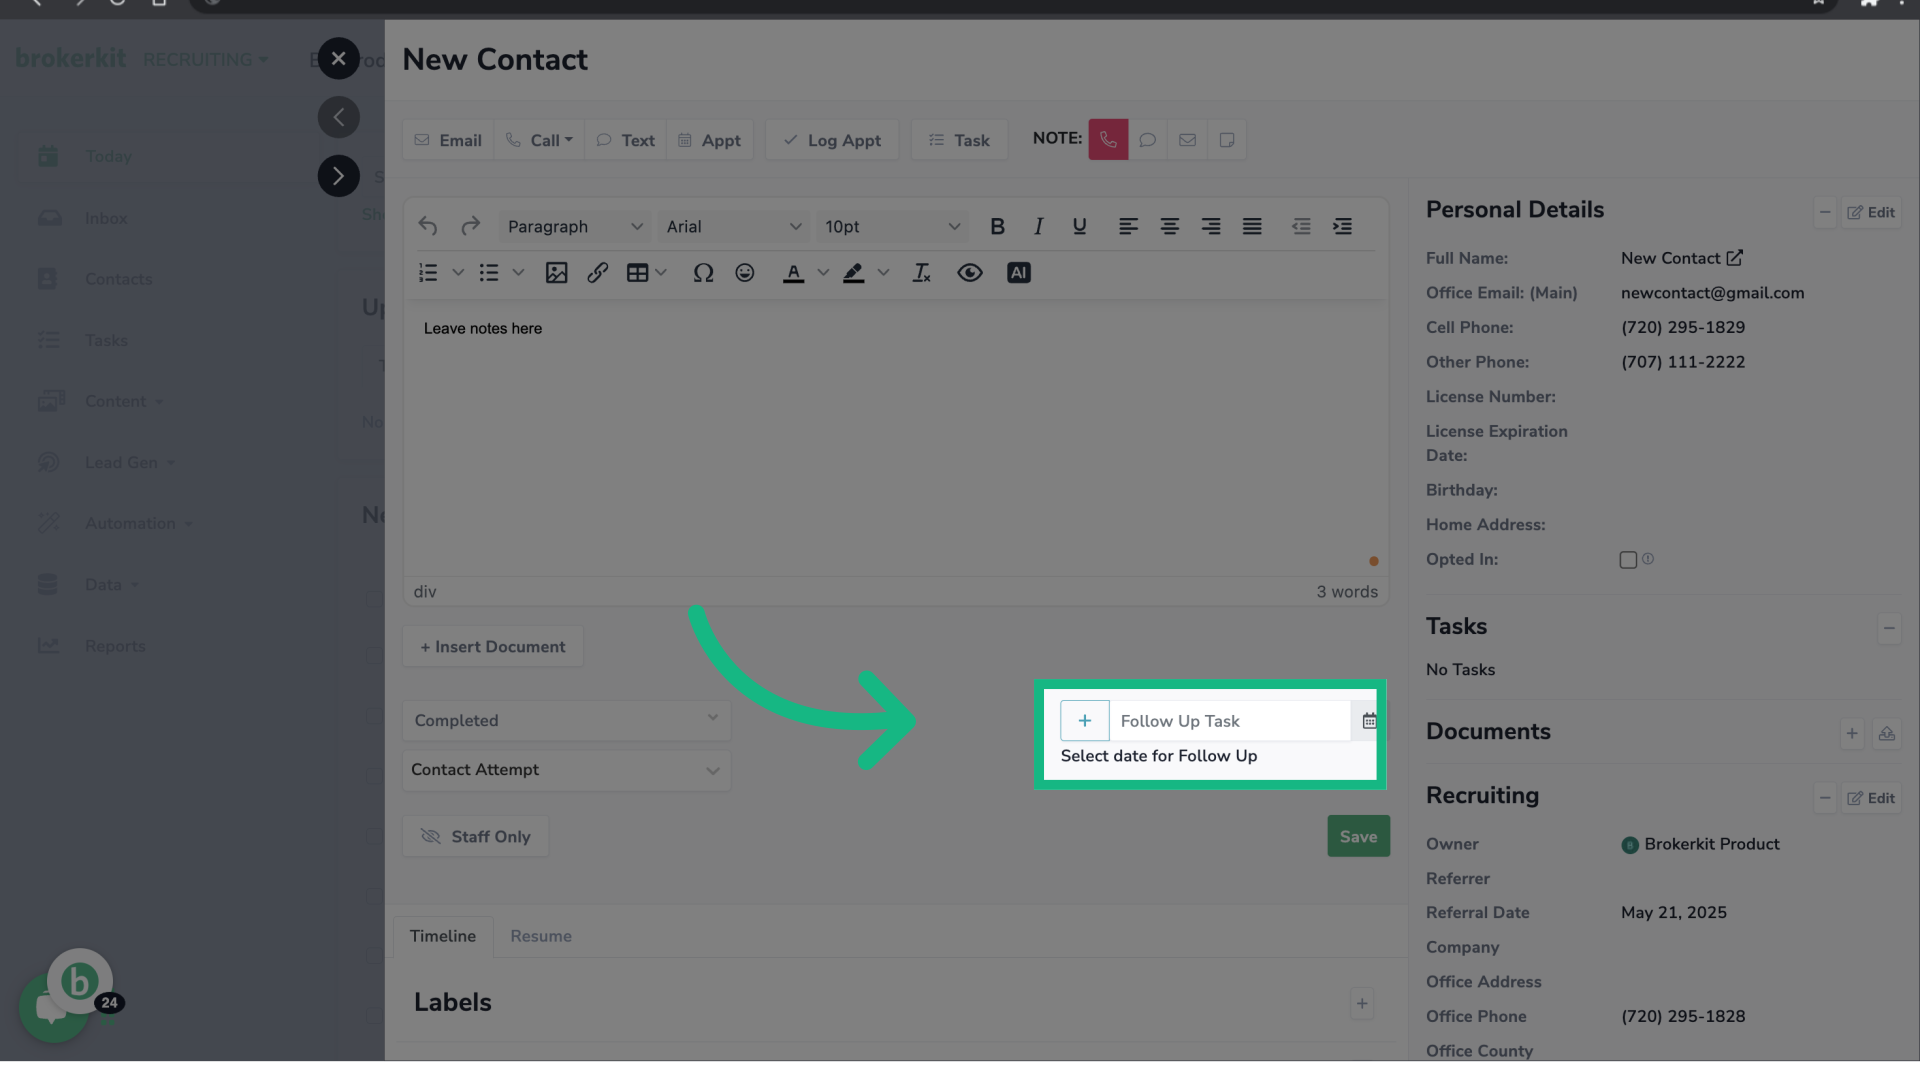
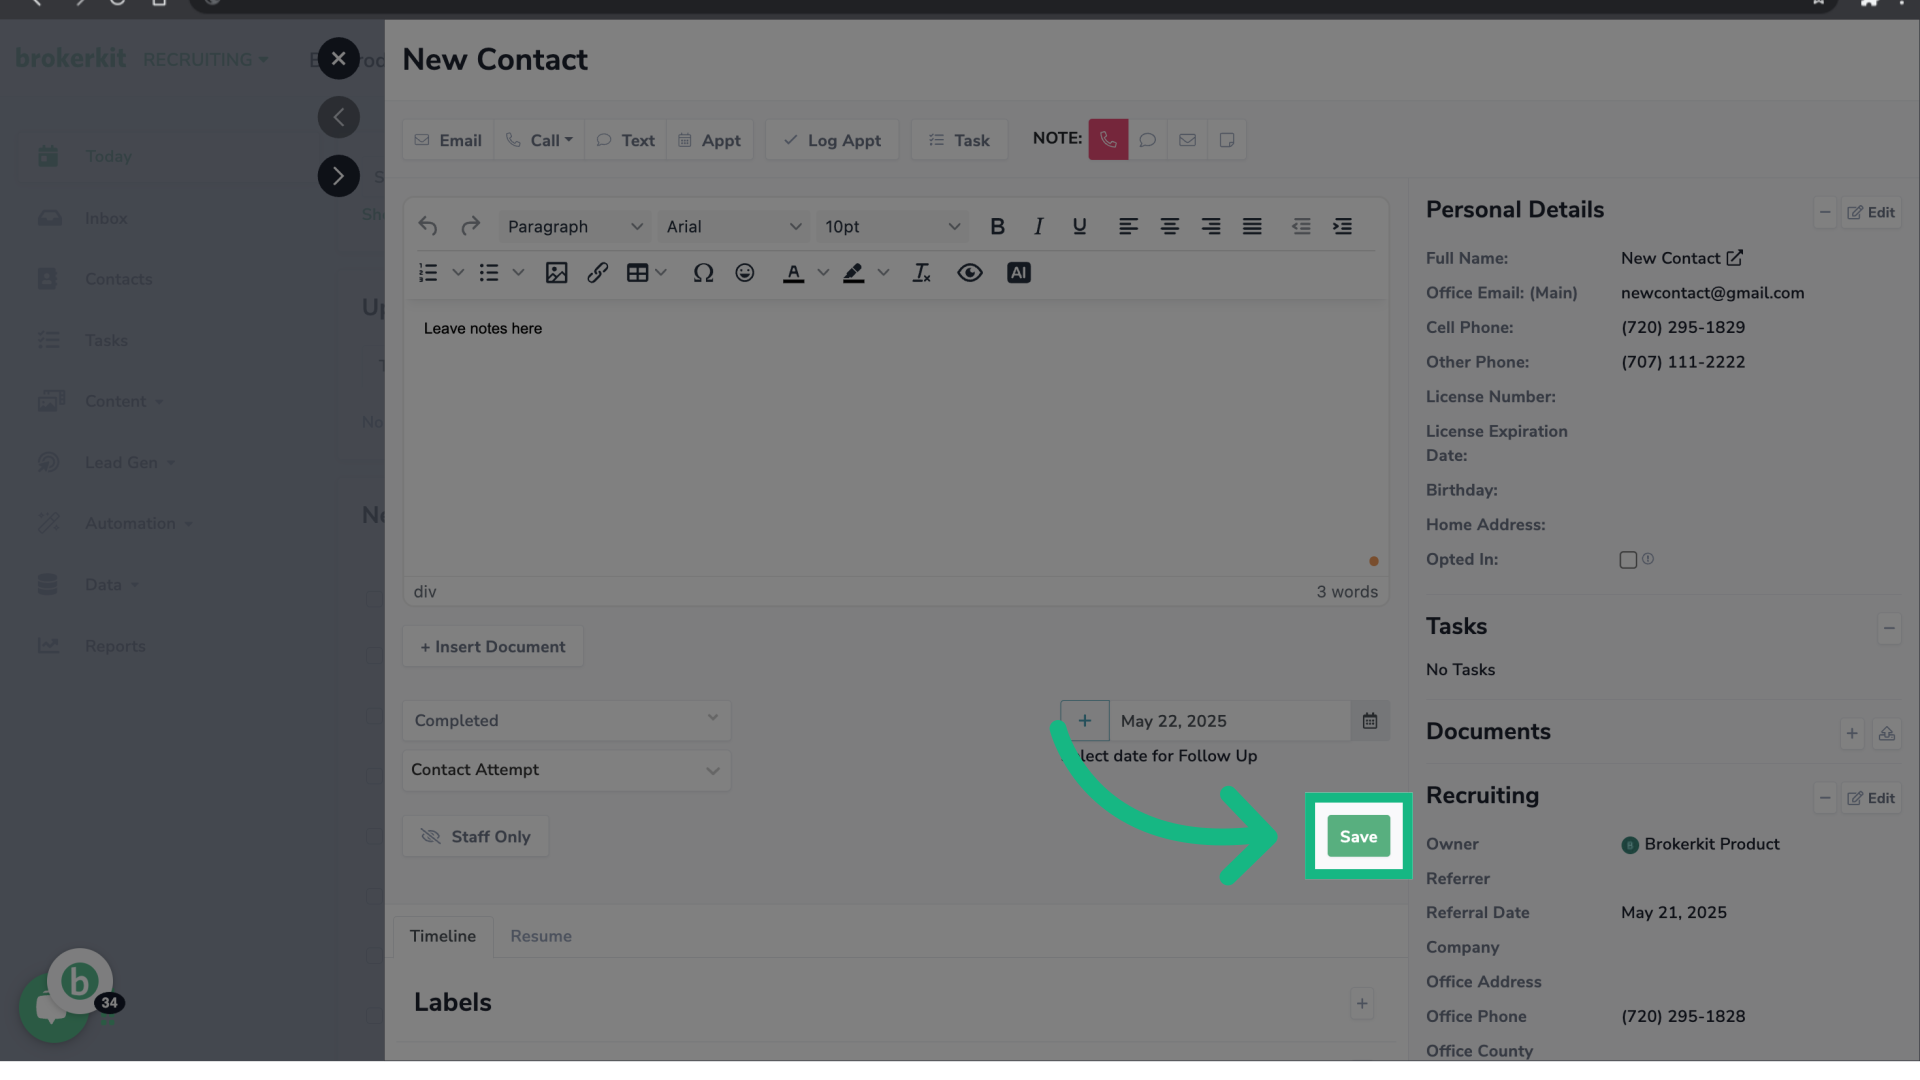
17. Click "+" icon
Is possible to create a Follow-Up Task, click on the plus icon and fill out the task details.
18. Click "Save"
Once you have finished adding your call notes, click save.
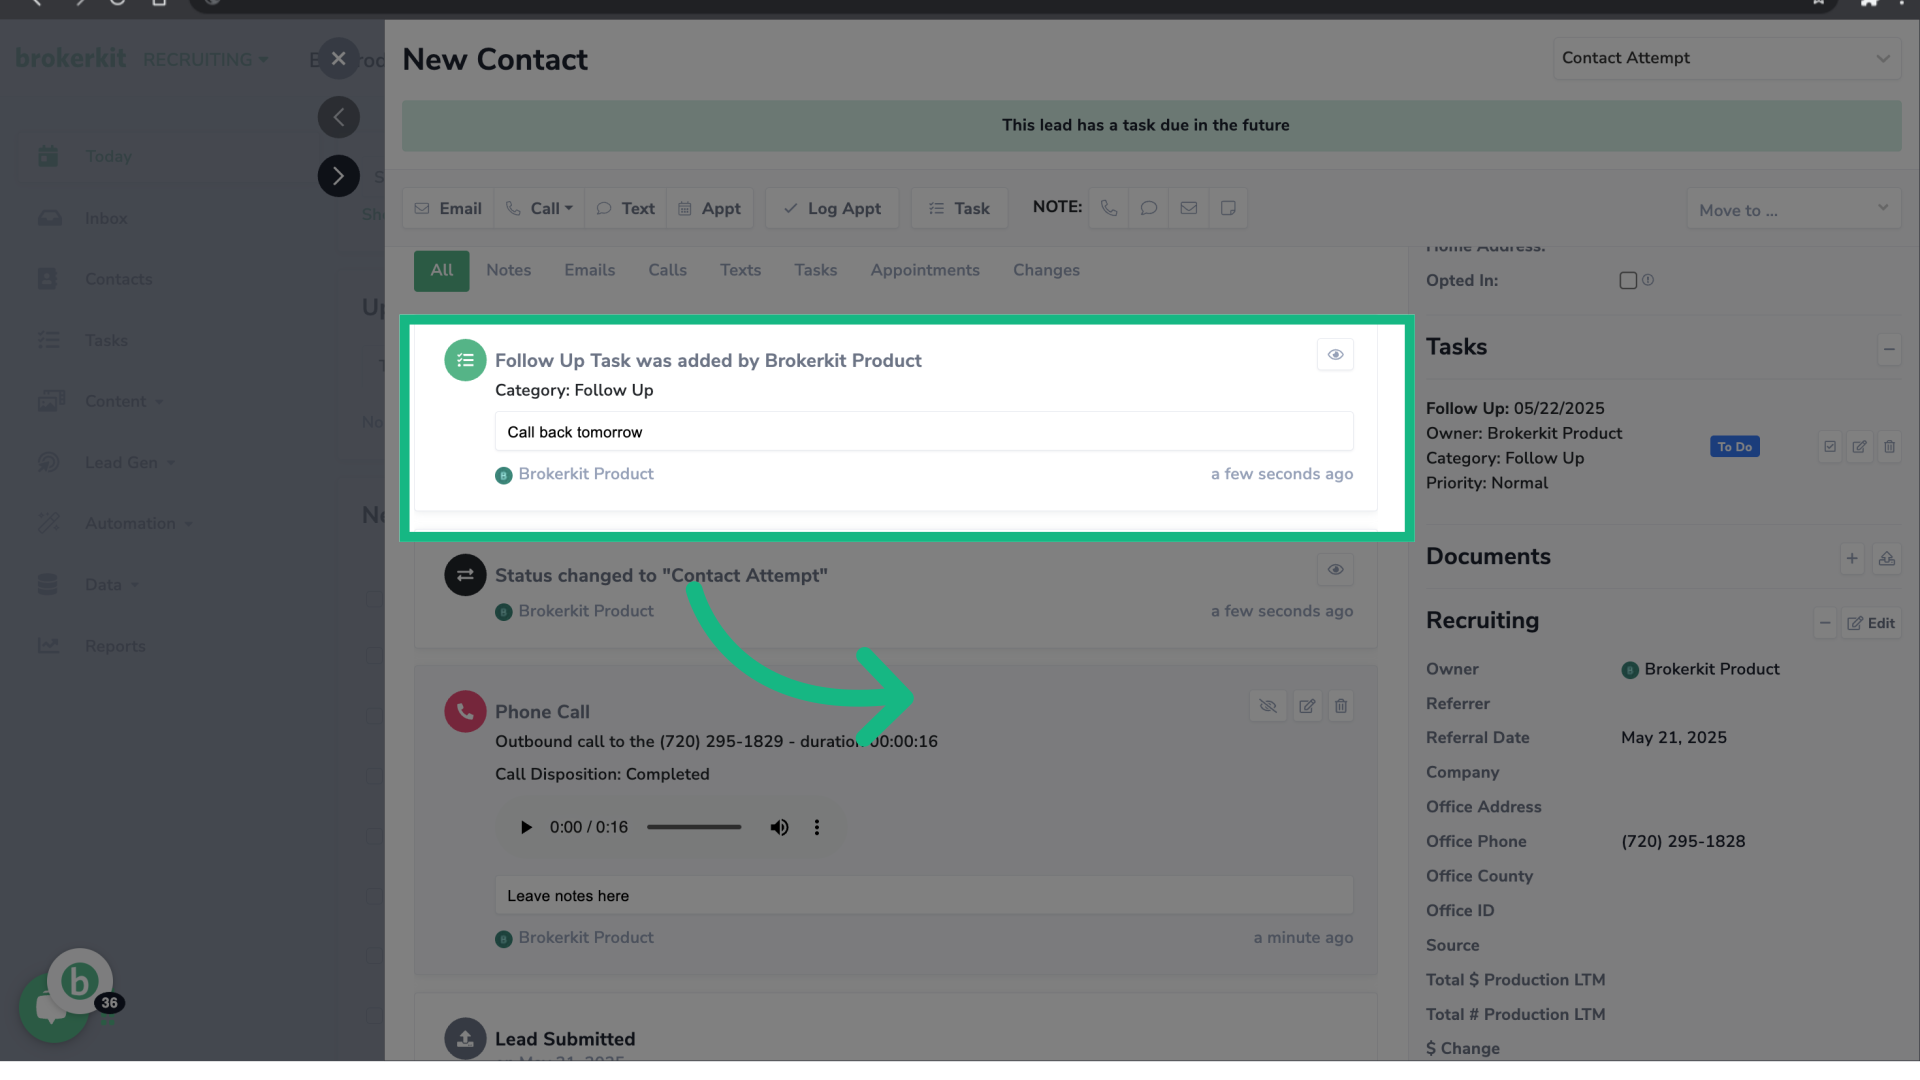
19. Call information logged
The call information, including the disposition and notes, has been logged. Additionally, since call recording was enabled, a recording of the call has also been saved.

20. Task created
The follow up task has also been logged in the contact's profile.
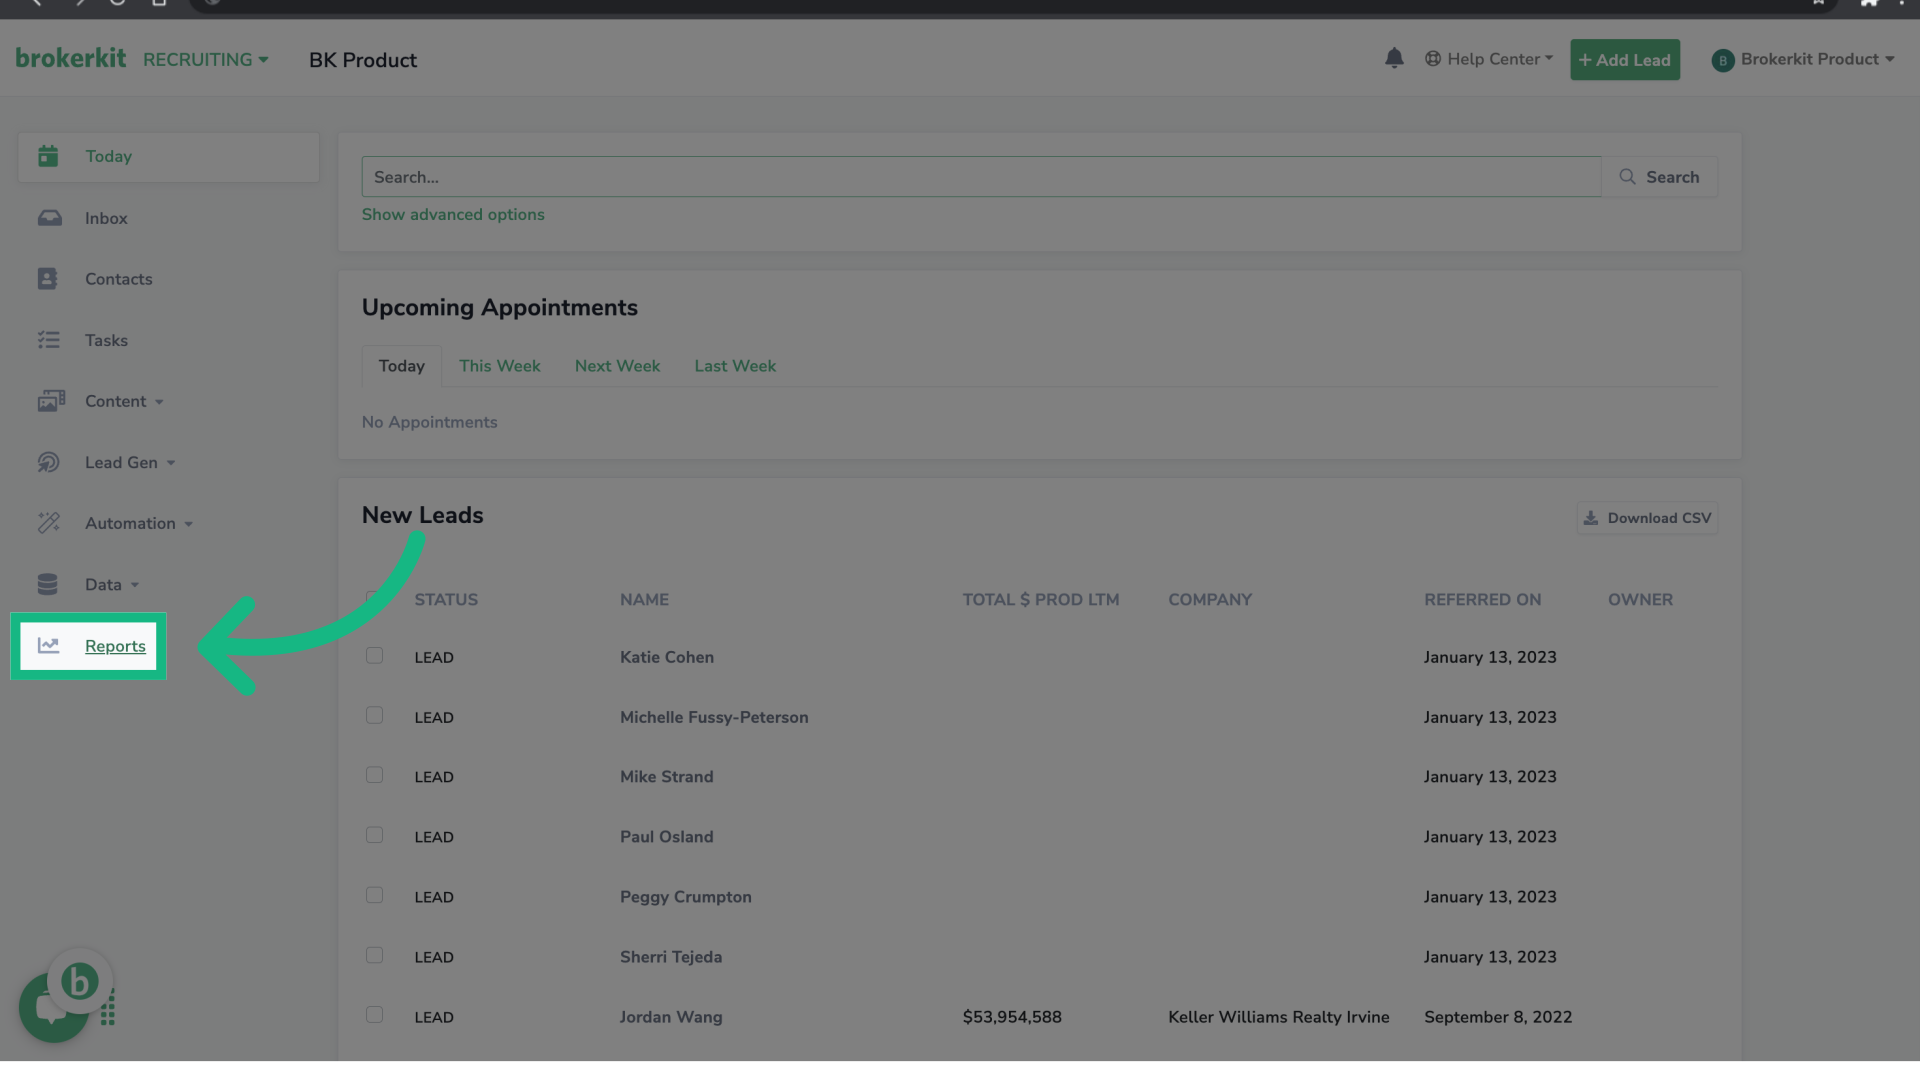
21. How to review the number of calls logged?
Now, let's move on to how to review the number of calls that have been logged.
22. Click "Reports"
To review the number of calls logged you have, go to Reports.
23. Click "Activity"
Select the option Activity.
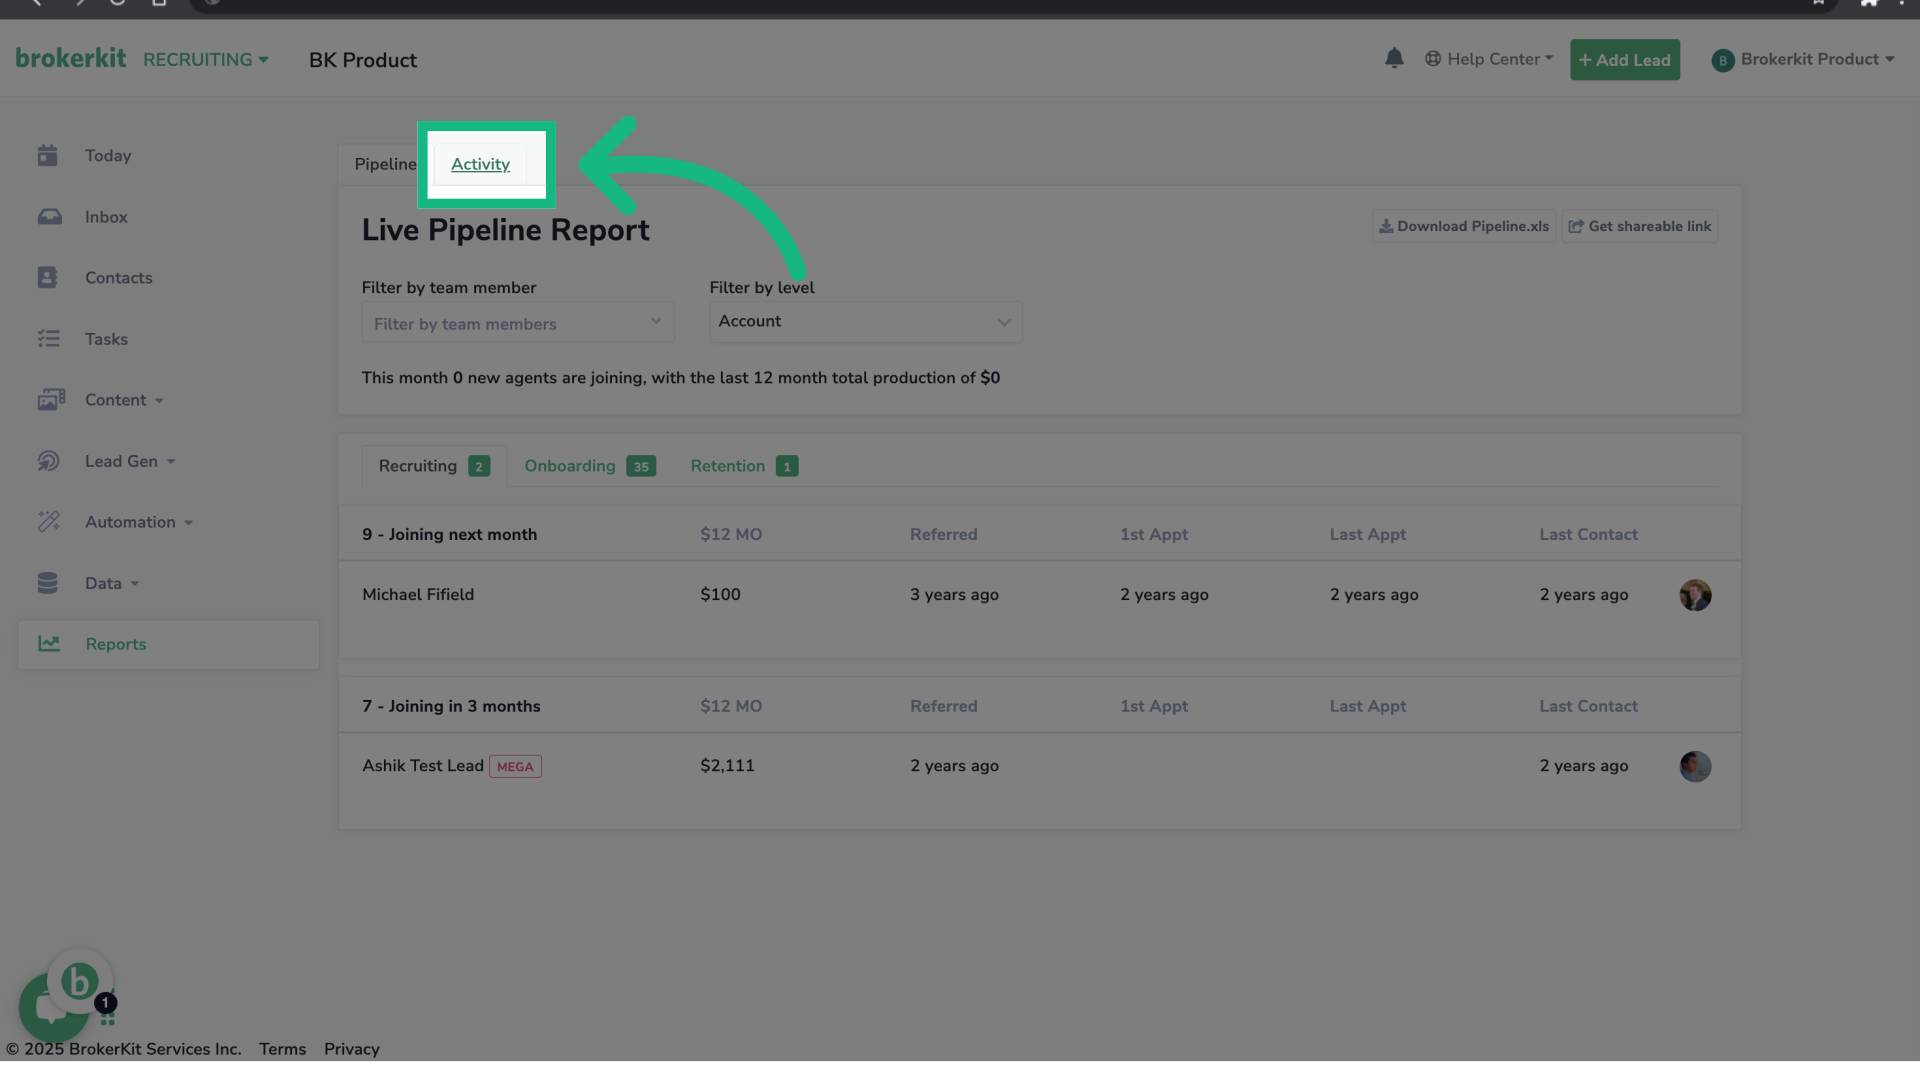
24. Filter by date
You can filter the report by date.
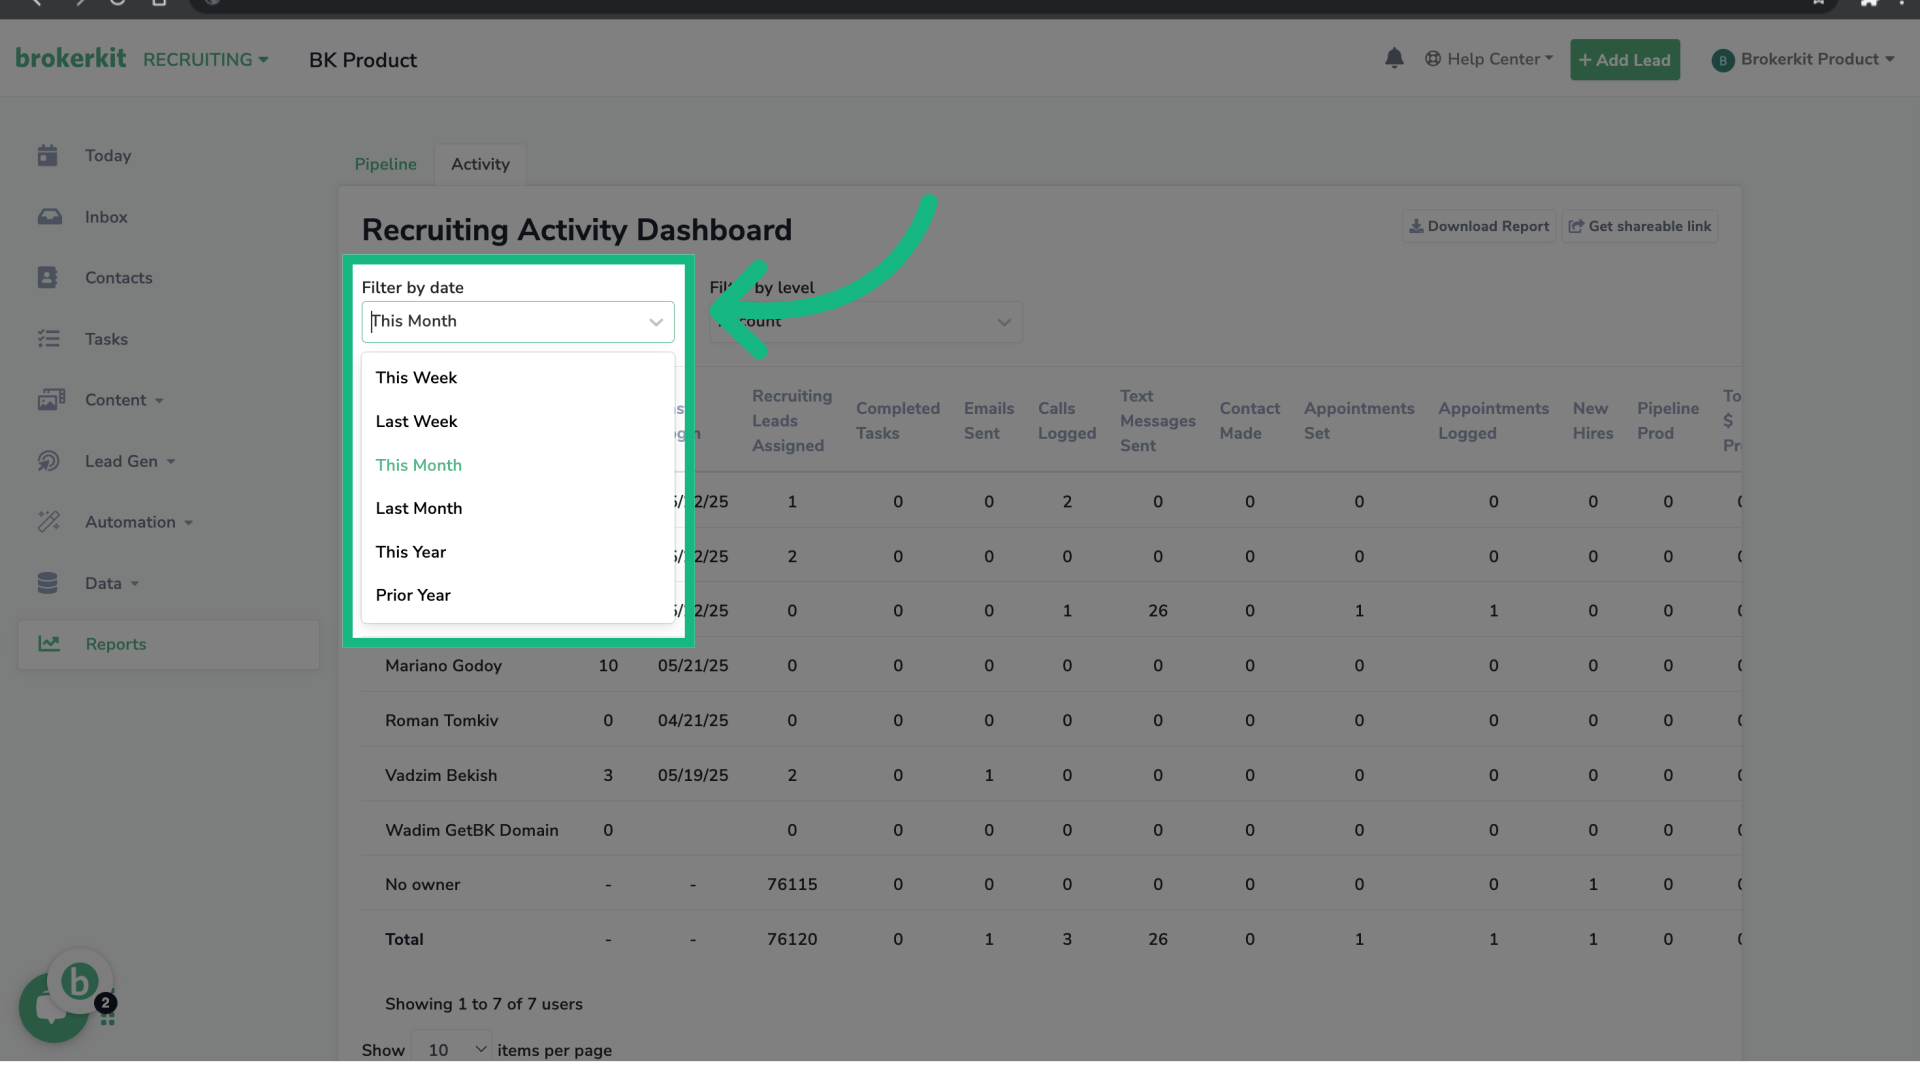
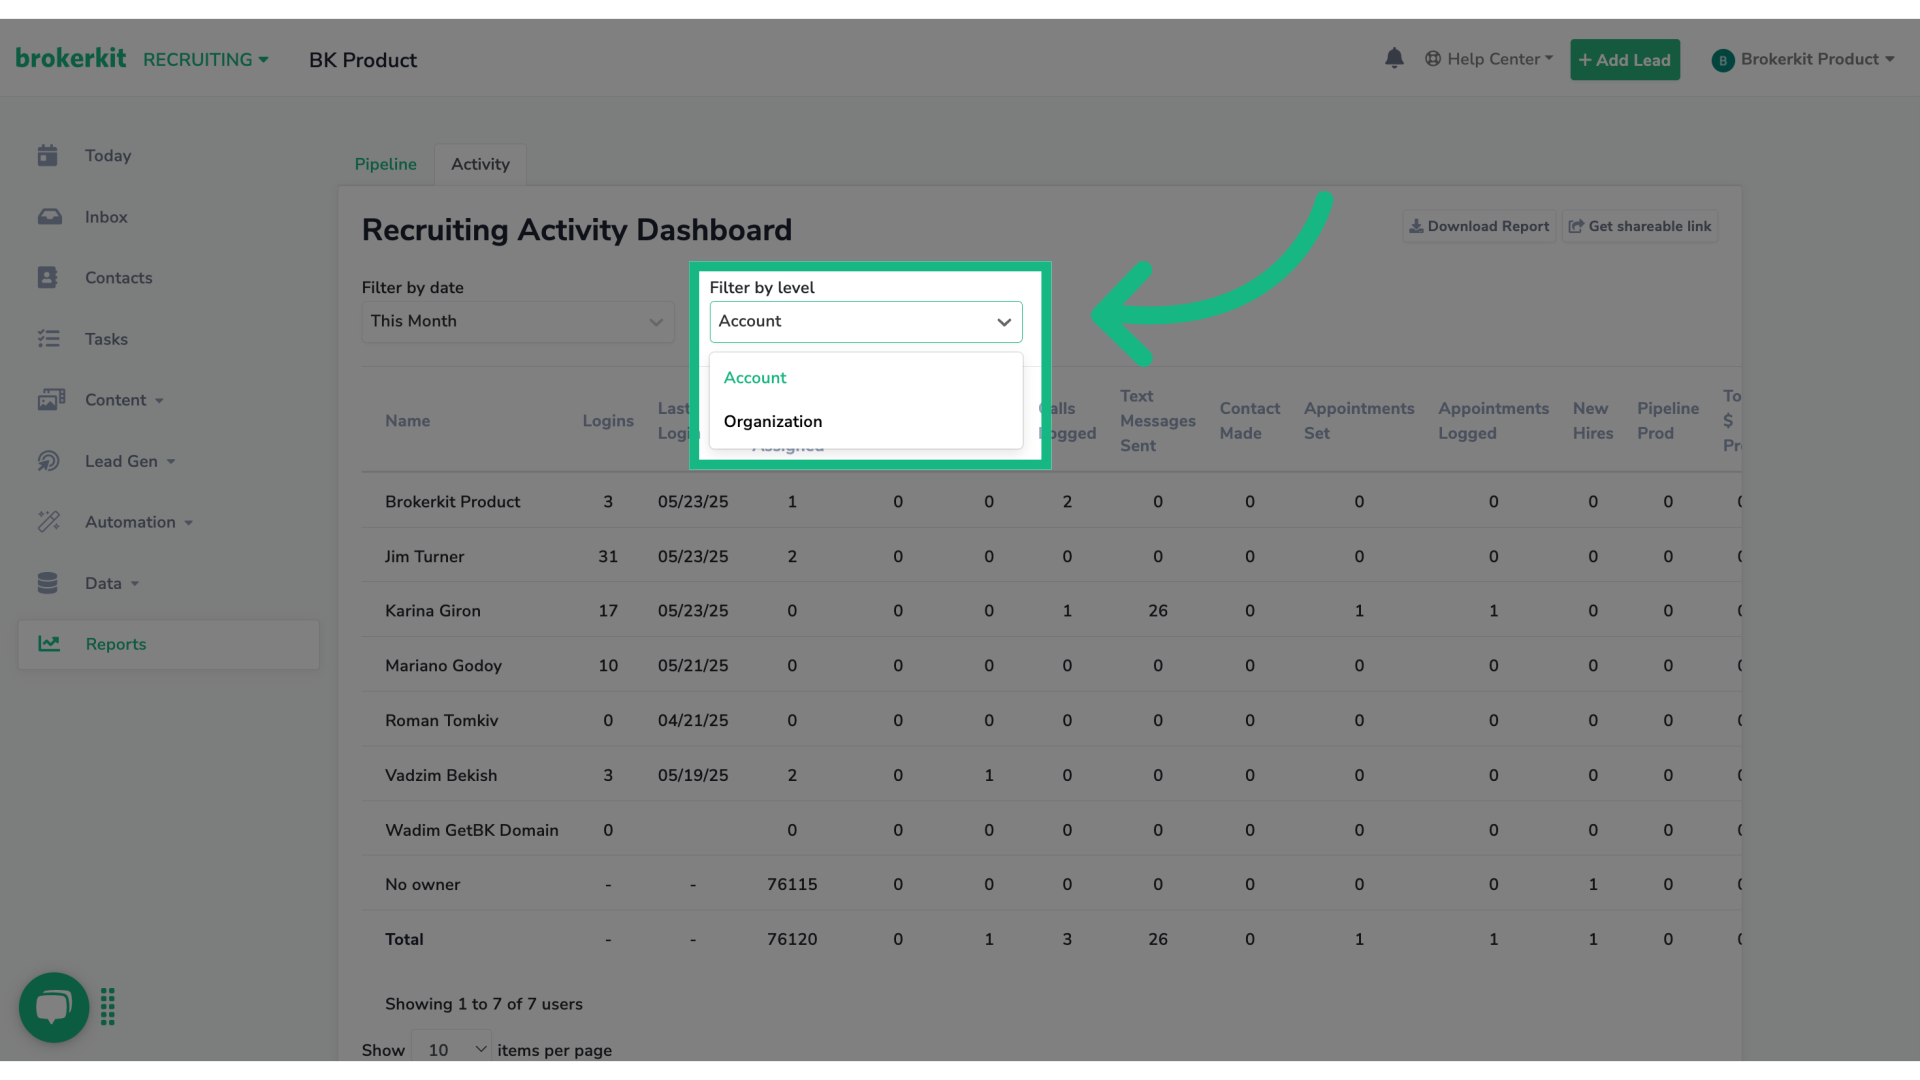
25. Filter by level
And f your account is part of an organization, you can also filter the report by level.
26. Calls Loggged
In this report, you can review the number of calls logged based on the filters you have selected.

How to find the contacts you recently called?
The Reports > Activity screen shows the number of calls logged, but not the individual contacts. There are two ways to find the actual people you called or need to call:
Option 1: Use the Last Activity filter
- Go to the Recruiting or Retention screen.
- Click the Search bar, then click Show Advanced Options.
- Use the Last Activity filter and select a date range (e.g., last 7 days).
- This will show all contacts you (or your team) recently interacted with, including logged calls, texts, individual emails, and notes.
Option 2: Use Call Tasks for organized calling
You can create call tasks to track who you need to call and who you have already called:
- Filter or search for the contacts you want to call (e.g., by label, status, or city).
- Bulk select them and add a task with the category Call.
- Go to the Tasks screen and filter on call tasks.
- Use the date range filter to see upcoming calls you still need to make, or past calls you have completed.
This approach is great for structured calling sessions - pick 30 minutes or an hour, filter your call tasks, and work through them. You can also filter for contacts you have not had a call task with in a certain period to identify who needs a follow-up.
For more details on filtering contacts, see Segmenting your Data with Advanced Search/Filter.
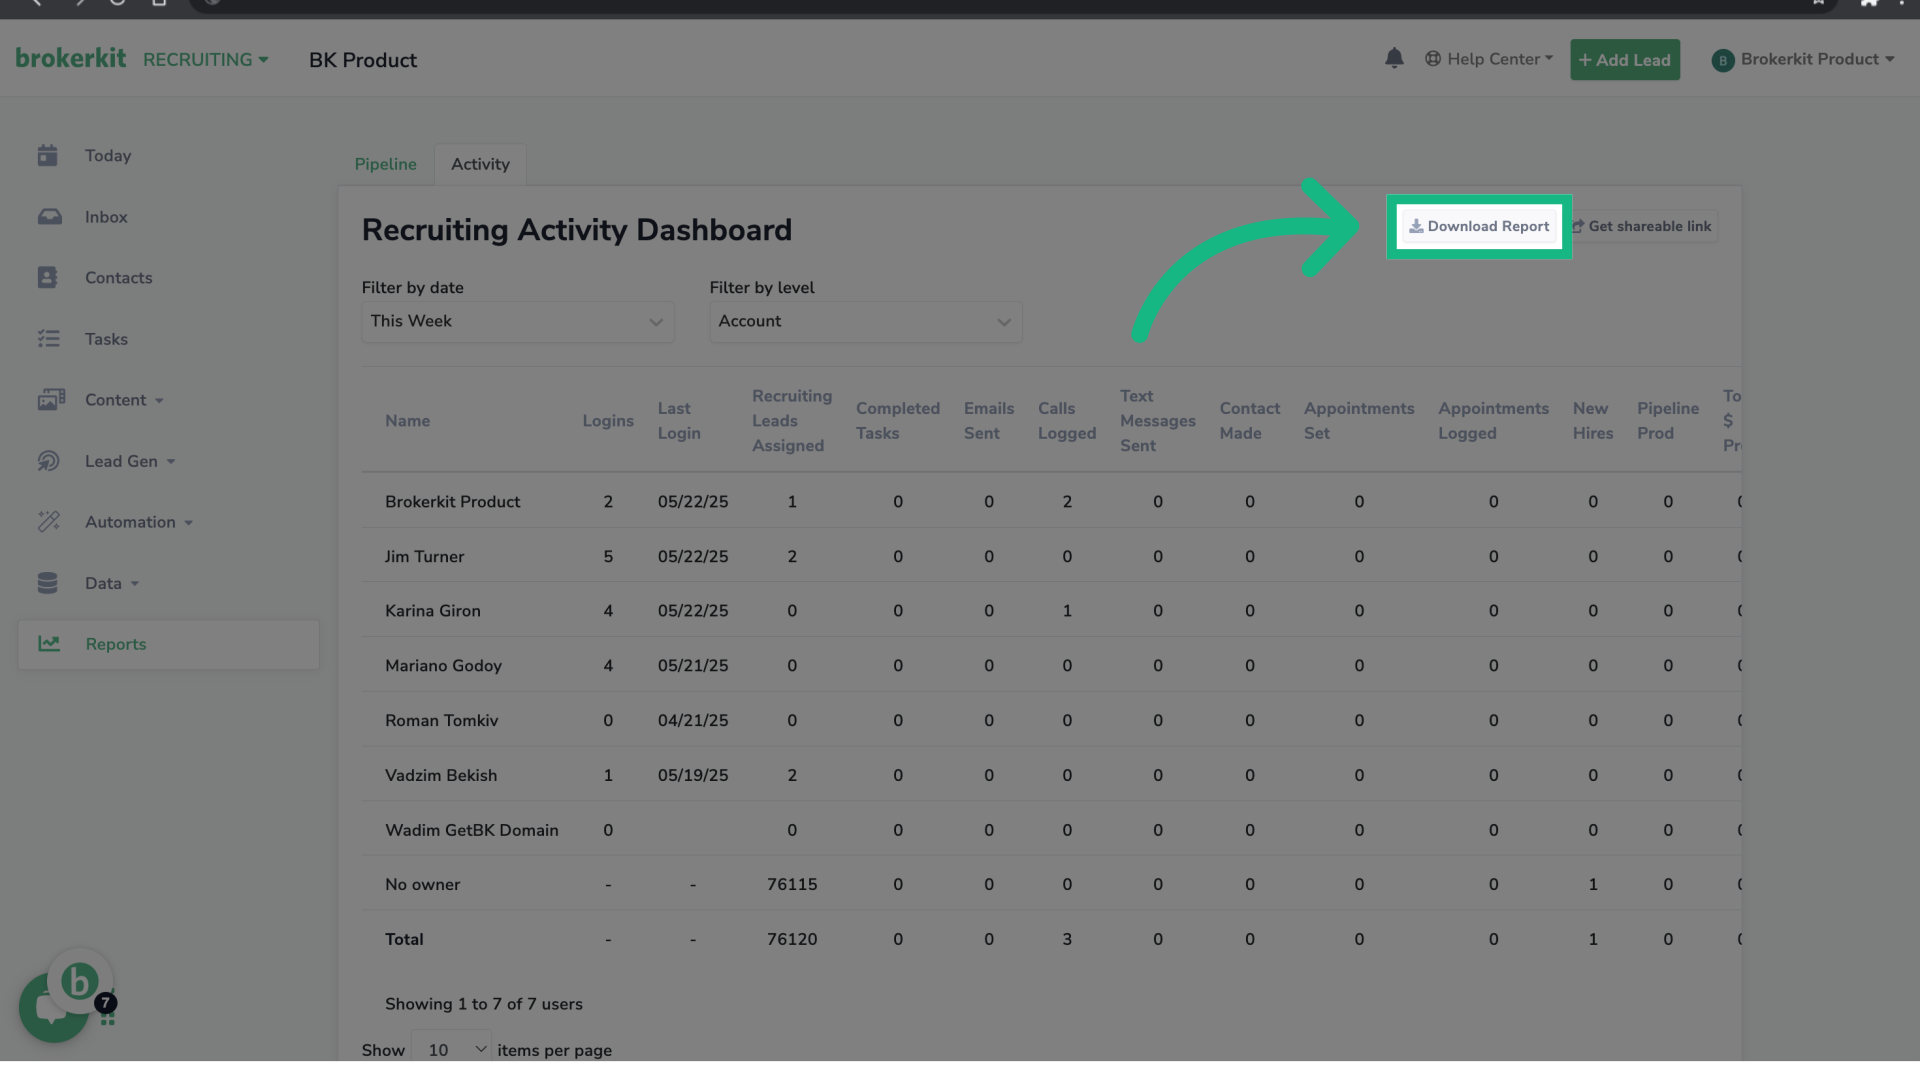
27. Click "Download Report"
To export your report for offline analysis, click the button Download report on the right top corner.
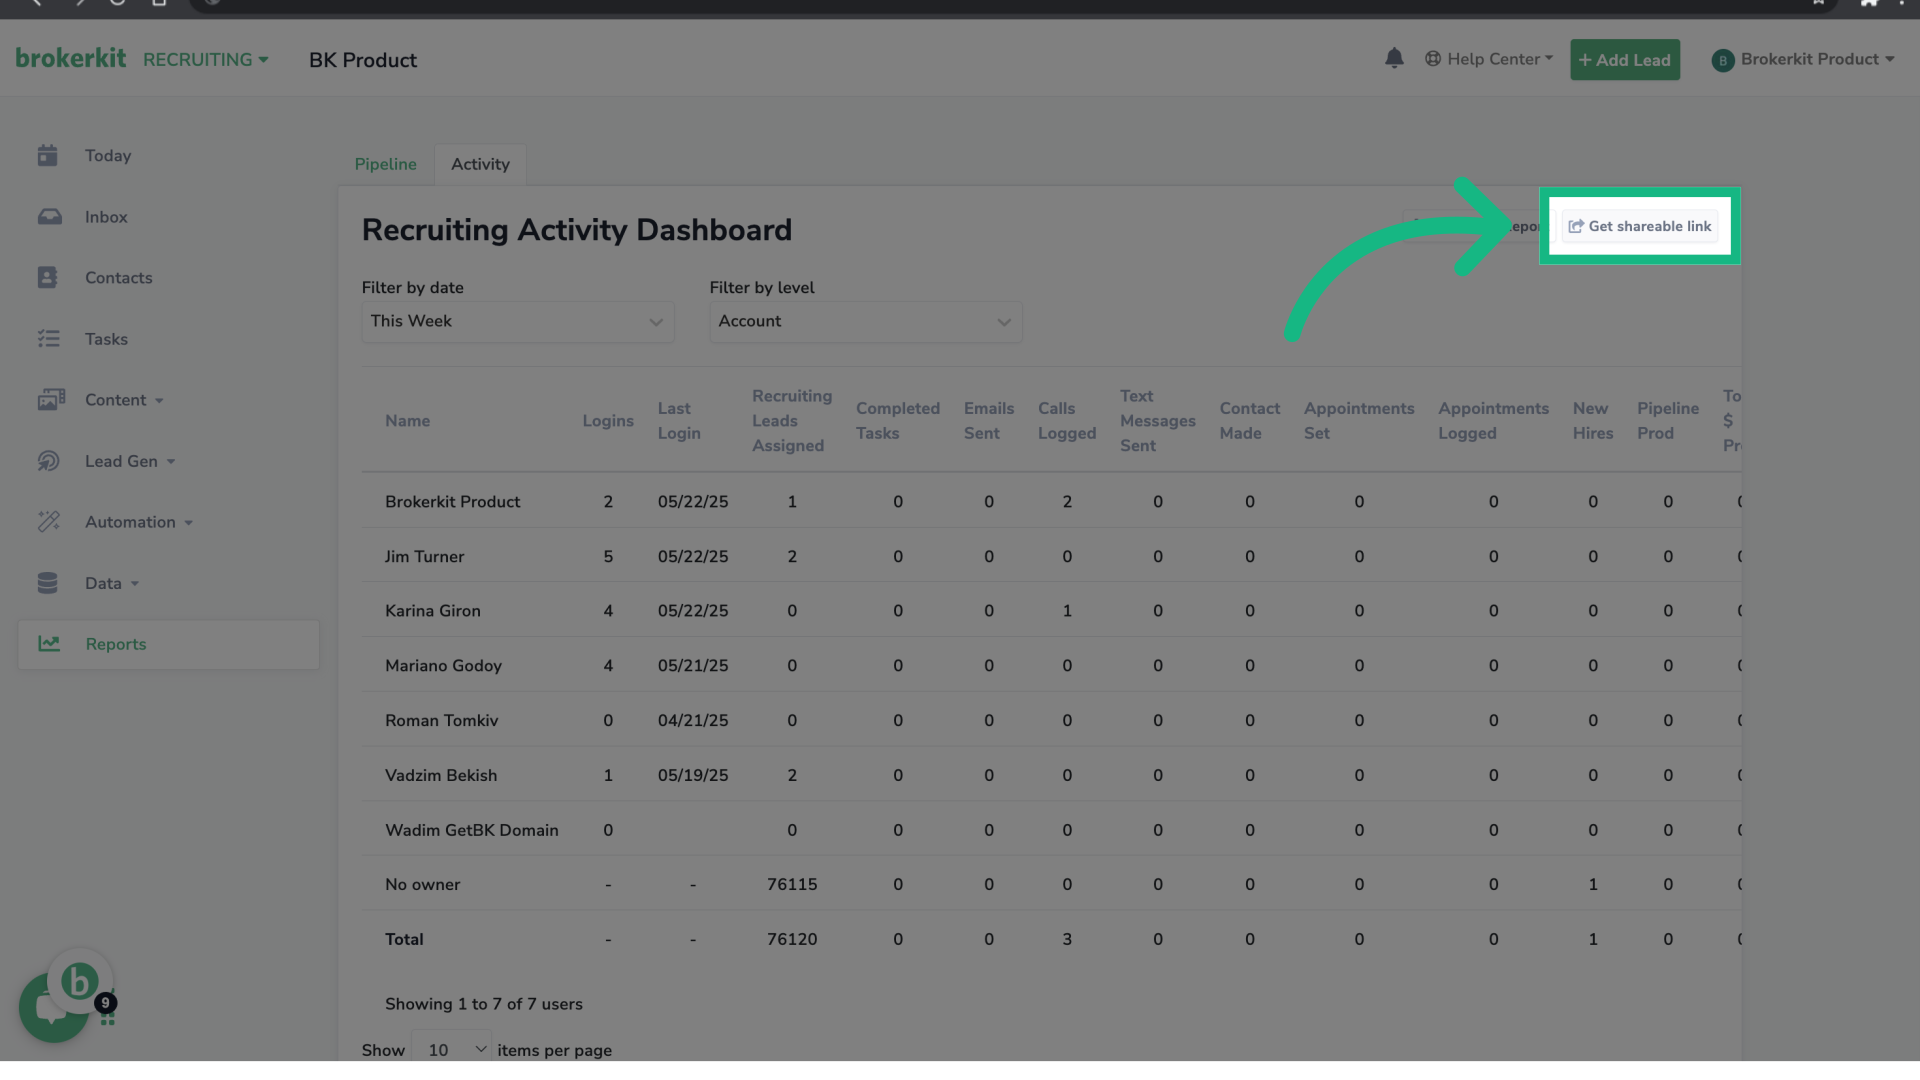
28. Click "Get shareable link"
If you'd like to share this report with people who don't have access to Brokerkit, simply click the Generate Shareable Link button. This will create a link that allows them to view the report directly.
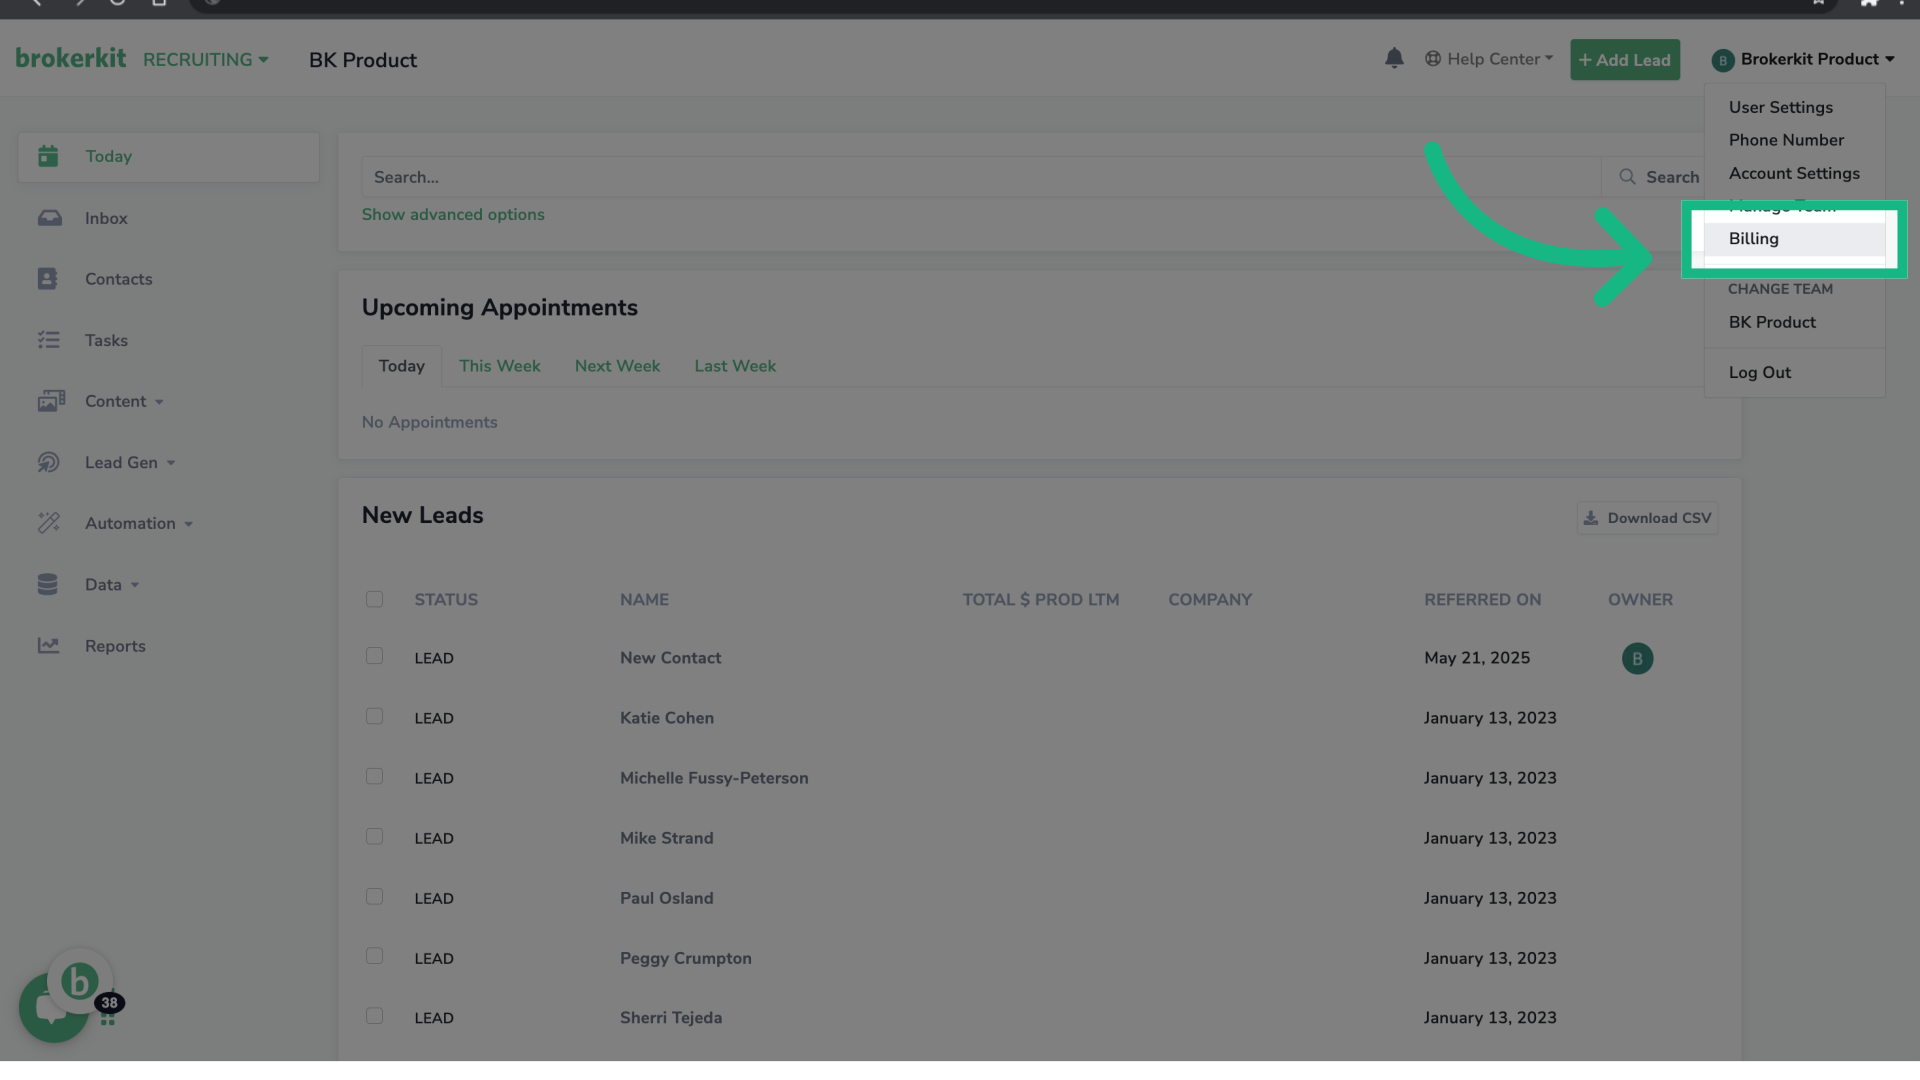
29. Click "Billing"
Finally, we will show you how to check your usage. For this, go to the option Billing.
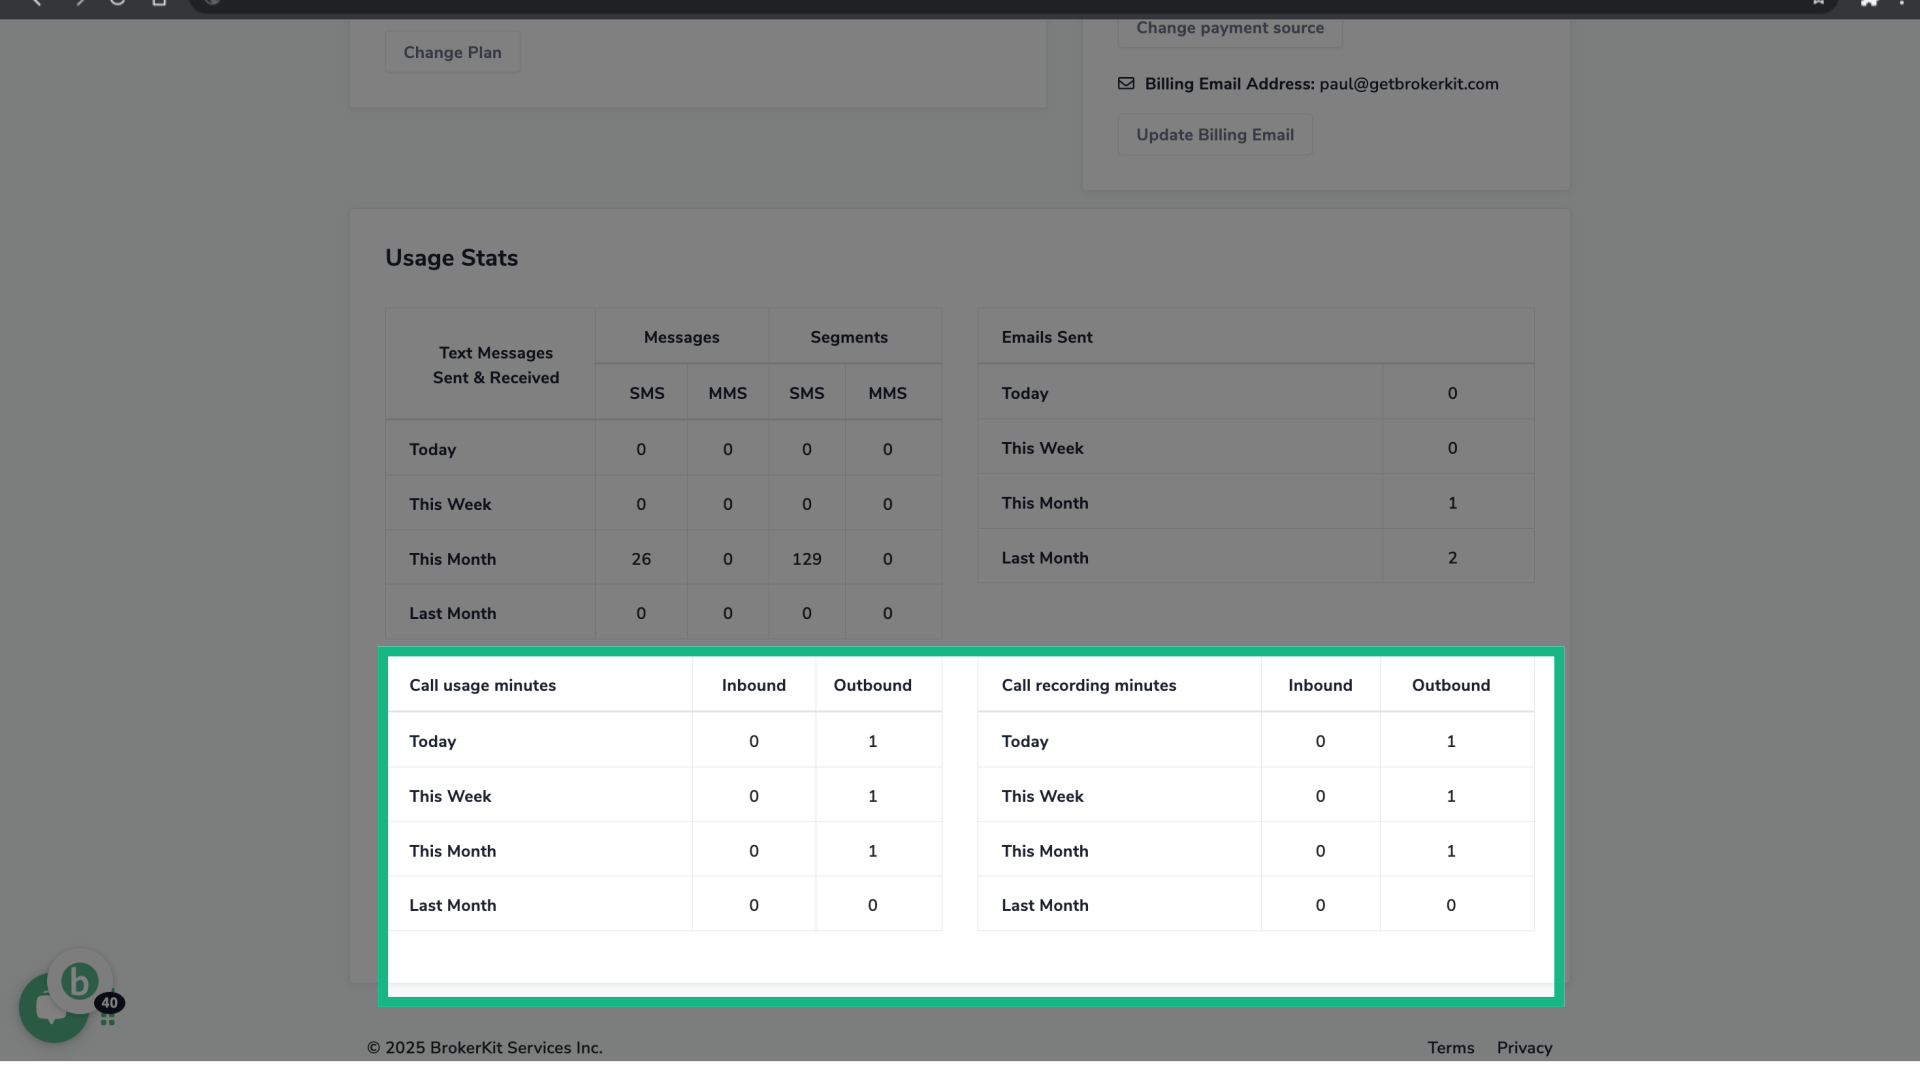
30. Usage Stats
At the bottom of the page, you will see a table with a summary of the number of calls your account has made.
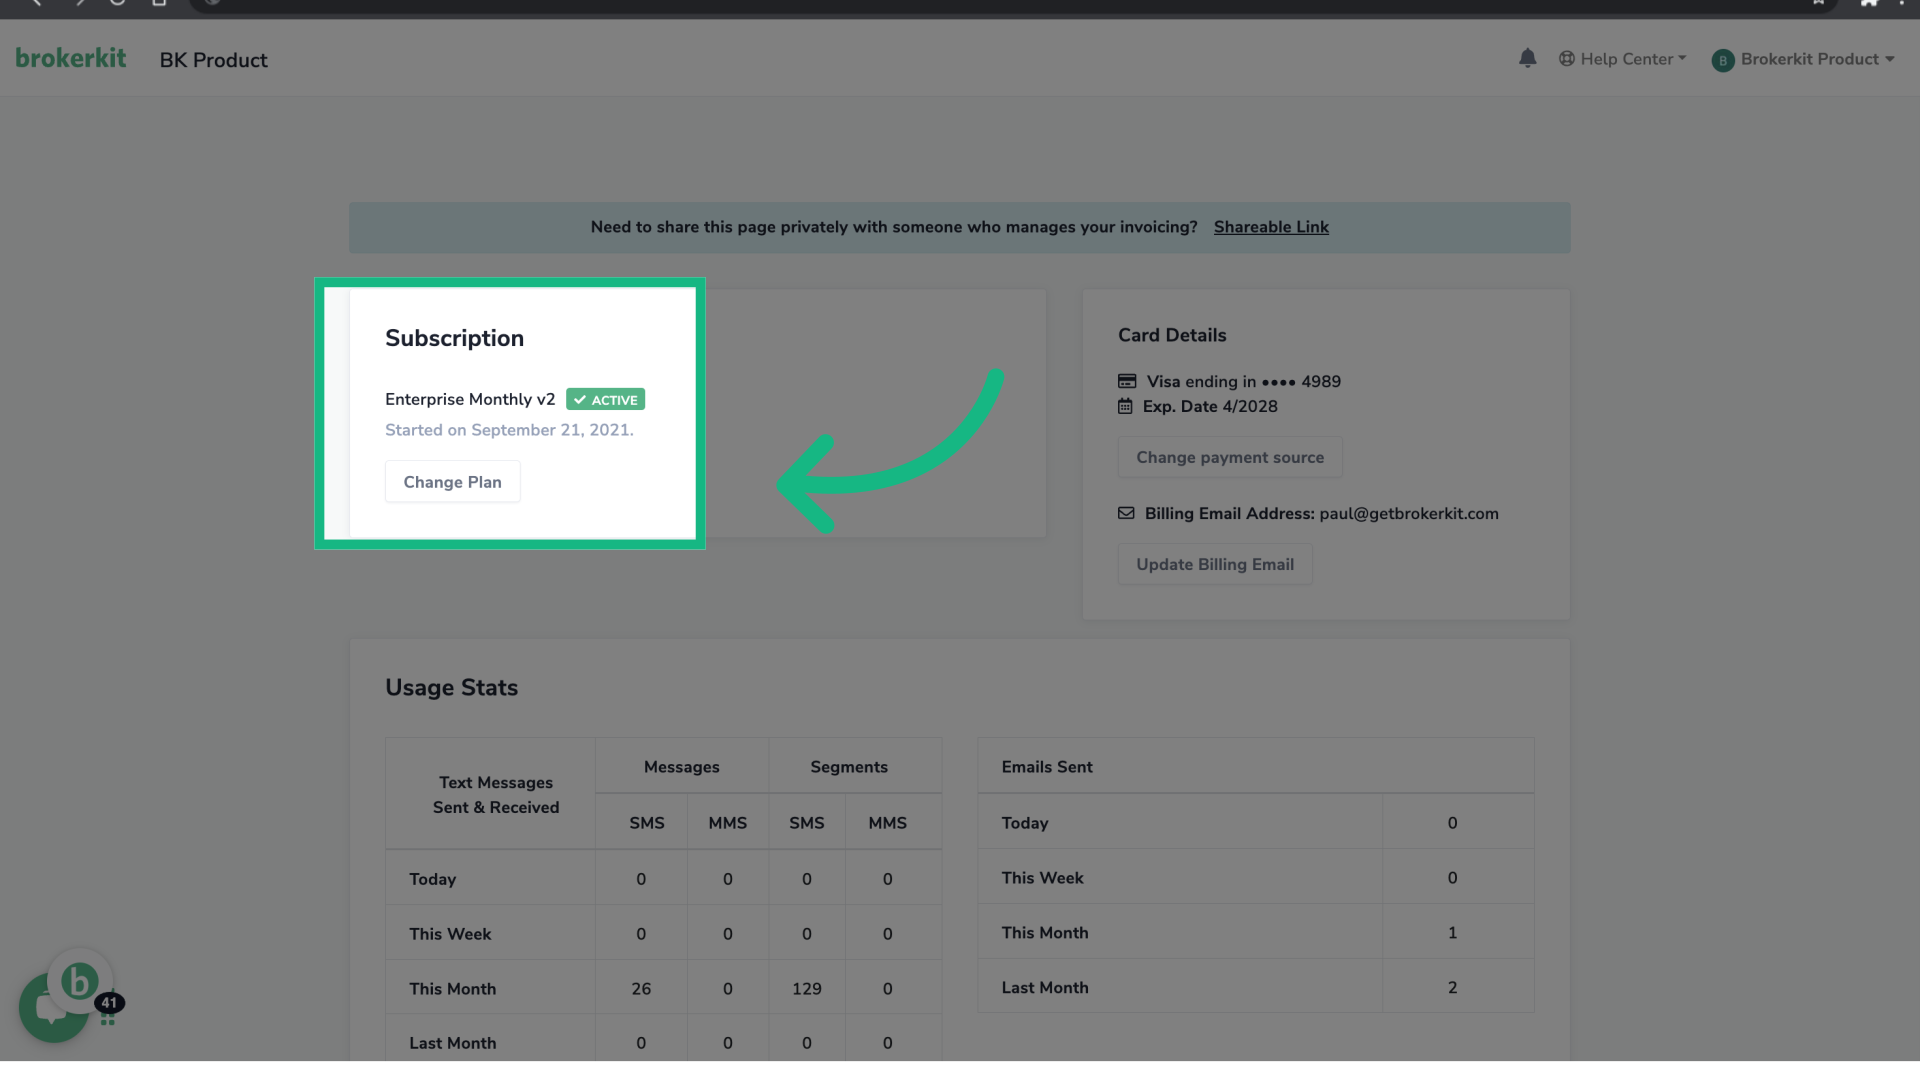
31. Click "Change Plan"
At the top of the page, you can know your current plan, which in this case is Enterprise Monthly. To learn more about the usage limits of your current plan, click Change Plan.
32. Usage Limits per plan
In the first table, you can check the number of call minutes to the US and Canada as well as the number of call recording minutes included in your plan.
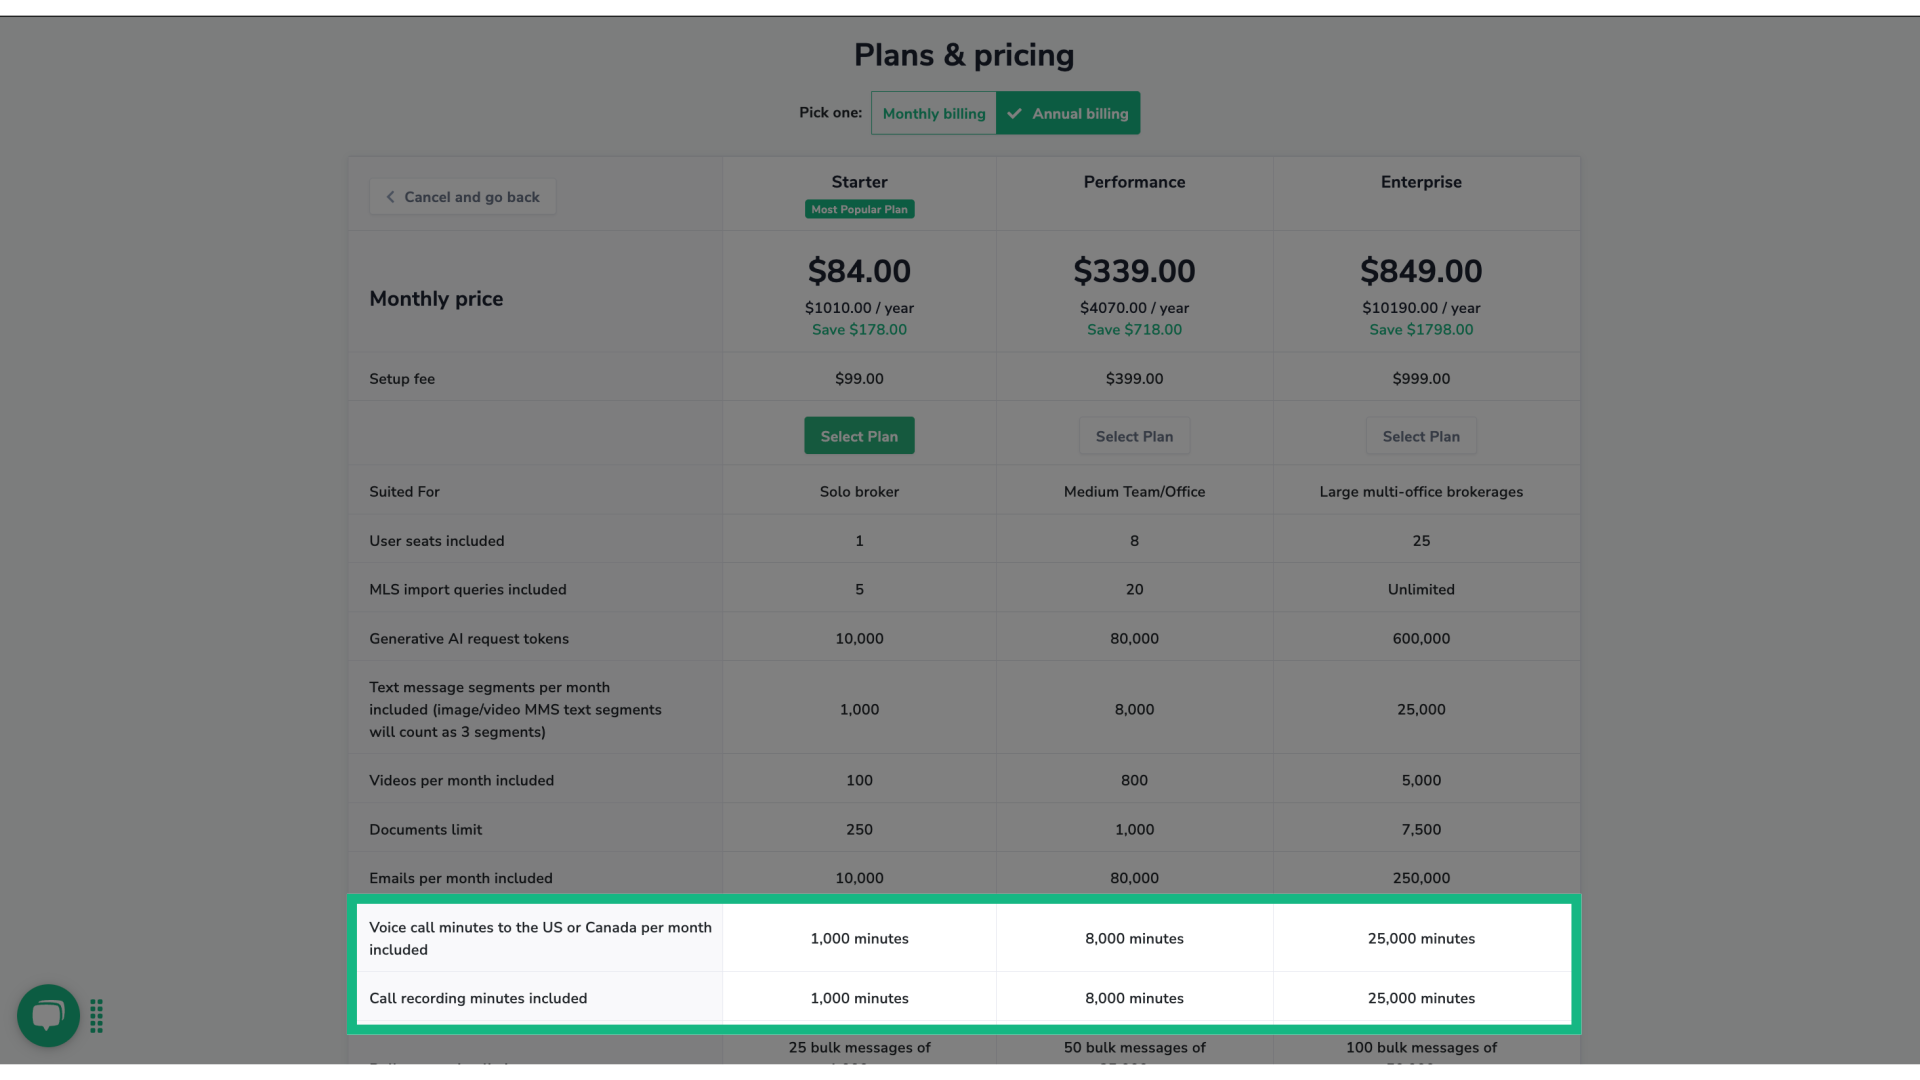
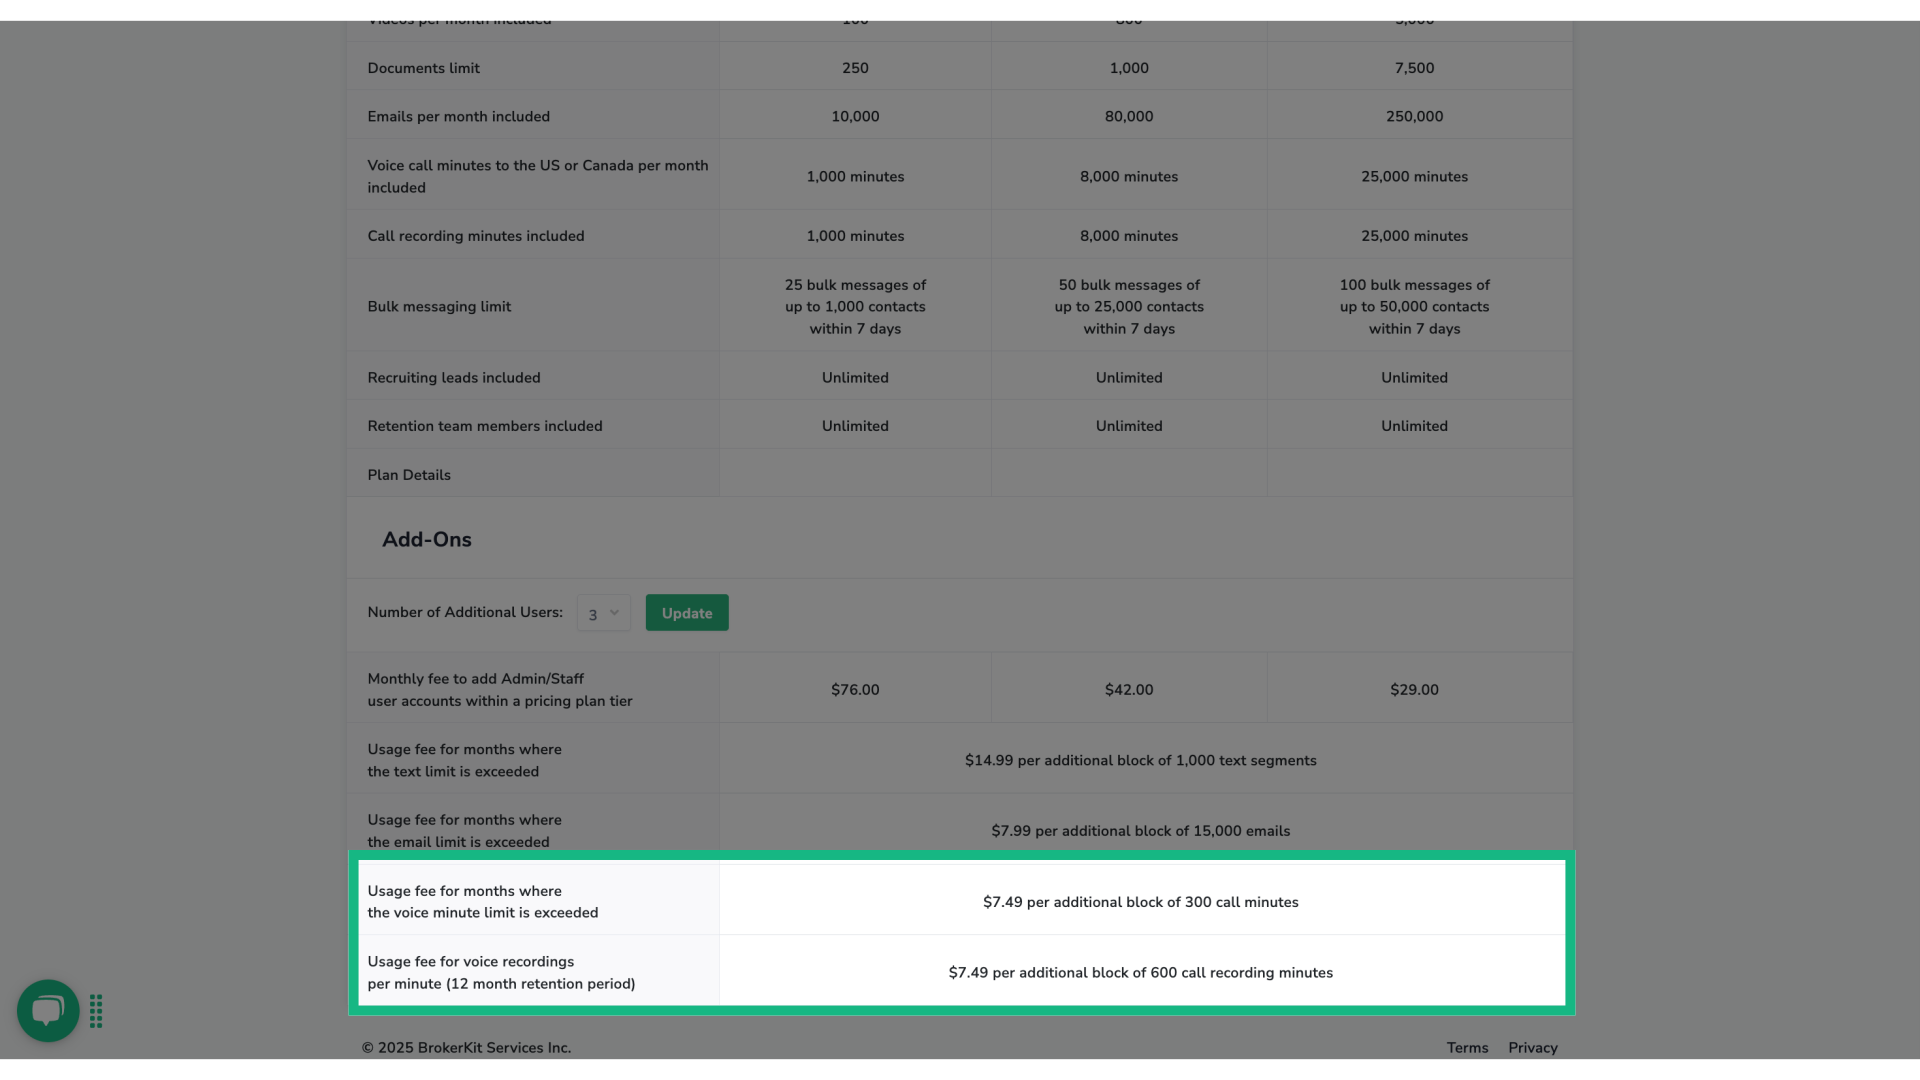
33. Extra Usage Details
If you go over these limits, Brokerkit will not block your calls. Instead, you will be billed based on usage at the rates listed in the second table.
34. Ending
That concludes this tutorial. If you have any questions, please reach out to our support team at support@brokerkit.com.
FAQ
1) How to Update Browser Permissions To Allow Microphone Recording?
- In most cases, you'll be prompted to allow microphone access the first time you use the dialer. If you want to block a website from accessing your mic or allow a website to access it, you can do so under browser settings:
- **Safari:**If you are using safari, follow these steps to access your browser settings:
-
-
- In the menu bar, select Safari -> Preferences.
- Click the Websites tab.
- In the list on the left, select Microphone.
- Find getbrokerkit.com, and be sure the microphone permissions are set to either Allow or Ask.
-
-
-
- Now, refresh the page, and when you click the dialer, if you see this popup, select Allow - we will only access your microphone while you are on the getbrokerkit.com site and recording.
-
-
- Chrome: If you are using chrome, follow these steps to access your browser settings:
-
-
- Open Chrome and select the three vertical dots in the upper-right corner.
- Select Settings. Choose the Privacy and security section.
- 💡 Tip: You can use a keyboard shortcut to access the Settings menu. On Windows, press Alt+F or Alt+E, or F10, followed by the Spacebar. On a Mac, press Command+, (comma).
- Choose the Privacy and Security section.
- Scroll down and select Site Settings.
- In the Permissions section, select Camera, which contains the Camera and Microphone options.
- Activate the Sites can ask to use your camera option. Repeat the process for the microphone and activate the Sites can ask to use your microphone option.
-
-
- **Firefox:**If you are using firefox, follow these steps to change your your microphone settings:
-
-
- In the Menu bar at the top of the screen, click Firefox and select Preferences.
- Click Privacy & Security from the left menu.
- Scroll down to the Permissions section.
- Click the Settings button for the Microphone option.
- Firefox displays the websites with saved Allow or Block permission.
- Use the Allow/Block selector to change permission for the website. You can remove the site by selecting it from the list and clicking Remove Website.
- Select the Block new requests asking to access your microphone checkbox if you do not want to give any other sites access to your microphone.
- Click the Save Changes button.
-
2) What to do if my call fails or it can't connect?
- Please check your internet connection. To ensure a successful call with good quality, you need a stable high-speed internet connection. If the issue persists, feel free to reach out to us via our help chat so we can assist you.
Does Brokerkit have a built-in dialer?
Yes. Brokerkit includes a built-in browser dialer for outbound calls. After your Brokerkit phone number and forwarding number are set up, open a contact profile and click Call. If the contact has more than one phone number, you can choose which number to call.
The first time you use the dialer, your browser may ask for microphone permission. Allow microphone access for getbrokerkit.com, and use a stable high-speed internet connection for the best call quality.
What should I do if my voice sounds muffled or call quality is poor?
Call quality can be affected by your browser, microphone, headset, internet connection, local network, or the phone carrier route for that specific call. Try these steps first:
- Use Google Chrome and refresh Brokerkit before testing again.
- Confirm that Chrome has microphone permission for
getbrokerkit.com. - Test with a headset or a different microphone if your voice sounds muffled.
- Use a stable high-speed internet connection, and avoid VPNs or unstable Wi-Fi when possible.
- Make another test call from the same device and network.
If the issue continues, contact Brokerkit Support with the date and time of the call, the contact name or phone number you called, your browser, and whether you were using a headset. Support can use those details to review the call logs with our calling provider.